EasyManua.ls Logo

Chamberlain 811LM User Manual

Chamberlain 811LM
2 pages
To Next Page IconTo Next Page
Page #1 background imageLoading...
Page #1 background image
To prevent possible SERIOUS INJURY or
DEATH from a moving gate or garage door:
ALWAYS keep remote controls out of
reach of children. NEVER permit children
to operate, or play with remote control
transmitters.
Activate gate or door ONLY when it can be
seen clearly, is properly adjusted, and
there are no obstructions to door travel.
ALWAYS keep gate or garage door in sight
until completely closed. NEVER permit
anyone to cross path of moving gate or
door.
Introduction
This product is for use with model 850LM and
860LM receiver. Depending on the receiver
channel, you may program up to 20 or 50
remote control dip switch configurations to your
receiver. To exceed the 20/50 limit, match the
dip switches in the new remote control to the
dip switches in an existing remote control.
MODEL 811LM
Set the Dip Switches
1 Slide the cover open to access the dip
switches in the remote control.
2 Use a pen or screwdriver to slide the dip
switches to any position you want (ON or
OFF).
1 Press and release the Learn button for the
selected channel on the receiver. The
corresponding LED will glow steadily for 30
seconds.
2 Within 30 seconds press and hold the button
on the remote control that you wish to
program to the receiver.
3 Release the remote control button when the
LED on the receiver blinks, then turns off.
Programming is complete.
Repeat the steps above for each remote control
you would like to program.
Programming
Learn Buttons
Question and Answer IconNeed help?

Do you have a question about the Chamberlain 811LM and is the answer not in the manual?

Chamberlain 811LM Specifications

General IconGeneral
BrandChamberlain
Model811LM
CategoryRemote Control
LanguageEnglish

Summary

LiftMaster 811LM Introduction

Product Compatibility and Capacity

This product is for use with 850LM and 860LM receivers, supporting up to 50 remote control configurations.

Set the Dip Switches

Accessing and Adjusting Dip Switches

Slide open the cover to access dip switches and use a pen or screwdriver to set them to ON or OFF positions.

Programming the Remote Control

Remote Pairing Process

Press receiver's Learn button, then press and hold remote button within 30 seconds until receiver LED blinks.

The Remote Control Battery

Battery Lifespan and Disposal

The 3-volt battery provides power for approximately 1 year; dispose of old batteries properly.

Battery Safety Warnings

Keep batteries away from children and seek immediate medical attention if swallowed.

Replacement Parts and Support

Available Replacement Components

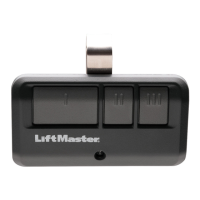
Lists replacement parts including Visor Clip (29C137), Dip Switch Cover (41A7605), and 3V Battery (10A20).

Technical Support Information

Contact for technical support via toll-free number 1-800-528-9131 or visit www.liftmaster.com.

Related product manuals