Do you have a question about the Chamberlain Merlin MS105MYQ and is the answer not in the manual?
Review garage structure, access doors, and necessary accessories before installation.
Test the garage door balance, check for binding, and ensure it operates smoothly.
Describes sectional doors with a curved track system for opener installation.
Details one-piece doors that use only horizontal tracks for operation.
Covers one-piece doors that do not utilize a track system.
Specifies J-Type tilt doors and their specific fitting requirements.
Details the need for a 240V general purpose outlet near the opener.
Lists all parts included in the opener and rail cartons for assembly.
Details rail lengths and part numbers for sectional doors up to 2.2m and 2.5m.
Covers rail extension options for sectional doors from 2.5m to 3.5m.
Specifies the rail size and part number for 2.3m tilt doors.
Lists all necessary tools for installing the garage door opener.
Details the specific hardware items provided with the opener for installation.
Illustrates a fully installed garage door opener with numbered components.
Details the power output available for external accessories like receivers.
Explains the purpose and connections for each terminal on the control panel.
Describes the functions of the UP, PROG, DOWN, LEARN buttons and the Indicator LED.
Instructions on how to correctly tension the opener's drive belt for optimal performance.
Steps to attach the rail to the opener's powerhead using brackets and screws.
Guidance on securely fastening the header bracket to structural supports.
Procedure for centering and securing the header bracket on a wall.
Procedure for centering and securing the header bracket on a ceiling.
Steps to align and secure the rail bracket to the header bracket using pins.
How to position the opener rail relative to a sectional door.
How to position the opener rail relative to a one-piece tilt door.
Instructions for hanging the opener assembly to the ceiling or brackets.
Guidance on attaching the door bracket to sectional doors.
Guidance on attaching the door bracket to one-piece doors.
Steps to attach the straight and curved door arms to the trolley and door bracket.
Crucial safety warnings before using the manual door release mechanism.
Procedure for disengaging and re-engaging the trolley for manual door operation.
Steps to set the full open and close positions for the garage door.
Procedure for automatically setting the door's opening and closing force.
Alternative method to manually set the door's opening and closing force.
How to test and ensure the door reverses upon contact with an obstacle.
How the opener automatically selects travel speed based on door distance.
Instructions to manually set the door's travel speed to slow or regular.
Explains the necessity and benefits of installing IR Beams for safety.
Safety precautions and positioning guidelines for installing the Protector System.
Steps to link a transmitter button to operate the opener's courtesy light.
Procedure to remove all learned transmitter codes from the opener.
Details the automatic closing feature and its safety requirements (IR Beams).
Instructions to enable TTC and set the delay time for automatic closing.
Steps to disable the Timer to Close feature.
Procedure for mounting the wireless wall control unit.
Guidance on where to affix the provided warning labels for safety.
How to program a transmitter for a partial door opening position.
Steps to disable the partial opening feature.
Steps to add new transmitter codes to the opener's memory.
Procedure to clear all learned transmitter codes from the opener.
Instructions to set or change the Personal Identification Number for the keypad.
Describes how to activate the opener using various devices like remotes or panels.
Procedure for manually opening or closing the garage door using the release cord.
Explains how the door behaves when activated by a transmitter (open, stop, reverse).
Conditions under which the opener's indicator light turns on and off.
Recommended monthly checks for door balance, operation, and safety reverse system.
Annual lubrication and care instructions for the opener and rail assembly.
Safety warnings and instructions for replacing transmitter batteries.
Lists available optional accessories for the garage door opener.
Identifies various parts used for assembling and mounting the opener rail.
Lists internal electronic and mechanical replacement parts for the opener unit.
Details replacement parts specifically for the opener's rail assembly.
Troubleshooting steps for when the opener does not respond to controls.
Diagnosing issues when the transmitter fails to operate the opener.
Solutions for reduced transmission range of the garage door opener remote.
Troubleshooting door reversing due to Protector System or other issues.
Addressing issues where the garage door operates without user input.
Fixing problems where the door stops mid-travel or fails to close fully.
Resolving issues where the door opens but fails to initiate the closing cycle.
Diagnosing issues related to opener strain, broken springs, or door locks.
Information on operating the opener during power outages.
Troubleshooting when the opener motor runs but the carriage remains stationary.
Guidance on interpreting flashing arrow sequences on the control panel.
Table correlating diagnostic codes (arrow flashes) with symptoms and resolutions.
Details input voltage, power, torque, door weight limits, dimensions, and receiver specs.
Information on how to register the product warranty online for validation.
Details the parts and periods covered under the manufacturer's warranty.
Lists exclusions from the warranty coverage, including batteries and travel costs.
Conditions that must be met for the warranty to remain valid, including professional installation.
Procedure for making a warranty claim and obtaining repairs or replacements.
Specific reasons that will void the Chamberlain Limited Warranty.
Legal disclaimers and limitations of liability specific to Australia.
Legal disclaimers and limitations of liability specific to New Zealand.
Contact information for Chamberlain service centres in Australia and New Zealand.
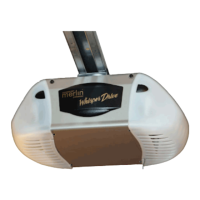
The Merlin Commander Elite MS105MYQ is a sectional and tilt garage door opener designed for residential use. It comes with installation and operating instructions, emphasizing safety throughout its use. The device is designed to operate spring-balanced residential sectional and tilt doors up to 20 m².
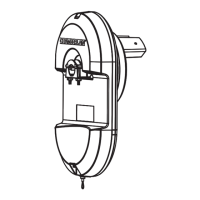
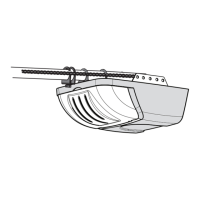
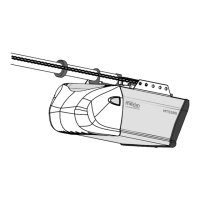
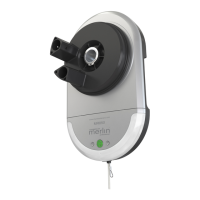
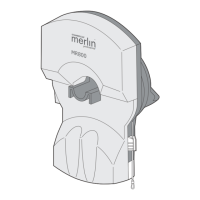
The primary function of the Merlin Commander Elite MS105MYQ is to automate the opening and closing of garage doors. It is equipped with a belt drive mechanism and a one-piece trolley on a steel rail, ensuring smooth and reliable operation. The opener includes a powerhead, a rail assembly, and various brackets for secure installation.
The device features a safety reverse system that is crucial for preventing serious personal injury or property damage. This system requires the garage door to reverse on contact with a 40 mm obstacle placed on the floor. After any adjustments, this safety reversal system must be tested to ensure proper function. The opener also incorporates automatic force adjustment to prevent excessive force from being applied to the door.
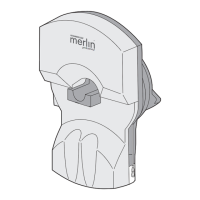
The Commander Elite MS105MYQ includes a control panel located under a cover at the rear of the opener. This panel features an E-Serial port for serial communication, push button inputs for wired wall controls, ground terminals, and an IR Sensor input for The Protector System™ (IR Beams). It also has dedicated terminals for a "Door-in-door" safety switch, which prevents the opener from activating if a built-in pedestrian door is open. Flasher terminals provide output for flashing lights during door motion.
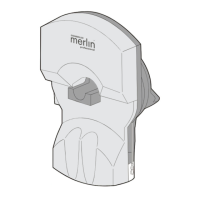
The control panel is equipped with UP, PROG, DOWN, and LEARN buttons, along with an Indicator LED. The UP and DOWN buttons are used for initial programming, driving the door, and displaying diagnostic codes. The PROG button is used to program door limits and other features. The LEARN button is used to program transmitters and manually learn forces. A green button on the control panel allows for manual activation (Open - Stop - Close) when transmitters are unavailable.
The opener is designed to be compatible with myQ technology, allowing for smart home integration and remote control capabilities. It also supports a battery backup system, ensuring operation during power outages.
Before installation, users are instructed to check the garage door for balance, sticking, or binding, and to repair any issues. All ropes, chains, and locks connected to the garage door must be removed to prevent entanglement. The header bracket, which supports the opener, must be rigidly fastened to a structural support. The rail is then assembled to the opener and attached to the header bracket. The door bracket is securely fastened to the door itself.
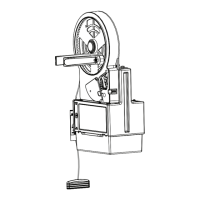
The opener includes a manual release mechanism, identified by a red handle and rope, which allows the door to be operated manually during power outages or emergencies. To disengage, the rope and handle are pulled down. To re-engage, a green button in the center of the trolley assembly is pressed, and the door will automatically re-engage when it passes the trolley position. It is crucial not to use the red handle to open and close the door, and the handle should be mounted at a height less than 1.8 m from the floor.
Travel limits regulate the points at which the door stops when moving UP or DOWN. These are programmed using the UP, DOWN, and PROG buttons on the control panel. The opener uses a position tab on the belt to activate a mechanical passpoint during door travel, which is essential for programming limits. The force settings are automatically adjusted during the travel limit setting process, but can also be manually learned if required.
After any adjustments to travel limits or force settings, the safety reverse system must be tested. A 40 mm high object is placed flat on the floor under the garage door. The door is then operated in the down direction and must reverse upon contact with the obstacle. If it fails to reverse, adjustments are necessary.
The opener offers two travel speeds: REGULAR and SLOW. The speed is automatically selected based on the door's travel distance (longer than 1.6 meters for REGULAR, shorter for SLOW). Users can also manually toggle between these speeds using the UP and DOWN arrows.
For enhanced safety, especially in installations where the closing force exceeds 400 N (40 kgf), The Protector System™ (IR Beams) is recommended. These IR beams prevent the door from closing if a person or object is in the beam's path. If the door is already closing and the beam is broken, it will return to the open position. The IR beams should be installed no higher than 100 mm above the floor.
Transmitters (remote controls) can be programmed to operate the opener and its courtesy light. This involves pressing and holding a button on the transmitter, then pressing and releasing the "LEARN" button on the opener. The opener's courtesy light will flash to confirm successful programming. Multiple transmitters can be programmed, and all codes can be erased by holding the "LEARN" button for an extended period.
A wireless wall button is supplied and pre-programmed. Additional wall controls can be programmed using the wireless programming instructions. It should be installed at a minimum height of 1.5 m above the floor, in a location where the garage door is visible and out of reach of children.
This feature allows the door to automatically close after a specified delay (10 to 180 seconds in 10-second increments) from a fully open position. It requires The Protector System™ (IR Beams) to be installed. The TTC feature is activated and adjusted using the PROG and DOWN buttons.
The PET feature provides an adjustable second stop position for ventilation, pedestrian, or pet access. This position is programmed to a specific transmitter button. The door can be driven to the desired PET access position, then programmed using the PROG and UP buttons.
Three warning labels are provided: a "Risk of entrapment" label near the fixed wall control, an "EMERGENCY Release/Service" label on the manual release cord, and a "WARNING Child Entrapment" label on a low inside panel of the door. These labels serve as reminders of safe operating procedures.
Users are advised to manually operate the garage door monthly to check for balance or binding. If issues are found, a qualified door technician should be called. The door should open and close fully, and limits and/or force should be adjusted if necessary. The safety reverse test must be repeated monthly, and any necessary adjustments made.
Annually, the belt and the inside of the rail assembly where the trolley slides should be lightly greased. This helps ensure smooth operation and prolongs the life of the components. The opener's internal components do not require additional lubrication.
The batteries in the transmitters have a long life, but if the transmission range decreases, they need to be replaced. The manual provides instructions for replacing the CR2032 battery in the standard transmitter and for optional transmitters (E943M, E940M & E945M). Users are reminded to observe battery polarity and dispose of old batteries properly, as they are not covered by the warranty.
The manual includes a comprehensive troubleshooting section to help users diagnose and resolve common issues. This section covers problems such as the opener not operating, short transmitter range, the door reversing for no apparent reason (often indicated by 10 flashes of the opener light), the door opening and closing by itself, the door stopping before closing completely, the door opening but not closing, the opener straining, the opener humming briefly but not working, the opener not activating due to power failure, and the carriage not moving despite the opener running.
A diagnostic chart is provided, detailing various diagnostic codes indicated by the flashing UP and DOWN arrows on the control panel. Each code corresponds to a specific symptom and offers possible resolutions, such as checking IR beam alignment, wiring, motor, logic board, or passpoint module. This chart helps users identify and address problems efficiently.
The Merlin Commander Elite MS105MYQ is designed for safe, convenient, and reliable garage door operation, with a strong emphasis on user safety and ease of maintenance.
| Manufacturer | Chamberlain |
|---|---|
| Model | MS105MYQ |
| Type | Garage Door Opener |
| Power Source | Electric |
| Motor Type | DC |
| Horsepower | 1/2 HP |
| Drive | Chain |
| Drive Type | Chain Drive |
| Remote Controls Included | 2 |
| Battery Backup | No |
| Connectivity | Wi-Fi |
| Control | Remote control |
| Compatibility | MyQ |
| Security | Rolling code technology |
| Warranty | 5 year motor warranty |