8E
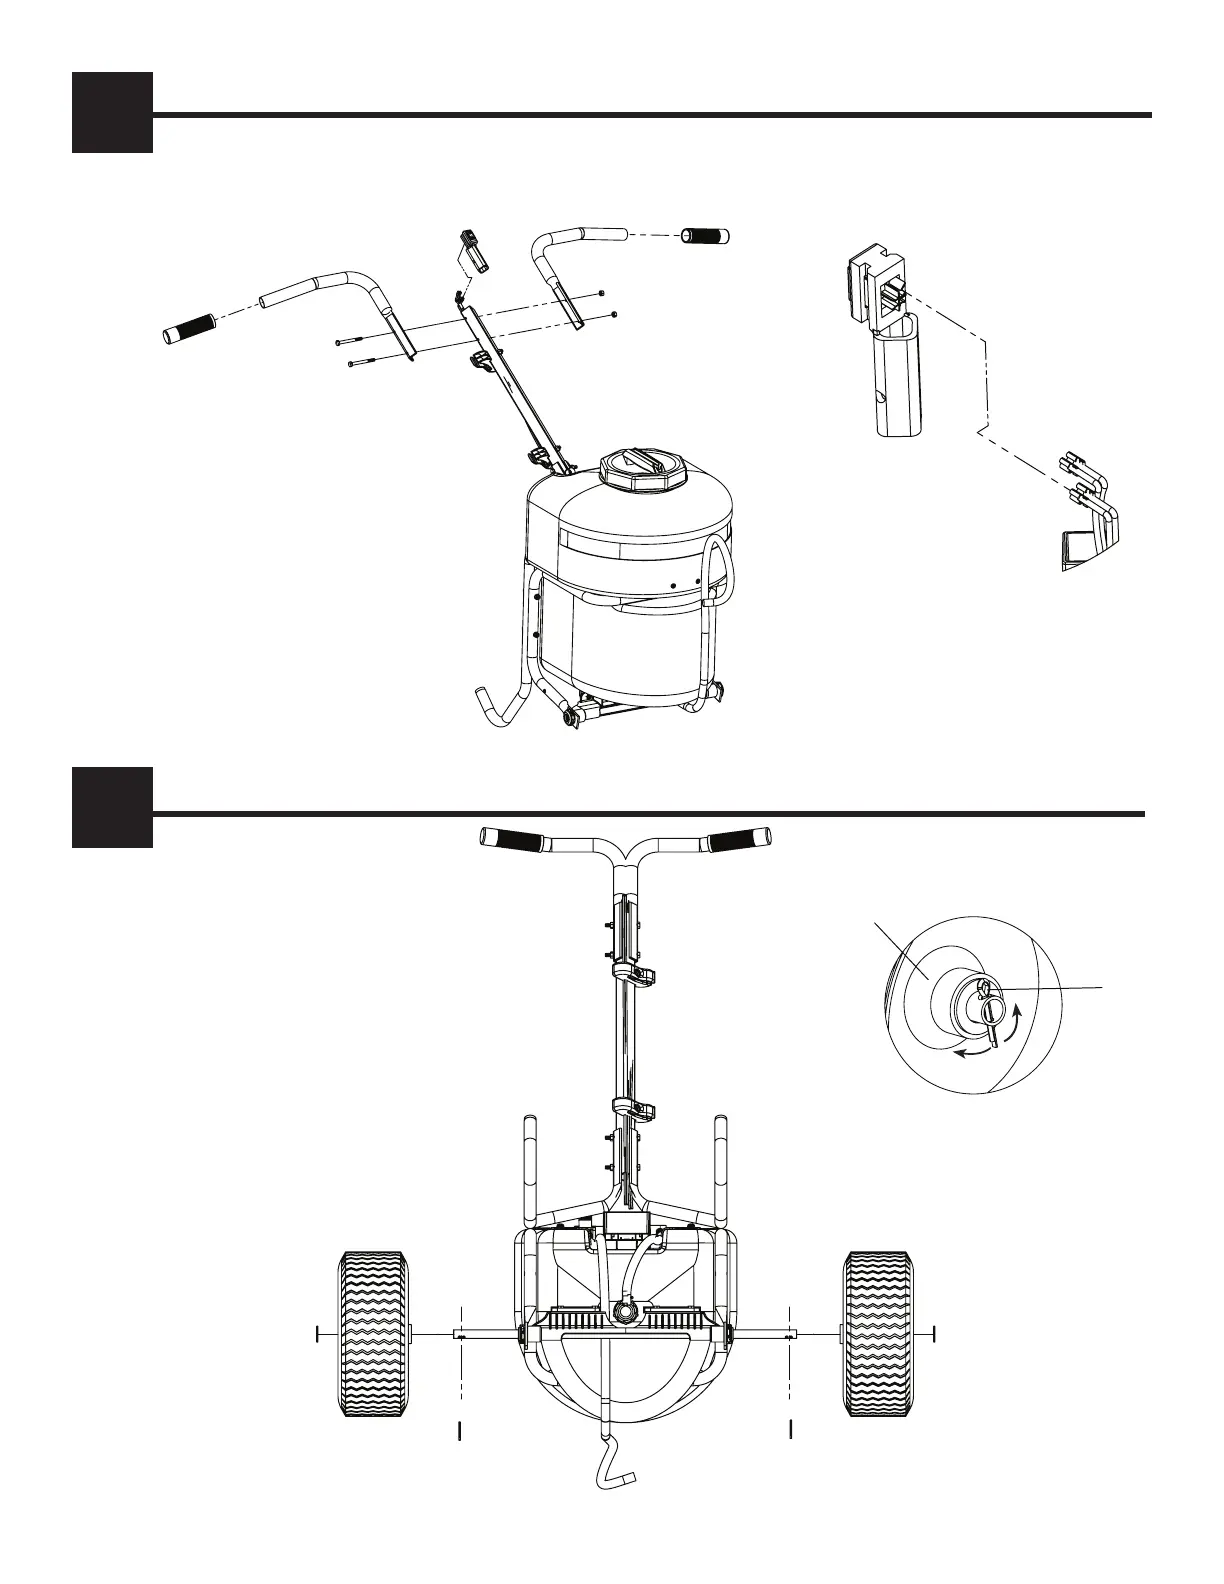
ASSEMBLE HANDLES AND ON/OFF SWITCH
4
Connect the on/off wiring harness( C-4) to switch and insert switch bracket (H-10) into square handle bar tubing (C-5). Bolt the right (C-10)
and left handles (C-11) to the handle bar tubing using (H-1) bolts. Lastly, insert handle grips (H-11) onto handlebars (C-10 and C-11).
C-10
C-11
H-1
H-1
H-1
H-1
H-10
H-11
H-11
H-10
C-5
C-4
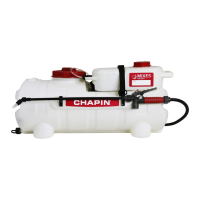
AXEL AND WHEEL INSTALLATION
5
Cotter Pin attaches on
outside of each wheel
Bend
Flip unit upside down for easy access. Insert axel
rod (C-3) into axel bracket until centered; then
fasten each wheel with washer (H-7) and cotter
pin (H-3) using the outermost hole in axel. Bend
each cotter pin to ensure a secure installation.
H-3 H-3
H-7
H-7
C-1 C-1
C-3C-3
H-7
H-3