ChatterBox USA Page 5 of 20
1) Discharge the battery completely by leaving the unit on and setting the MICROPHONE SENSITIVITY
sensitivity to the highest next to a TV or radio or in noisy room until the battery is completely drained.
2) Charge the battery completely using the charger supplied with the kit. It should take about 5 hours to fully
charge the battery.
If you are planning to store the unit for a long period of time, store it after fully charging the battery. Upon
using it again, please follow the pre-conditioning process described above.
To reduce the risk of damage to the battery, do not use any other charger except the one supplied with the kit.
Make sure the battery is always stored at room temperature.
Battery indicator in the LCD display means as followed:
Indicator Means
3 Bars Fully charged
2 Bars Half charged
1 Bar Low charged
When the battery indicator shows 1 bar, you need to charge the battery. Or you can hear a chime sound
when it is time to charge the battery.
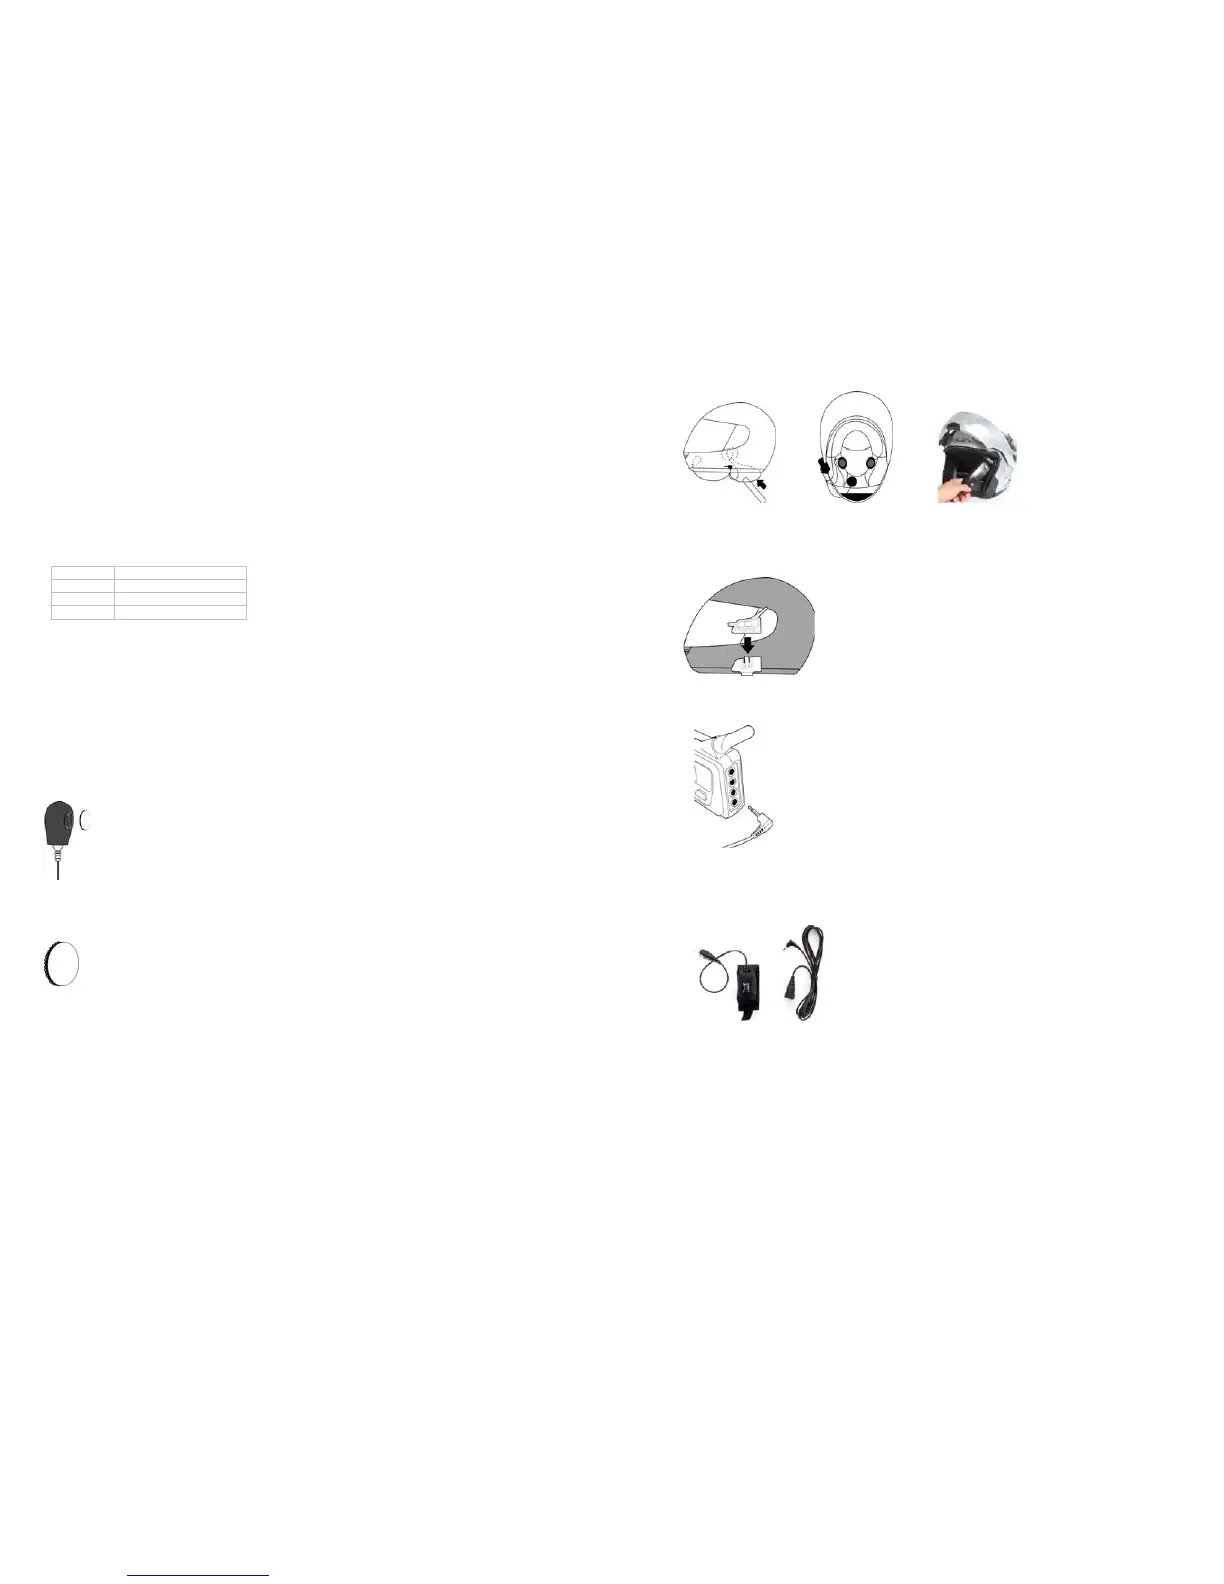
Installation of headset, main unit, and wired PTTB (Push to talk button)
The Multi Headset comes with both open and full face microphones. Choose the one that you intend to use
and plug it into the connector on the headset. Please keep the microphone that you are not using in a safe
place for future use. All microphones come with foam cover. For full face helmet, attach soft Velcro disk to
the helmet chin bar and hard Velcro disk to the microphones. Use the wooden wire tuck stick to gently tuck
the microphones wire between the headliner and the shell of your helmet.
The headset speakers should already have Velcro on the back casing. Simply apply the soft Velcro disks
on the liner of your helmet. Mount them in the indentation of the helmet padding where your ears would line
up. Please keep in mind that you need to mount the speakers in a location that is directly next to your ears.
Attach the right speaker (with the longer wire) to the corresponding Velcro disk that you applied on the
helmet liner. Attach the left speaker (with the shorter wire) to the other Velcro disk. For helmets with
speaker pockets, simply insert the speakers in each corresponding pocket. Use the wooden wire tuck stick
to gently tuck all wires between the headliner and the shell of the helmet as shown below. If you helmet has
washable lining that pops out, you can tuck the wires behind that.
ChatterBox USA Page 6 of 20
Fasten the mounting bracket snugly to the bottom left side of the helmet with two bolts supplied. Align the
back side of the X1slim unit to the grooves on the mounting bracket. Slide the X1 slim unit down on the
mounting bracket until it latches firmly into place.
Insert the 3.5mm plug of the headset into the Rider’s headset jack on the back of the main unit.
If you decide to use the handle bar mount PTT button, place the wired PTT button on the left side handle bar
grip (closest to where your thumb would be) of the motorcycle using the integrated Velcro strip. And insert
the 2.5mm plug into the PTT input in the back of the main unit.