EasyManua.ls Logo

Cheerlux CL312 Series - User Manual

Cheerlux CL312 Series
26 pages
Print Icon
To Next Page IconTo Next Page
Loading...
1
Home Theatre LED Projector
Model No.: CL312/CL317 Series
User's Manual

Questions and Answers

Summary

Warnings and Safety

Laser Safety

Do not stare into the lens during operation; the intense light can damage eyes, especially for children.

Electrical Hazard

Avoid wet conditions to prevent electric shock. Do not open the unit due to high voltage.

Operational Indicators

Symbols indicate important operation instructions or dangerous voltage levels.

Safety Precautions

Manual and Cleaning

Read the manual carefully. Unplug before cleaning with a wet cloth; avoid cleansers.

Environment and Placement

Avoid wet/moist environments and direct sunlight. Ensure stable, level placement.

Ventilation and Overheating Prevention

Ensure proper ventilation. Clean the filter monthly to prevent overheating and extend service life.

Power, Grounding, and Cable

Uses 90-240V AC with a 3-pin plug. Inspect the power cable before connecting.

Thunderstorm and Professional Repair

Unplug during thunderstorms. Do not attempt self-repair; contact a professional technician.

Heat Source Proximity

Keep projector away from other heat-generating devices to protect its service life.

Cautionary Notes

Installation Environment Guidelines

Avoid wet, dusty conditions and direct sunlight for optimal projector life and performance.

Operating and Storage Temperatures

Maintain operating temperature between 0-60°C and storage temperature between -20-70°C.

Ventilation Window and Filter Maintenance

Do not block ventilation. Clean the filter monthly to prevent overheating and automatic shut-off.

Power On;Off Procedure

Connect power cable and press the power key to turn on. Press the power key again to turn off.

Appearance Overview

Top Panel Layout

Identifies panel key-press, speaker bulb, and compartment cover on the projector's top view.

Bottom Panel Layout

Identifies ceiling mount holes, ventilation windows, bottom cover, and supporting feet on the projector's base.

Ceiling Mount Safety Precautions

Note on high-feet adjustment and screw rod length to prevent electric shock during ceiling mounting.

Appearance Details

Front Panel Features

Identifies remote sensor, lens, and adjustable supporting feet on the projector's front.

Rear Panel Features

Identifies air outlet and power socket on the projector's rear panel.

Focus and Angle Adjustment Guidance

Adjust lens focus for clarity and supporting feet angle for optimal projection.

Connectivity and Design

Side Panel Identification

Identifies air outlet (left) and air inlet, keystone, signal interface (right).

Air Inlet Critical Warning

Warning: Blocking the air inlet can cause the projector to overheat and fail.

Input and Output Ports

Details HDMI, Audio, USB, TV, S-Video, and VGA connectivity ports for various devices.

Installation Guide

Full Home Theatre Setup Diagram

Illustrates a complete home theatre setup with projector, screen, speakers, and seating.

Sunlight Interference Warning

For optimal image quality, avoid direct sunlight shining on the screen during daytime use.

Projection Setup

Throw Distance Chart

Chart for adjusting picture size and throw distance based on 4:3 and 16:9 aspect ratios.

Throw Distance Clarity Advisory

Advisory on potential clarity issues if throw distance is less than 2m or over 5m.

Image Alignment for Trapezoid Correction

Visual guide showing correct versus incorrect image installation for trapezoid correction.

Mounting and Environment

Projector Mounting Options

Illustrates front/rear projection on ceiling or table mounts for flexible placement.

Installation Safety and Environmental Guidelines

Warnings on secure mounting, operating temperature (0-35°C), environment, and ventilation.

Signal Connection Procedures

Analog and HDMI Input Connections

Diagrams for analog audio input and High-Definition Multimedia Interface (HDMI) connections.

Video, USB, and VGA Input Connections

Diagrams for Video, Audio In, S-Video, USB, and VGA inputs and component video connections.

TV Input and Pre-Power Connection Notice

Note: CL312A/CL317A has TV input. Connect devices before powering on to prevent damage.

Basic Operation Guide

Powering On the Projector

Steps to power on: insert batteries, plug in power cable, press power key, check image.

Remote Control Battery Installation

Instruction to insert two 7-size batteries into the remote control before use.

Initial Image Adjustment Guidance

For new projectors, address unclear images or trapezoid distortion by referring to adjustment chapters.

Operation Procedures

Powering Off the Projector

Steps to power off: press power key, fan stops. Unplug for long-term storage.

Projector Control Panel Overview

Overview of buttons on the projector panel: Power, Sources, Menu, CH +/-, V+/-.

Remote vs. Panel Key Mapping

Mapping of remote control keys (e.g., CH+/-, V+/-) to the projector's operating panel keys for control.

Remote Control Operations

Remote Control Functions Explained

Details functions of remote buttons: Power, Mute, Flip, Input Source, aspect ratio, and navigation keys.

Remote Control Handling Precautions

Warning against exposing the remote control to shocks, liquid, or direct sunlight.

Image Quality Adjustments

Lens Focus Adjustment Procedure

Turn lens to achieve the clearest image, focusing on the middle area for best results.

Lens Condensation Note

Note regarding vapor on lens when moving from cold to warm environments; wait for it to clear.

Keystone Distortion Correction

Use Keystone adjustment to correct trapezoid shape caused by uneven screen or projector placement.

Keystone Correction Limitations

Repositioning may improve angle but could affect focus circumference of the image.

Menu Settings and Navigation

Basic Menu Navigation Controls

Using MENU, CH +/-, and V+/- keys to navigate and select options within the menu system.

Input Source Selection Guide

How to select the input signal source using the 'Source' key when 'NO SYNC' is displayed.

Model-Specific Input Source Menus

Displays input source menus for different projector models (CL312/CL317, CL312A/CL317A, CL312D/CL317D).

Advanced Menu Options

Analog TV Channel Management

Details Auto Tuning, Manual Tuning, and Program Edit functions for analog TV channels.

TV Input Model Availability

Notice: Analog TV input functionality is exclusive to CL312A/CL317A models.

Picture Menu Settings

Picture Mode Selection Options

Adjust picture display modes: standard, vivid, movies, and user mode for personalized viewing.

Color Temperature Adjustment

Options for adjusting color temperature: normal, cold, or warm for desired visual output.

Aspect Ratio and Zoom Settings

Includes screen zoom options and 16:9 display settings for various content.

Noise Reduction Functionality

Option to activate image background noise reduction for cleaner visuals.

PC Mode Picture Adjustments

In VGA mode, picture settings are limited to contrast and brightness adjustments.

System Settings

Option Menu Features

Adjust OSD language, transparency, display time. Includes option to recall factory settings.

Audio Volume Control

Use V +/- keys on the remote or panel to directly adjust the volume level.

Sound Mode Configuration

Select sound modes: Balance, Auto Volume, Surround Sound, SPDIF, EQ for audio preferences.

USB Media Playback

Supported Media File Types

Lists supported document, picture, video, and audio file formats for playback via USB port.

USB Picture File Specifications

Details JPEG, BMP, PNG file specifications including resolution and compression options.

USB Media Format Details

Supported Video File Formats

Details video file formats like MPEG, AVI, MP4, MOV, MKV, RMVB, DIVX, VC1, FLV with resolutions.

Supported Audio File Formats

Details WMA, MP3, M4A(AAC) formats with sample rate, baud rate, and sound channel information.

Maintenance and Care

Projector Filter Cleaning Procedure

Clean the projector filter monthly to prevent overheating. Remove screws and grille for access.

LCD Panel Cleaning Guide

Clean the LCD panel with a dry, soft cloth. Unscrew the bolt and remove the cover for access.

LCD Cleaning Safety Advisory

Warning: Improper LCD cleaning can cause fatal failure. Non-professionals should not perform this task.

Troubleshooting Common Issues

Power and Lamp Troubleshooting

Troubleshoot no power (cord, fuse) and lamp not working (replace lamp, reset).

Image and Remote Control Troubleshooting

Troubleshoot no image (lens cap, signal cords) and remote control issues (batteries, aiming).

Auto Shutdown and Laptop Output Troubleshooting

Troubleshoot auto shutdown (filter, fans) and laptop VGA output settings (Fn+F*).

Technical Specifications

Core Projector Specifications

Details technology, resolution, brightness, contrast ratio, multimedia interface, USB support.

Lamp Life, Display, and Projection Specs

Details lamp life, displayable colors, uniformity, projection method, keystone, throw ratio, and image size.

Language, Noise, Power, and Dimensions

Details OSD languages, noise level, power supply, case dimensions, carton size, and weight.

Accessories and Parts

Standard Included Accessories

Lists standard accessories: projector, remote, power cable, AV/VGA cables, warranty card, manual, spare fuse.

Optional Purchasable Accessories

Lists optional items available for purchase: projector screen, ceiling mount, and spare lamps.

Overview

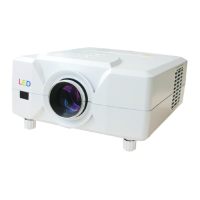
This document serves as the user's manual for the CL312/CL317 Series Home Theatre LED Projector, providing comprehensive instructions for its installation, operation, maintenance, and troubleshooting.

Function Description

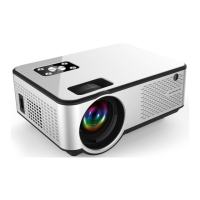
The CL312/CL317 Series projector is designed for home theatre use, utilizing LED technology to project images onto a screen. It supports various input signals and offers features for image adjustment, sound control, and media playback from USB devices. The projector is capable of displaying content from multiple sources, including PCs, DVDs, and TV (for specific models).

Important Technical Specifications

The CL312/CL317 Series projectors come in several models: CL312, CL312A, CL312D, CL317, CL317A, and CL317D, with variations in brightness and lamp type.

  • Technology: TFT-Single LCD Panel + LED Technology.
  • Resolution: 800x600, 1024x768, 720P, 1080P.
  • True Brightness: 2200 Lumens for CL312/CL312A/CL312D models, and 2500 Lumens for CL317/CL317A/CL317D models.
  • Contrast Ratio: 1000:1.
  • Multimedia Interface:
    • 2 HDMI Ports (Support 1.1-1.3).
    • 2 USB Ports.
    • VGA (PC) input.
    • YPbPr input.
    • S-Video input.
    • Composite A/V input.
    • Audio out (L/R).
    • Analog TV input (for CL312A/CL317A models).
    • Digital TV input (for CL312D/CL317D models).
  • USB Support: 2.0 High Speed input, supporting 1080P picture, video, and audio formats.
  • Speaker: 5W.
  • Lamp Life: 50,000 hours.
  • Lamp Type: 50W LED lamp/bulb for CL312 series, 90W LED Lamp/bulb for CL317 series.
  • Displayable Colors: 16.8 million, 24-bit RGB.
  • Light Uniformity: 90%.
  • Projection Method: Front, Rear, Ceiling Mount, Table Top. Supports horizontal and vertical image flip.
  • Keystone: ±20° Vertical, Manual keystone correction.
  • Throw Ratio: 50" at 1.72m, 72" at 2.46m, 100" at 3.38m.
  • Suggested Image Size (Diagonal): 50-120".
  • Aspect Ratio: 4:3 Native, 16:9 Compatible; Switch freely.
  • OSD Language: Chinese, English, French, Spanish, Portuguese, Arabic.
  • Noise Level (STD/Bright): <25db.
  • Power Supply: AC 90-240V, 50-60Hz.
  • Power Consumption: <70W for CL312 series, <110W for CL317 series.
  • Projector Case: Black/White.
  • Dimensions (W x H x D): 300 x 240 x 100 mm.
  • Carton Size: 380 x 290 x 185mm.
  • Weight: N.W: 2.5KG (projector only), G.W: 3.6KG, V.W: 5KG.

Usage Features

  • Installation Flexibility: The projector can be set up for front projection (ceiling mount or table mount) or rear projection (ceiling mount or table mount). Adjustable supporting feet allow for projection angles up to 15°C, though angles less than 8°C are recommended for best image quality.
  • Signal Connection: Supports a wide range of input sources including HDMI, VGA, YPbPr, S-Video, Composite A/V, and USB. Users must connect external devices before powering on the projector to avoid equipment damage.
  • Basic Operation:
    • Power On/Off: Connect the power cable, insert two AAA batteries into the remote control, open the lens cap, then press the power key on the remote or panel. The power indicator will turn from red to light. To turn off, press the power key again.
    • Image Adjustment: For initial use, focus adjustment (turning the lens slowly until the image is clear) and keystone adjustment (correcting trapezoid distortion) are necessary.
    • Source Selection: The "Source" key on the remote or panel allows users to select the desired input signal.
    • Menu Navigation: The "Menu" key accesses the main menu, with CH +/- keys for navigation and V +/- keys for selection or adjustment.
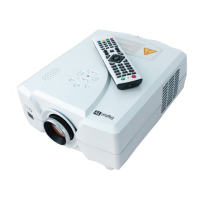
  • Remote Control: A full-featured remote control is provided, including keys for power, mute, image flip, info, picture mode, freeze, number buttons for TV channels, source selection, menu navigation, volume control, and aspect ratio switching (16:9/4:3).
  • Image Settings: Users can adjust picture display modes (standard, vivid, movies, user mode), color temperature (normal, cold, warm), aspect ratio (16:9, 4:3, eight screen zoom), and noise reduction (middle). In VGA mode, only contrast and brightness are adjustable.
  • Audio Settings: The audio menu allows selection of sound playing mold, balance (left/right channel equilibrium), auto volume (adjusts volume based on ambient noise), surround sound, SPDIF mode (PCM), and EQ (accompanying sound effect).
  • USB Media Playback: Supports playback of various document, picture, video, and audio formats from USB drives.
    • Picture Formats: JPEG, BMP, PNG (JPG/BMP/PNG).
    • Video Formats: MPEG1, MPEG2, MPEG4, H264, RM, RMVB, MOV, MJPEG, VC1, DIVX, FLV (Avi/mpg/dar/vob/div/mov/mkv/rm/rmvb/mp4/mjpeg/ts/trp/wmv/asf/flv).
    • Audio Formats: WMA, MP3, M4A(AAC) (wna/mp3/n4a).
  • TV Functionality: Specific models (CL312A/CL317A for Analog TV, CL312D/CL317D for Digital TV) include TV input, allowing for auto tuning, manual tuning, and program editing (favorite, skip, delete, move, rename).
  • Laptop VGA Output: When connecting to a laptop via VGA, users may need to adjust the laptop's display output settings using function keys (e.g., Fn+F3 for Panasonic, Fn+F5 for Toshiba, Fn+F4 for HP, Fn+F7 for Lenovo, Fn+F10 for Fujitsu, Fn+F8 for Dell).

Maintenance Features

  • Filter Clearance: The projector's filter should be cleaned at least once a month, or more frequently in dusty environments, to prevent overheating. This involves removing screws, detaching the grille, clearing dust, and ensuring the filter is dry before reinstallation.
  • Cleaning of LCD Panel: The LCD panel can be cleaned by unscrewing a bolt, removing the cover, and gently wiping with a dry and soft cloth. Warning: This procedure should only be performed by professionals, as faulty operation can cause fatal damage. Unauthorized cleaning by end-users may void warranty service requests.
  • Ventilation: Proper ventilation is crucial for stable operation and to prevent overheating. The ventilation windows should not be blocked, and the filter should be cleaned monthly to avoid dust buildup.
  • Environmental Conditions: The projector should be placed on a stable, leveled surface in a dry, non-moist, and non-dusty environment. It should not be exposed to direct sunlight or other heat-sensitive devices.
  • Temperature Range: The projector operates optimally between 0°C and 35°C and should be stored between -20°C and 70°C.
  • Power Cable Inspection: Always inspect the power cable before plugging it in.
  • Thunder/Long-Term Storage: Unplug the power cable during thunderstorms or if the projector will not be used for an extended period.
  • Professional Repair: Due to high voltage inside, users should not attempt to open or repair the projector themselves. All repairs should be handled by professional technicians or authorized dealers.

Accessories

The projector package includes:

  • Projector (1 unit)
  • Remote control (1 pc)
  • Power cable (1 pc)
  • AV signal cable (1 pc)
  • VGA signal cable (1 pc)
  • Warranty card (1 pc)
  • Manual (1 pc)
  • Spare fuse (1 pc)

Purchasable Accessories:

  • Projector screen
  • Projector ceiling mount
  • Spare lamps

Cheerlux CL312 Series Specifications

General IconGeneral
BrandCheerlux
ModelCL312 Series
CategoryProjector
LanguageEnglish

Related product manuals