Plastic support pads
Removing the Food Carriage:
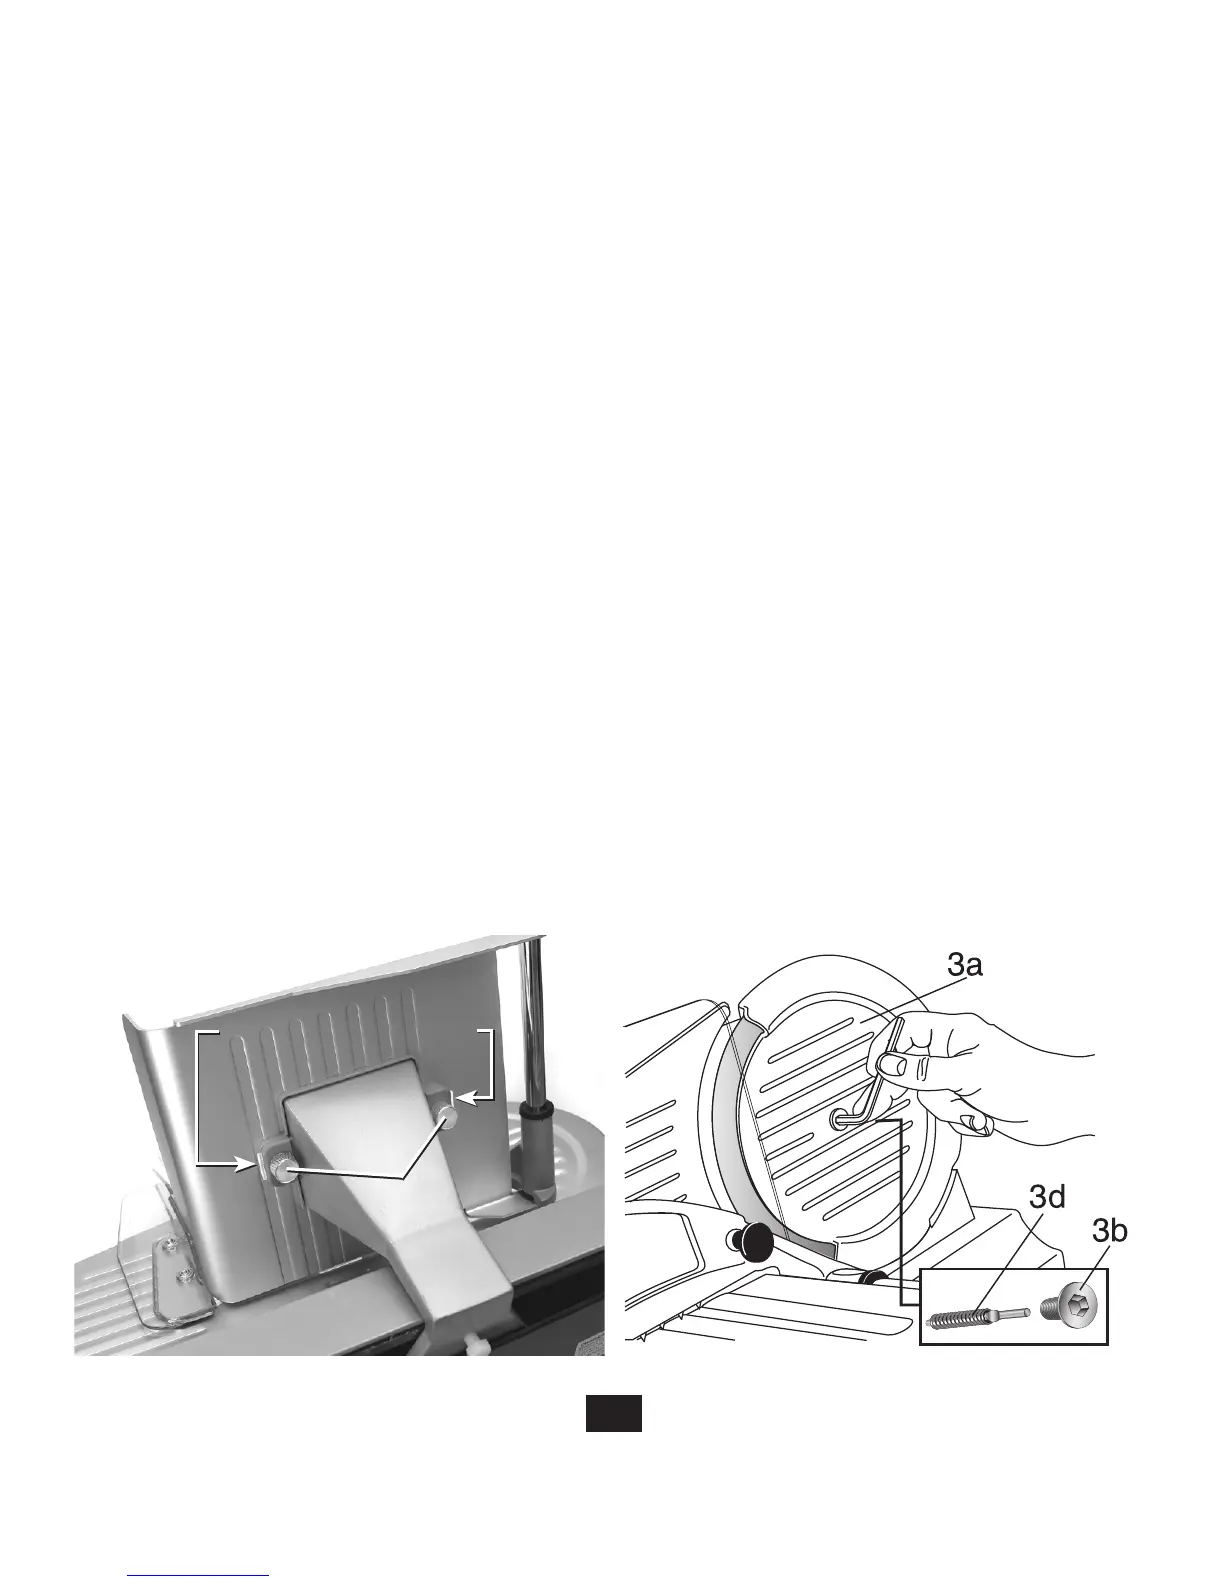
Turn the thickness control knob clockwise past the “zero” position until it stops. Reach underneath the
food carriage and unscrew the two knurled thumb screws (8). Put aside the thumb screws and plastic
support pads (see Figure 6) in a safe place. Lift off the food carriage with the attached food pusher and
wash them in a sink using a mild soap. Do not wash these parts in the dishwasher.
To replace the carriage, follow the above directions in reverse. Make sure the carriage is properly positioned
andtightenedsecurelyusingtheplasticsupportpadsandknurledthumbscrews.Pleasenote:when
reattaching the carriage, make sure the plastic support pads are oriented correctly and pressed firmly
against the cast support. Then fold the side ears under. After confirming that the holes in the pad are in
line with the holes in the cast support, the carriage can be reattached. With proper installation the carriage
should not jiggle. To confirm that it is aligned correctly, push the food pusher as far as it will move towards
the food thickness control plate. Now move the carriage past the blade and insure that the “teeth” on the
food pusher do not touch the thickness control plate or the blade. There should be about ¼” clearance.
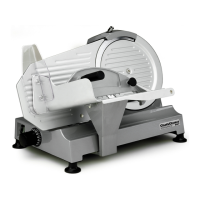
Cleaning the Blade (without removal of blade):
Make sure the thickness control knob is turned fully clockwise. Remove the blade guard (3a) by unscrewing
the retaining screw in the center of the guard (3b) with the provided hex-key tool (see Figure 7). Do not
remove the power actuator pin or spring (3d), but if it falls out, set it aside and reinsert in orientation shown
(Figure 7) before replacing the blade guard and its securing bolt (3b). The slicer will not operate unless the
pin and spring are in place. They actuate an internal safety power switch, not shown. Clean the guard in the
sink or with a spray cleaner.
Now, carefully clean the front of the blade with a moist sponge or cloth. Most – but not all of the back
of the blade can similarly be cleaned with a moist sponge or cloth, by carefully rotating the front of the
blade by hand (touch only the flat side of the blade, not the edge), to expose additional sections of the
blade. For a more thorough cleaning of the blade see the next page.
Figure 7. Removing retaining screw on blade guard.Figure 6. View of underneath of food carriage.
Plastic support pads
Thumb
screws
Thumb
screws
9