6
4. Place the food into the hopper, but do not start to feed it into the feed/grinder tube until the unit is turned on.
Food should be cut into strips or cubes (see “Tips” on page 7).
5. Turn the switch to the “2” position and the grinder will operate at full speed. Start feeding food into feed tube
as soon as possible.
6. Use the food pusher to feed the food through the hopper opening into the feed/grinder tube.
Clearing Jams
If sinew, tendons, bone or some foreign object slows down or stops the grinder motor, immediately turn the unit “off.” To clear
the jam, turn the power switch to the “Reverse” position and release it quickly. You may need to repeat this 2 or 3 times.
For minor jams caused by excessive sinew, you may be able to then turn the grinder back to the number 2 setting and
resume grinding.
If the unit continues to jam, you will need to turn the grinder “off”, unplug it and dissemble the grinding head and clean all its parts.
Your Chef’sChoice Professional Grinder is also equipped with an overload switch (13) to protect the motor from overheating
or being damaged in case of a major jam. Should the overload switch trip and stop the grinder:
1. Turn “off” the grinder.
2. Wait 10 seconds.
3. Reset the overload switch by pressing it in (see Figure 3).
4. Turn the power switch to the “REV” position and quickly release it to clear the blockage.
5. Turn the unit “off” and unplug the cord.
6. Disassemble the grinding head and clean all parts.
7. Re-assemble the grinder and continue grinding.
Mounting the Sausage Stuffer on the Grinder
1. Make sure the fully assembled grinder is turned “off” and unplugged.
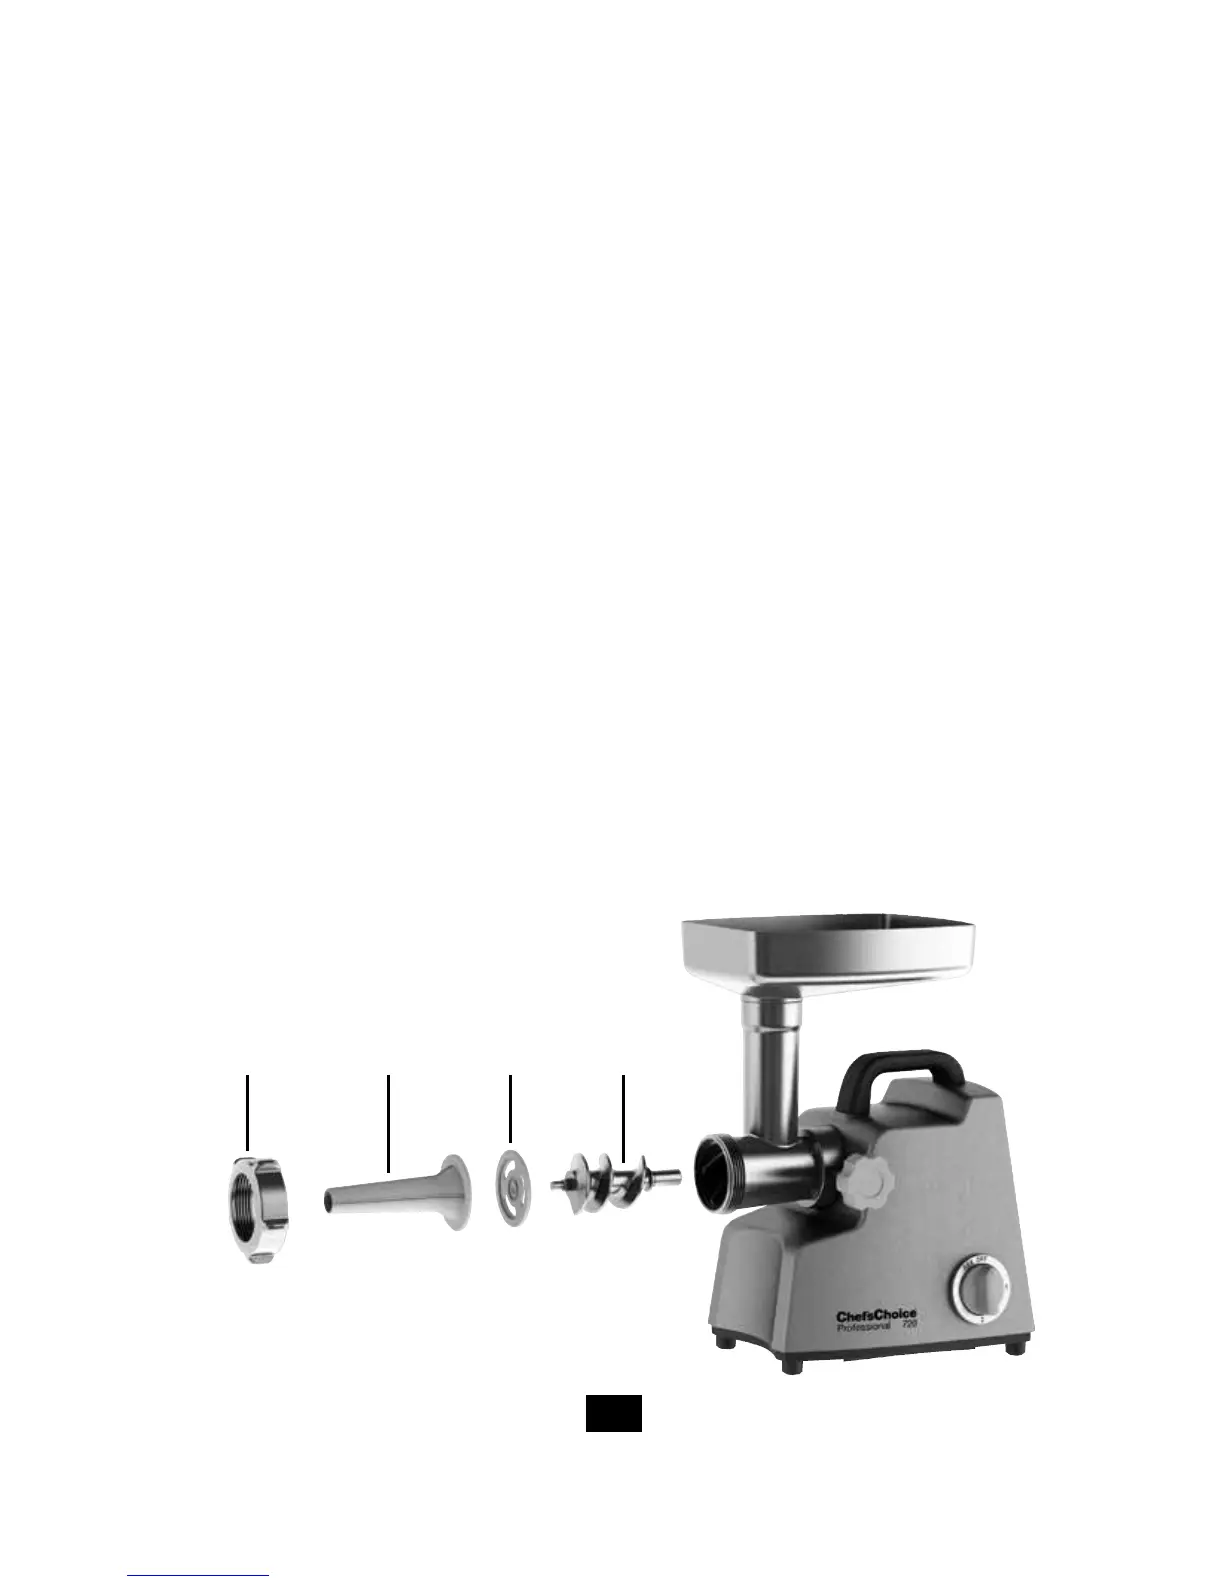
2. Unscrew the locking ring (1) and remove the grinding plate (2) and cutting blade (3). Set them aside.
Figure 1. Mounting the sausage stuffer on the grinder.
Locking
Ring
Sausage
Tube
Sausage
Spacer
Plate Auger
 Loading...