18
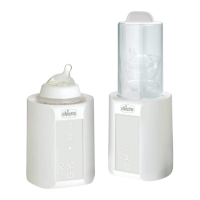
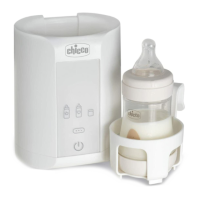
bottle support (b) before being inserted inside the main body (a).
Make sure that no water overows from the top of the appliance; for small sized feeding bottles or
jars, check that the water does not reach the top or open mouth of the same.
If water overows from the bottle warmer when the feeding bottle is placed inside the main body
(a), immediately use a dry cloth to dry the outside and base of the bottle warmer and the power
cord; then pour out the water in excess from the tank.
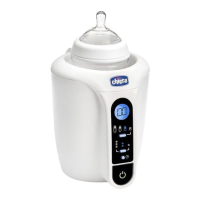
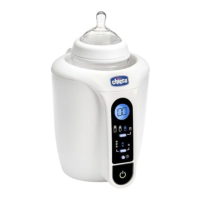
4. Connect the power cord connector (c) to the appliance and plug it into the mains socket. The
appliance will beep when it is connected correctly (1 beep).
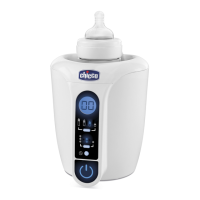
5. Press and hold the ON/OFF button (d5) for about 3 seconds to switch the bottle warmer ON.
NB: After 3 minutes of inactivity or from the end of the “warm-up” cycle, the appliance will switch to
“stand-by” mode and the green led above the main button will blink. To restart the appliance when
it is in “stand by” mode, briey press and release the “ON/OFF” button (d5).
NB: To switch the bottle warmer o, at any time, press and hold the “ON/OFF” button (d5).
6. Select the type/capacity of the container to be warmed by pressing the Feeding Bottle (capac-
ity)/Jar selector button selector button (d2) until the blue led is positioned on the desired option:
Jar, Feeding Bottle 150 ml; Feeding Bottle 250 ml; Feeding Bottle 330 ml.
7. Set the starting temperature of the food by pressing the food starting temperature selector but-
ton (d3) until the blue led is positioned on the desired option: Ambient temperature (* about
20°C); Average fridge temperature (** about 5°C); Average freezer temperature (*** about -18°C);
8. Press and release the “ON/OFF” button (d5) to start the selected cycle. The red led above the but-
ton will come on (fixed light) to signal the start of the warm-up cycle. The warming cycle count-
down time can be seen on the display (d1). At the end of this cycle, a visual signal will appear on
the display (d1 (00) and the ON/OFF button led will turn to green. In addition, the appliance will
beep 5 times to indicate the food is ready.
STANDARD WARM UP TIMES (in minutes)
Feeding Bottle (capacity) or jar
Feeding bottle
approx.
150 ml/5 oz
Feeding bottle
approx.
250 ml/9 oz
Feeding bottle
approx.
330 ml/11 oz
Baby food jar
Starting
temperature
20°C 3.5 min 4 min 5.5 min 7 min
5°C 5 min 6 min 8 min 8.5 min
-18°C 13 min 18 min 24 min 19 min
9. On removing the bottles and/or baby food jars from the main body of the bottle warmer (a),
dry them carefully.
WARNING
The warming cycle times in the table above refer to Chicco feeding bottles and 80 ml jars. The nal
temperature may not be that desired with feeding bottles of other brands and jars of different sizes.
Before feeding your baby, always check the temperature of the contents is not too hot.
If the food is not hot enough, put it back in the warmer and repeat the warming cycle. Check the
warming status at regular intervals, taking care not to burn yourself, until the required temperature
is reached.
IN PARTICULAR:
For feeding bottles:
- Shake the feeding bottle for a few seconds to ensure the temperature of the contents is even; then
check the temperature by squeezing a few drops onto the inside of your wrist.
For baby food jars:
– Stir the contents of the jar to make sure the temperature is even, then taste it to check it is not
too hot.
NB: If the content is warmed too much, the precious nutrients and vitamins contained in milk may
be destroyed.
10. Press and hold the ON/OFF button (d5) for about 3 seconds to switch the bottle warmer OFF.
Disconnect the plug from the mains and the connector from the appliance.
USING THE TIMER FUNCTION
This feature can be used to warm-up the food in advance (up to 1 hour before).
Follow the instructions in steps 1 to 5 of the USER INSTRUCTIONS.
6. Press the Timer button (d4) until you reach the time interval within which the contents should be
ready. Time intervals: 15 min; 30 min; 45 min; 60 min.
7. Press the ON/OFF button (d5) to start the selected cycle.
The led above the button will go red and blink until the actual warm-up cycle begins. The red led
will remain fixed from start to finish of the warm-up cycle.
The warming cycle countdown time can be seen on the display (d1).
At the end of this cycle, a visual signal will appear on the display (d1 (00) and the ON/OFF button
led will turn to green. In addition, the appliance will beep 5 times to indicate the food is ready.
NB: If the time needed to complete the warm-up cycle is longer than the options available for the
Timer function, the numbers will ash on the display (d1) to warn you that the entered time is not
within the timer threshold. Press the ON/OFF button (d5) to start the selected cycle.
WARNING: Always check that the temperature of the food is not too hot before feeding
your child.
We recommend consuming powdered formula mixed with cold water immediately.
NB:
- We recommend consuming warmed milk and baby food immediately.
- Milk and baby food must never be warmed again after feeding. If you warmed the milk/baby food
for a previous meal, throw it away.
CLEANING, CARE & MAINTENANCE OF THE APPLIANCE
When you nish using the appliance, always unplug the bottle warmer’s power cord (c) plug from
the mains socket. Allow the bottle warmer to cool down completely, remove any water left inside
and dry the inside thoroughly; store it in a clean and dry place.
DESCALING
During normal use of the appliance, limescale residue may build up inside the water tank which
can compromise the performance and damage the appliance over time. To remove the limescale
from the bottom of the tank, check that the bottle warmer is cold, make a 200-ml solution of water
and white vinegar, in equal parts, and pour into the tank; leave to soak overnight.
Never switch the bottle warmer ON when the tank is being soaked in the water-white vinegar mix.
On completing the descaling cycle, rinse the inside of the tank thoroughly; then wash and dry the
inside and outside of the appliance.
Fill the bottle warmer tank with 140 ml of water and complete an idle warming cycle using the 250
ml feeding bottle fridge starting temperature settings. When the green led above the ON/OFF (d5)
button comes on, switch the appliance OFF, leave to cool down and then remove any water left