Do you have a question about the Chicco Ct 0.1 and is the answer not in the manual?
Keep the owner's manual for future reference to ensure proper usage and safety guidelines.
The stroller requires assembly by an adult before use to ensure correct and safe construction.
Always keep the child in view while in the stroller for constant supervision and safety.
Use the seat belt and adjust it snugly to prevent the child from falling or sliding out.
Ensure straps are fastened to close leg openings when seat is reclined to prevent strangulation hazards.
Exercise caution when folding/unfolding the stroller, ensuring it's latched before allowing children near.
Avoid using the stroller on stairs or escalators to prevent loss of control and potential injury.
Do not place items with strings around the child's neck or suspend them from the product.
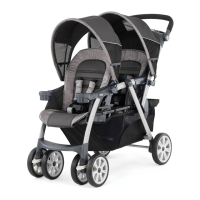
Stroller is designed for children up to 50 lbs (22.7 kg) and for one child at a time.
Do not place more than 3 lbs (1.4 kg) on the parent's tray to prevent tipping.
Never place hot liquids in the parent's tray to prevent burns.
Do not place items on the handle or canopy to maintain stroller stability.
Do not place more than 10 lbs (4.5 kg) in the storage basket to maintain stability.
The storage basket is not designed to carry children; use it only for storage.
Prevent children from standing on the basket as it may collapse and cause injury.
Always place the child in the stroller with their head away from the front of the stroller.
The stroller is not a toy and should not be used as one to prevent accidents.
Use the stroller only at walking speed; it is not intended for jogging or skating.
Stop using the stroller immediately if it becomes damaged or broken to ensure safety.
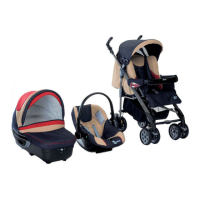
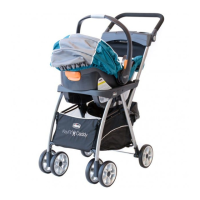
This travel system is designed exclusively for use with the Chicco KeyFit infant carrier.
Refer to the manual provided with the Chicco carrier before using it with the stroller.
Ensure the child is always secured with the carrier harness when placed in the stroller.
Verify all listed parts are present before beginning assembly to ensure completeness.
Assembly of the stroller does not require any special tools, simplifying the process.
The parent tray contains the mechanism to unfold the stroller; it must be attached correctly.
Tabs on the tray secure it to the stroller handle; ensure the fold cable does not interfere.
After attaching the tray, pull up on the handle to open the stroller.
Verify the stroller is fully open and stable before proceeding with further use or assembly.
Follow steps 5 and 6 to adjust the stroller's handle to a comfortable position.
Insert the stand into the basket fabric and snap it onto the frame tubes for secure attachment.
The basket stand must be installed to enable the use of the storage basket.
Always secure the child with the seat belt; the tray is not a restraint device.
Slide the child tray onto the stroller frame, aligning it with the attachment points.
The child tray can be opened using the buttons located on either side.
Snap the tray insert into the child's tray as illustrated for added functionality.
The tray insert can be removed by pulling up on one of its corners.
Attach the front wheels to the wheel assemblies by snapping them into place.
Pull on the wheel assemblies to ensure the front wheels are securely attached.
Connect the rear axle assembly to the stroller frame by snapping it into place.
Position the rear wheel and washer onto the axle as shown in the illustration.
Push the straight side of the pin through the axle hole, ensuring the curved end faces upwards.
Snap the wheel hubcap over the pin to secure the rear wheel assembly.
Slide the canopy down the stroller frame, connecting it to the frame connectors.
Fasten the front canopy panel over the top of the rear canopy panel as depicted.
Follow the instructions to open the stroller canopy.
Squeeze the buckle on both sides to release the 5-point harness for securing the child.
Pull the leg rest out and down to lower it to the desired position.
Pull the leg rest upwards to raise it to the desired position.
Ensure fabric is not pinched in latches when returning seat upright to avoid malfunction.
Recline the seat to its full position, ensuring leg opening straps are fastened.
Lift the canopy back and squeeze the recline handle to recline the seat.
Push the backrest upwards to return the seat to an upright position.
Recline the seat to its full position and release straps from under the footrest as shown.
Lift the leg rest and thread straps through the button holes on the seat cover.
Fasten the hook and loop straps together to secure the child in the reclined position.
Ensure brakes are engaged by trying to push the stroller forward.
Lock front swivel wheels for stability on uneven surfaces like grass or gravel.
Apply brakes, unfasten straps, and lift the tray handle before folding.
The stroller automatically latches and stands on its own when folded correctly.
This travel system is compatible only with the Chicco KeyFit infant carrier.
Ensure the child is always secured with the carrier's harness at all times.
The KeyFit car seat attachment points are located behind the flaps inside the stroller seat.
Recline the stroller seat and unsnap the seat flaps to access attachment points.
Insert the KeyFit car seat into the stroller and pull up to ensure it snaps securely into place.
Squeeze the release handle at the back of the carrier and lift it out of the stroller.
The seat pad is machine washable on a delicate cycle in cold water; do not bleach.
Clean the stroller frame with mild household soap and warm water; avoid bleach or detergent.
Regularly check for loose screws, worn parts, or torn material and repair/replace as needed with Chicco parts.
Excessive exposure to sun or heat can cause fading or warping of stroller parts.
If the stroller gets wet, open the canopy and allow it to dry thoroughly before storing.
Use light oil on squeaky wheels, applying it to the axle and wheel assembly.
After beach use, clean the stroller thoroughly to remove sand and salt from mechanisms and wheels.
Contact Chicco USA by phone, email, or mail for product questions or missing parts.
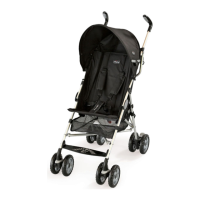
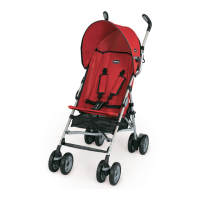
| Type | Umbrella stroller |
|---|---|
| Weight | 11 lbs |
| Foldable | Yes |
| Reversible seat | No |
| Adjustable handlebar | No |
| Harness | 5-point |
| Compatible with car seat | No |
| Wheels | 4 |