EasyManua.ls Logo

CHICOLOGY SNAP-N'-GLIDE User Manual

CHICOLOGY SNAP-N'-GLIDE
2 pages
To Next Page IconTo Next Page
Page #1 background imageLoading...
Page #1 background image
C
Wall Mount
Wall Mount
C
INSTALLATION
1
Measuring
3
Mount Headrails to the ceiling
2
Install Ceiling Mounts Brackets to ceiling
SNAP-N’-GLIDE
CORDLESS ROLLER SHADE
PREPARATION
1
Check the Hardware
2
Gather other necessary tools
A
B
C
Head Rail x 1
Cord x 1 Mounting
Bracket
23”-39” = 2
48 x 72 = 3
Screw
23”-39” = 4
48 x 72 = 6
D
Anchor
23”-39” = 4
48 x 72 = 6
E
Mark where the
Mounting Brackets
should be installed.
2 Mounting Brackets
should be positioned 4 inches from the left and right edges of the blinds. Use a
steel tape measure and a level to ensure accuracy.
4in
4in
C
C
4in
4in
C
Wall Mount
C
Drill 2 screws for each Mounting brackets to the wall or ceiling.
D
C
D
D
C
OR
Ceiling Mount
Ceiling Mount
Ceiling Mount
C
OR
D
D
C
Place the back groove of the headrail into the back mounting bracket (facing the window). Then push the back
headrail in and push the front headrail(facing you) upward until the front groove to clip into the mounting bracket.
A
C
Question and Answer IconNeed help?

Do you have a question about the CHICOLOGY SNAP-N'-GLIDE and is the answer not in the manual?

CHICOLOGY SNAP-N'-GLIDE Specifications

General IconGeneral
Light ControlRoom Darkening
MaterialPolyester
PrivacyYes
UV ProtectionYes
Adjustable WidthYes
Color OptionsMultiple
Mounting LocationInside Mount
Special FeaturesCordless

Summary

Preparation - Check Hardware

Hardware Components List

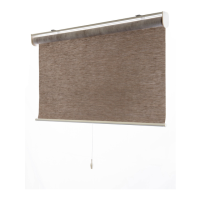
Check for Head Rail, Cord, Mounting Bracket, Screws, and Anchors required for installation.

Preparation - Gather Tools

Necessary Installation Tools

Gather essential tools like a drill and measuring tape for the shade installation process.

Installation - Measuring and Bracket Placement

Position Mounting Brackets

Position mounting brackets 4 inches from edges for accurate installation using a tape measure and level.

Installation - Mounting Brackets

Install Ceiling Mounts Brackets

Drill two screws for each mounting bracket into the wall or ceiling.

Installation - Mount Headrails

Secure Headrail to Bracket

Clip the headrail's grooves into the mounting bracket for secure attachment.

Installation - Attaching String Cord

Secure String Cord to Lift Handle

Insert the cord through the lift handle hole and tie a knot to secure it properly.

How-to-Use Guide

Operate the Blind

Learn how to open and close the blind by pulling and tucking the cord.

Chicology Warranty Information

Warranty Coverage Details

Details what manufacturer defects are covered under the limited one-year warranty.

Warranty Exclusions

Lists exclusions such as normal wear, consumer damage, and incorrect measurements.

Reporting Shipping Damages

Instructions on reporting shipping damages via email within 14 days.

Consumer Rights and Contact

Outlines consumer rights, Chicology's obligations, and contact info for defects.
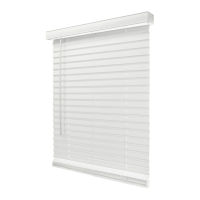
Related product manuals