Installation Instructions OXCM1U
9
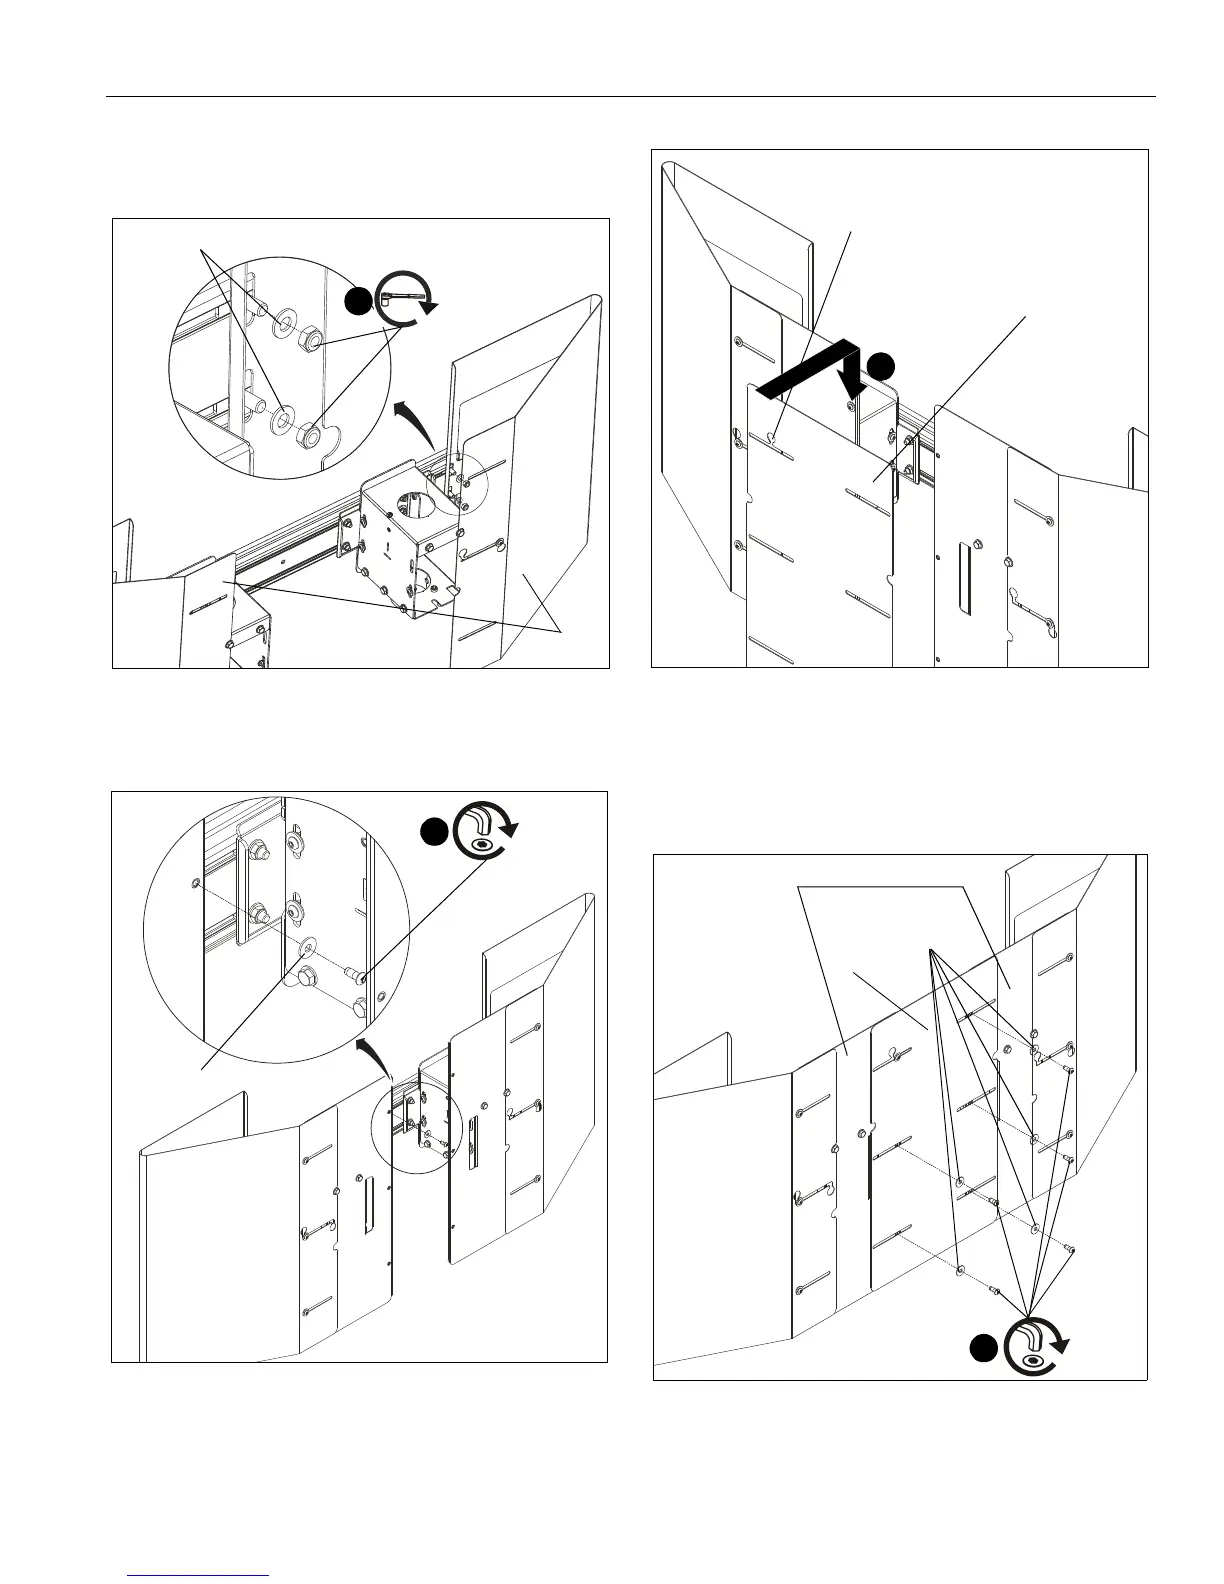
8. Use four 5/16-18 hex nuts (BB) and four 5/16" washers (CC)
to secure four wind shield connectors (HH) to side wind
shields (J). (See Figure 13)
Figure 13
9. Loosely install 1/4-20 x 5/8" button head cap screw (Z) and
1/4" washers (DD) into top right hole on left center shield
(K). (See Figure 14)
Figure 14
10. Hang x-large adapter (FF) onto screw loosely installed in
Step 9 teardrop mounting hole in upper left slot. (See Figure
15)
Figure 15
11. Use five 1/4-20 x 5/8" button head cap screws (Z) and five
1/4" washers (DD) to secure x-large adapter (FF) to two
center wind shields (K). (See Figure 16)
12. Tighten all six screws (Z).
Figure 16
(Center wind shields
hidden for transparency)
(BB) x 4
8
(CC) x 4
(J) x 2
(Z)
(DD)
9
(FF)
teardrop mounting hole
10
11
(Z) x 5
(DD) x 5
(FF)
(K) x 2