CCH01718:08/00
JCHE p65
child craftchild craft
child craftchild craft
child craft
1
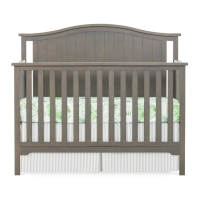
DOUBLE D ROPSIDE CRIB
CHILD CRAFT INDUSTRIES, INC.
P.O. Box 444, Salem, IN USA 47167-0444
PH: 812-883-3111 - FAX: 812-883-1819 - http://www.childcraftind.com
ASSEMBLY DIRECTIONS AND PARTS LIST
ΦREAD ALL INSTRUCTIONS WITH CARE BEFORE STARTING THE ASSEMBLY PROCEDURE.
ΦΦ
ΦΦ
Φ YOU WILL NEED A #2 PHILLIPS SCREWDRIVER, A STANDARD SLOTTED SCREWDRIVER & ENCLOSED WRENCH
FF
FF
F.
PARTS E NCLOSED IN H ARDWARE B AG ( NOTED WHEN SHOWN ACTUAL SIZE)
(12) Combo/Phillips
Machine Screws
(4) Hexhead Machine
Screws
(4) Gate Shoes (28) Combo/Phillips
Wood Screws
(4) Angle Brackets
(4) 4-Position
Spring Brackets
(with Lip)
(1) Hex Wrench
AA
AA
A
BB
BB
B
CC
CC
C
(actual size)
II
II
I
FF
FF
F
(8) BumperSprings
GG
GG
G
HH
HH
H
(4) Casters
(style may vary)
DD
DD
D
EE
EE
E
(actual size)
PARTS I NCLUDED IN C ARTON
(1) Headboard N
(1) Footboard O
(2) Dropsides P& Q (1) Crib Spring R
(4) Crib Rods
KK
KK
K
(2) Stabilizer Bars
JJ
JJ
J
PREPARATION
Carefully remove and lay out all hardware and parts. Remove wires securing Stabilizer Bar
JJ
JJ
J and Crib Rods K to Crib Spring R. Check
quantities and match to the two Parts Lists above. If any part is missing or broken contact your dealer or Child Craft, 812/ 883-3111 or
http://www.childcraftind.com for a replacement part or instructional literature. Before making this contact identify your crib by its model
number. Model Identification numbers are stamped on the label attached to the inside face of Footboard
OO
OO
O bottom rail. Record the
complete model identification number now: #____________________. Include this number with your request for a part or literature for
your crib. DO NOT SUBSTITUTE PARTS!
(actual size)
Place Headboard N and Footboard O
in a horizontal position on a soft surface
(i.e., carpet) with pilot holes facing up.
Attach 4-Position Spring Brackets D
and Angle Brackets I to both Head-
board N and Footboard O
using
Combo/Phillips Wood Screws
EE
EE
E, to be
positioned exactly as shown. NEVER
REMOVE 4-POSITION SPRING BRACK-
ETS
DD
DD
D, ANGLE BRACKETS
II
II
I, OR ANY
OTHER HARDWARE ITEM ATTACHED
WITH COMBO/PHILLIPS WOOD
SCREWS
EE
EE
E.
STEP 1 - DIAGRAM 1: INSTALL BRACKETS
Holes to
Receive
Combo/
Phillips
Wood
Screws
E
4-Position
Holes
Receive
Hexhead
Machine
Screw B
to be placed
in selected
position hole
for Crib
Spring
R
positioning
13301/16942.78
E
E
N
orO
I
D
(16) Washers
XX
XX
X
(actual size)
(style may vary)
Plastic
pouch