Do you have a question about the ChoiceMMed MD300C2 and is the answer not in the manual?
Explains how the oximeter determines SpO2 and pulse rate using red and infrared light.
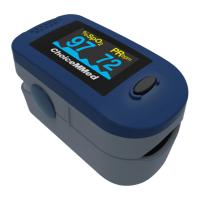
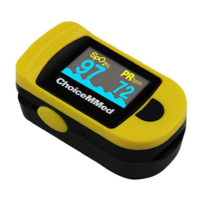
Highlights key functionalities like dual color OLED display, adjustable brightness, and battery indicator.
Defines the device's purpose for spot-checking SpO2 and pulse rate in various patient settings.
Lists essential guidelines for safe and effective operation, including reading manual and avoiding specific environments.
Specifies conditions or uses for which the device is not suitable, such as continuous monitoring.
Details factors that can lead to erroneous readings, like patient movement or low perfusion.
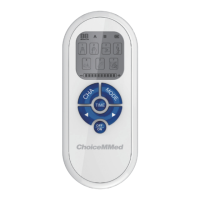
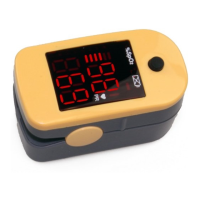
Identifies the controls and display elements on the front of the pulse oximeter.
Instructions for inserting batteries and recognizing low power indicators.
Guidelines for cleaning the device and general care to ensure longevity and performance.
Details measurement and accuracy ranges for SpO2 and pulse rate, including resolution.
Provides information on the wavelength and radiant power of the emission diodes.
Outlines battery requirements, power consumption, and operational/storage environment conditions.
Information on RF emissions and compliance with CISPR 11 standards.
Details on immunity to electrostatic discharge, magnetic fields, and RF fields.
Guidance on maintaining safe distances from RF communications equipment.
Troubleshooting guide for common issues like no reading or sudden power off.
Explanation of symbols used on the device and in documentation.
Lists all items included in the product packaging.
Lists the specific model numbers for which this manual applies.
This document describes a Fingertip Pulse Oximeter, a handheld non-invasive device designed for spot-checking oxygen saturation of arterial hemoglobin (SpO2) and Pulse Rate in adult, adolescent, and child patients in various settings, including hospitals, hospital-type facilities, and homecare.
The pulse oximeter operates by applying a sensor to a pulsating arteriolar vascular bed, typically a finger. It uses two frequencies of light—red light (660nm) and infrared-red light (905nm)—emitted by a dual light source. A photo detector in the finger sensor collects and converts the light into an electronic signal. As blood volume in the arteriolar bed changes during systole and diastole, variable amounts of light are absorbed. The ratio of absorbed light is then translated into an oxygen saturation measurement (SpO2) and pulse rate. The device displays both SpO2 and pulse rate, along with a pulse bar and waveform, on a dual-color OLED screen. The pulse bar, when less than 30%, indicates signal inadequacy and potentially incorrect readings.
The device is designed for simple operation and convenience. To use, two AAA batteries are installed according to the battery installation instructions. A finger is then placed into the rubber opening of the pulse oximeter. Pressing the switch button on the front panel turns the device on. For accurate readings, it is crucial to keep the hand still and avoid shaking the finger or moving the body during the test. The device automatically powers off after 8 seconds if no or low signal is detected, conserving power.
The pulse oximeter offers six different display modes, which can be cycled through by pressing the power switch after the device is turned on. The brightness of the OLED display is adjustable, with 10 levels available, and the default setting is level four. The device is small, lightweight, and consumes low power, making it easy to carry.
A lanyard is provided for convenience. To attach it, the thinner end of the lanyard is threaded through the hanging hole, and then the thicker end is threaded through the threaded end before pulling it tightly. Users are cautioned to keep the oximeter away from young children, as small items like the battery door, battery, and lanyard are choking hazards. The lanyard should not be hung from the device's electrical wire, and users should be aware that it may cause strangulation if tied to the oximeter due to excessive length.
The fingertip pulse oximeter is intended as an adjunct in patient assessment and must be used in conjunction with other methods of assessing clinical signs and symptoms. It is not designed for continuous monitoring and does not have alarms. It should not be used in an MRI or CT environment, in an explosive atmosphere, or in situations where alarms are required. Operation may be affected by the use of an electrosurgical unit (ESU). To ensure correct sensor alignment and skin integrity, the maximum application time at a single site should be less than half an hour.
Inaccurate measurements can be caused by several factors, including significant levels of dysfunctional hemoglobin (e.g., carbonyl-hemoglobin or methemoglobin), intravascular dyes (e.g., indocyanine green or methylene blue), high ambient light (requiring the sensor area to be shielded), excessive patient movement, high-frequency electrosurgical interference and defibrillators, venous pulsations, placement of a sensor on an extremity with a blood pressure cuff, arterial catheter, or intravascular line. Patients with hypotension, severe vasoconstriction, severe anemia, hypothermia, cardiac arrest, or shock may also yield inaccurate readings. Fingernail polish or false fingernails, weak pulse quality (low perfusion), and low hemoglobin can also affect accuracy. If the signal is unstable, the reading may be inaccurate and should not be referenced.
Regular maintenance includes replacing the batteries in a timely manner when the low voltage lamp is illuminated. If the oximeter will not be operated for a long time, the batteries should be removed. The device should be stored in a dry place, as extreme moisture can affect its lifetime and cause damage. Proper disposal of batteries should follow applicable local battery disposal laws.
For cleaning, the silicone touching the finger inside the oximeter should be wiped with a soft cloth dampened with 70% isopropyl alcohol. The finger being tested should also be cleaned with alcohol before and after each test. Liquids should not be poured or sprayed onto the oximeter, and no liquid should enter any openings. The oximeter must be allowed to dry thoroughly before reuse. The fingertip pulse oximeter does not require routine calibration or maintenance other than battery replacement.
For disinfection, the applied parts touching the patient's body should be disinfected once after each use. Recommended disinfectants include ethanol 70%, isopropanol 70%, and glutaraldehyde-type 2% liquid disinfectants. However, disinfection may cause damage to the equipment and is not recommended for this pulse oximeter unless otherwise indicated in a hospital's servicing schedule. The pulse oximeter should be cleaned before disinfecting it. Users are cautioned never to use EtO or formaldehyde for disinfection.
The device has a use life of five years, assuming 15 measurements per day, with each measurement lasting 10 minutes. Users should stop using the device and contact a local service center if an error is displayed, the oximeter cannot be powered on (excluding battery issues), or if there is physical damage to the oximeter (crack on display, invalid spring, unresponsive key) that prevents readings from being identified. The device is not intended for sterilization by autoclaving, ethylene oxide sterilizing, or immersing in liquid. Disposal or recycling of the device and its components, including batteries, should follow local ordinances and recycling instructions.
| Product Name | ChoiceMMed MD300C2 |
|---|---|
| Category | Medical Equipment |
| Type | Pulse Oximeter |
| SpO2 Measuring Range | 70% - 99% |
| Pulse Rate Measuring Range | 30 - 235 bpm |
| Resolution | 1% for SpO2, 1 bpm for pulse rate |
| Display Type | LED |
| Weight | 50g (including batteries) |
| Dimensions | 58mm x 32mm x 34mm |
| Operating Temperature | 5°C - 40°C |
| Pulse Rate Accuracy | ±2 bpm or ±2% |
| Power | 2 x AAA batteries |
| Battery Life | Approximately 30 hours |
| Automatic Shut-off | Yes, after 8 seconds of non-use |
| Humidity | 15% - 80% |
| SpO2 Accuracy | ±2% in the range of 80% - 100%, ±3% in the range of 70% - 79% |
| Storage Temperature | -20°C to 55°C |