4. Before starting the pump, verify the c
motor and that
the protections against electrical and mechanical contacts are correctly
positioned and attached.
5. It is advisable to follow the steps listed below before handling the pump in any way.
a) Turn off the voltage to the pump.
b) Lock starting devices.
c) Verify that there is no voltage in the circuits, including ancillary devices and auxiliary circuits.
d) Wait until motor stops completely.
The above list should be considered indicative and
specific safety
rules may exist in particular regulations.
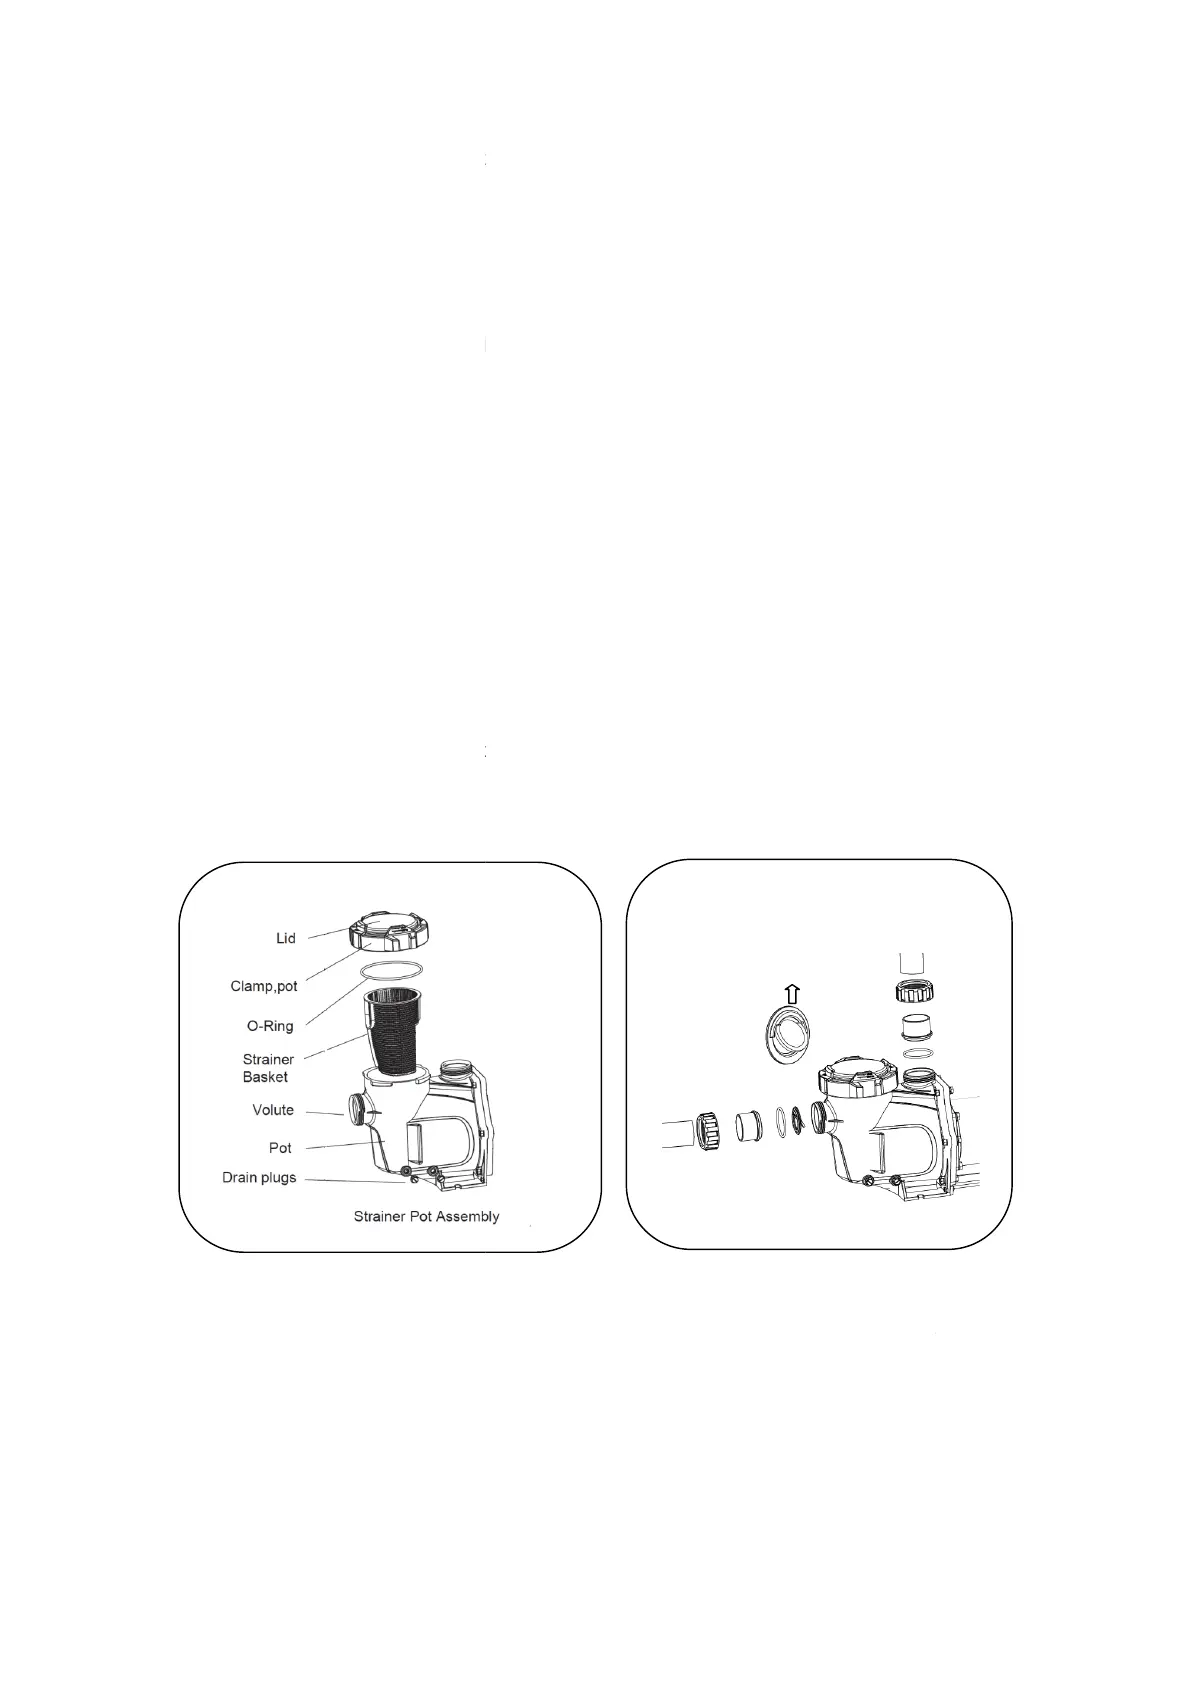
Assembly Instructions (some parts may be pre
Follow the step below and the corresponding diagrams for assembly.
Step 1.
Place the strainer baske
t to the strainer housing. Be sure that the opening the basket is
aligned with the opening in the housing. Secure Lid
Step 2.
The water level of the inground
In order to prevent water from
First screw the adapter into the
assembly.
REGULARLY VERIFY
1. The correct a
ttachments of the mechanical parts and of the support screws of the pump.
2. The correct position, attachment and condition of the supply cables and of the insulating
parts.
3. The temperature of the motor. In the event of any excessive high, stop immediat
have it repaired.
4. The vibration of the pump. In the case of any excessive high, stop immediately and have it
repaired.
4. Before starting the pump, verify the c
alibration of the electrical protection devices of the
the protections against electrical and mechanical contacts are correctly
5. It is advisable to follow the steps listed below before handling the pump in any way.
a) Turn off the voltage to the pump.
c) Verify that there is no voltage in the circuits, including ancillary devices and auxiliary circuits.
d) Wait until motor stops completely.
The above list should be considered indicative and
not binding for the purpose of safety,
rules may exist in particular regulations.
Assembly Instructions (some parts may be pre
-assembled)
Follow the step below and the corresponding diagrams for assembly.
t to the strainer housing. Be sure that the opening the basket is
aligned with the opening in the housing. Secure Lid
pool is lower than the water inlet of the
backward, this pump equipped a check
inlet of the pump, and then install the
ttachments of the mechanical parts and of the support screws of the pump.
2. The correct position, attachment and condition of the supply cables and of the insulating
3. The temperature of the motor. In the event of any excessive high, stop immediat
4. The vibration of the pump. In the case of any excessive high, stop immediately and have it
Please ensure this direction
towards the pump
alibration of the electrical protection devices of the
the protections against electrical and mechanical contacts are correctly
5. It is advisable to follow the steps listed below before handling the pump in any way.
c) Verify that there is no voltage in the circuits, including ancillary devices and auxiliary circuits.
not binding for the purpose of safety,
t to the strainer housing. Be sure that the opening the basket is
ttachments of the mechanical parts and of the support screws of the pump.
2. The correct position, attachment and condition of the supply cables and of the insulating
4. The vibration of the pump. In the case of any excessive high, stop immediately and have it
15
 Loading...