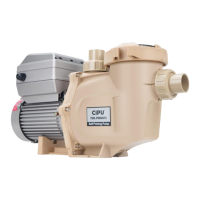
This document is an owner's manual for CIPU Inground VS Pumps, Item # CSPPV711. It provides comprehensive instructions for installation, operation, and maintenance, emphasizing safety precautions and technical specifications.
Function Description
The CIPU Inground VS Pump is a variable speed pump designed for the pre-filtering and re-circulation of water in swimming pools and spas. It is suitable for various water applications, including waterfalls, cleaners, heaters, and salt chlorine systems. The pump's variable speed capability allows for optimized operation, contributing to energy efficiency and system longevity.
Important Technical Specifications
- Item #: CSPPV711
- Input Power: 125W
- H. Max (Head Maximum): 59ft
- Q. Max/min (Flow Rate Maximum/Minimum): 366L
- Voltage (V): 230
- Frequency (HZ): 50/60
- IP Rating: IPX5 (protected against low-pressure water jets from any direction)
- Water Temperature: Not exceeding 104°F (40°C)
- Power Cord Quality: 245 IEC66 (HO7RN-F) for models >1kW, 245 IEC57 (H05RN-F) for models <1kW.
- Circuit Breaker: Open contact distance no less than 3mm.
- Residual Current Device (RCD): Rated residual operating current not exceeding 30mA.
Usage Features
The pump features an LED control panel for easy operation and monitoring. It offers three pre-programmed schedules:
- Regular Mode: Utilizes three quick-start buttons (ECO, CLEAN, BOOST) with adjustable speeds.
- ECO: Default 1500 RPM (adjustable range: 1000-2400 RPM)
- CLEAN: Default 2400 RPM (adjustable range: 2400-2850 RPM)
- BOOST: Default 3250 RPM (adjustable range: 2850-3450 RPM)
- When starting in Regular Mode, the pump runs at 2850 RPM for 5 minutes to eliminate air and prevent dry grinding before switching to the selected default speed.
- Mode 1: A 16-hour clean cycle with four stages (S1, S2, S3, S4).
- S1: Default Start Time 6:00 AM, Running Hours 3, Default Speed 2400 RPM (CLEAN)
- S2: Default Start Time 9:00 AM, Running Hours 5, Default Speed 1500 RPM (ECO)
- S3: Default Start Time 6:00 PM, Running Hours 3, Default Speed 2400 RPM (CLEAN)
- S4: Default Start Time 9:00 PM, Running Hours 5, Default Speed 1500 RPM (ECO)
- Mode 2: A 24-hour clean cycle with four stages (S1, S2, S3, S4).
- S1: Default Start Time 12:00 PM, Running Hours 6, Default Speed 1500 RPM (ECO)
- S2: Default Start Time 6:00 AM, Running Hours 3, Default Speed 2400 RPM (CLEAN)
- S3: Default Start Time 9:00 AM, Running Hours 9, Default Speed 1500 RPM (ECO)
- S4: Default Start Time 6:00 PM, Running Hours 6, Default Speed 2400 RPM (CLEAN)
The control panel allows users to display and change the current time and running speed. It also features alarm indicators and error messages for conditions such as under/over voltage, high temperature, over current, and freeze protection. The pump includes a re-start and reset function for normal schedule after power interruptions or fault conditions. It also incorporates step-by-step acceleration and deceleration to extend motor and control panel life.
Installation Requirements:
- Location: Install as close to the pool/spa as possible, with short, direct suction piping. Minimum 5 feet (1.52 meters) from the inside wall of the pool/spa (9.8 feet/3 meters for Canadian installations). Minimum 3 feet (0.9 meters) from the heater outlet. Not more than 10 feet (3.1 meters) above the water level. Must be in a well-ventilated location protected from excessive moisture.
- Clearance: At least 3 inches (76.2mm) rear clearance for motor removal.
- Piping: Use larger pipe sizes for improved plumbing. Suction side piping should be the same or larger than the return line diameter and as short as possible. A valve, elbow, or tee in the suction line should be no closer than five times the suction line pipe diameter from the pump front.
- Fittings and Valves: Do not install 90° elbows directly into the pump inlet. Gate valves are recommended for flooded suction systems but should be no closer than five times the suction pipe diameter. A check valve is recommended in the discharge line if there is significant head after the pump, and when plumbing in parallel with another pump to prevent reverse impeller rotation.
- Electrical: Installation must be performed by a licensed electrician, adhering to the National Electrical Code and local ordinances. A means for disconnection must be incorporated into the fixed wiring. The motor must be permanently grounded using the green ground screw and bonded to the pool/spa structure with a solid copper bonding conductor (not smaller than 8 AWG, 6 AWG or larger for Canadian installations). The pump should be on its own independent circuit unless operated with a salt chlorine generator.
Maintenance Features
- Strainer Basket: Regularly inspect and clean the strainer basket in the filter tank. Remove debris, hose off with clean water, inspect and lubricate the lid gasket (replace if damaged). Re-prime the filter tank after cleaning.
- Priming: The pump will prime and pre-prime if the filter tank has water and there is sufficient supply from the suction point. If water is lost, refill the filter tank before starting.
- Winterization: In climates prone to frost or freezing, the pump should be drained completely and stored in a dry location if not used during winter.
- Seals and O-rings: Ensure all seals and o-rings are in operational condition; re-grease or replace as necessary.
- Motor Shaft: Check that the motor shaft moves freely before re-activation.
- Troubleshooting: The manual includes a troubleshooting guide for common issues like low flow, pump not running, pump not priming, motor overload, and noisy operation, with suggested causes and solutions.
- Alerts and Warnings: The control panel displays alerts for conditions such as power out, priming error, overheat, over current, and over voltage. These alerts disable control panel buttons until acknowledged. Error codes are provided for specific fault conditions.
The manual highlights critical safety warnings, including:
- Hyperthermia Risk: Water temperatures above 100°F (37.7°C) can be hazardous.
- Child Safety: Do not permit children to use or operate the equipment.
- Emergency Switch: For non-single-family dwellings, a clearly labeled emergency switch must be installed at least 5 feet (1.52m) away, adjacent to, and within sight of the pump.
- Electrical Shock/Electrocution Risk: Always disconnect power at the circuit breaker before servicing the pump. Pumps require high voltage.
- Suction Entrapment Hazard: Improperly sized or installed pumps can lead to serious injury or death due to hair, limb, body, evisceration, or mechanical entrapment. ANSI/ASME A112.19.8 approved anti-entrapment drain covers must be used, with a minimum of two drains per pump recommended. Covers must be regularly inspected and replaced every seven years or sooner if damaged.
- General Safety Rules: Emphasizes installation by qualified professionals, adherence to safety standards (e.g., HD 384.7.702), and the use of original replacement parts. Warns against working on the pump while under electric voltage.
- Pump Operation: The pump must not be used when people are in the water. It must be protected from running dry.