EasyManuals Logo

Cisco 4000 Series Installation Manual

Cisco 4000 Series
18 pages
To Next Page IconTo Next Page
To Previous Page IconTo Previous Page
Page #16 background imageLoading...
Page #16 background image
16 Cisco 4000 Series Rack-Mount and Wall-Mount Installation
Mounting the Chassis Shell on a Wall
After you have installed the telco rack-mount or wall-mount brackets, take the following steps to
mount your system on a wall:
Step 1 Install the wall-mount brackets following the procedures described in the section
“Preparing the Chassis for Rack-Mounting or Wall-Mounting” and “Overview of Telco
Rack-Mounting and Wall-Mounting.
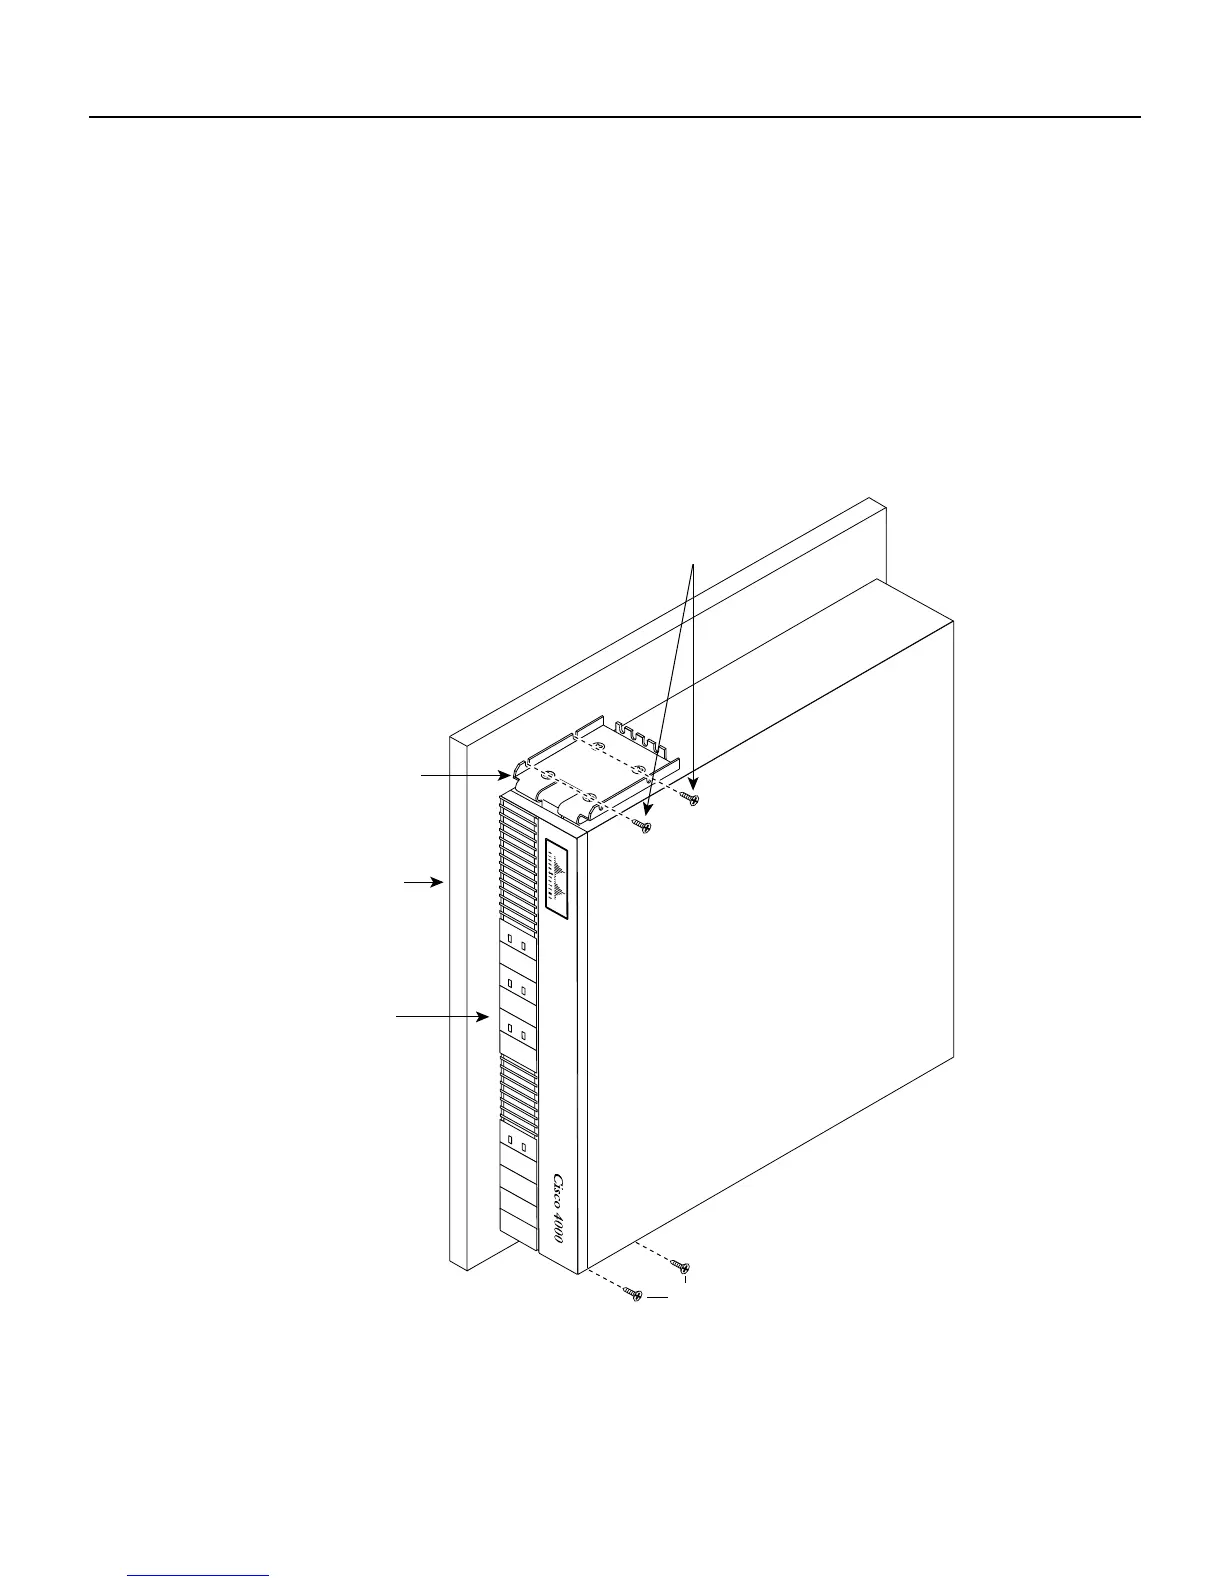
Step 2 Choose the wall on which you will mount the Cisco 4000 chassis. When choosing a
location, consider cable lengths and limitations, and wall structure (see Figure 17).
Figure 17 Wall-Mounted Chassis
Wood screws
19 x 19" or larger
plywood board
Front of the
chassis
Wall-mount bracket
H6216
2
DATA
OK
3
DATA
OK
1
DATA
OK POWER
OK
SERIES
Wood screws

Other manuals for Cisco 4000 Series

Questions and Answers:

Question and Answer IconNeed help?

Do you have a question about the Cisco 4000 Series and is the answer not in the manual?

Cisco 4000 Series Specifications

General IconGeneral
CategoryNetwork Router
Product TypeRouter
Form FactorRack-mountable
Connectivity TechnologyWired
Product FamilyCisco 4000 Series
Operating SystemCisco IOS XE
DimensionsVaries by model
WeightVaries by model
ModelCisco 4000 Series
WAN PortsVaries by model
LAN PortsVaries by model
StorageVaries by model
RedundancyVaries by model
Security FeaturesVaries by model
Network ManagementVaries by model
Data Link ProtocolEthernet, Fast Ethernet, Gigabit Ethernet
Network/Transport ProtocolTCP/IP, UDP
FeaturesVaries by model
InterfacesVaries by model
ModelsVaries
Network InterfacesVaries by model
Power SupplyVaries by model
Virtualization SupportYes

Related product manuals