Cisco 4000 Series Rack-Mount and Wall-Mount Installation 15
Mounting the Chassis in a Telco Rack
Mounting the Chassis in a Telco Rack
After you have installed the telco rack-mount or wall-mount brackets, take the following steps to
mount your system in a telco rack:
Step 1 Partially thread two 10-32 machine screws into one side of the telco rack with enough space
to allow one side bracket to fit (see Figure 16).
Step 2 While supporting the chassis shell, slip one side bracket over the two screws in place and
thread one screw in on the bracket on the opposite side to secure the shell to the telco rack.
Step 3 Thread the remaining machine screw and tighten all the screws in place.
Step 4 Replace the front panel by snapping it into the front of the chassis shell.
Step 5 Reinsert the component tray into the shell.
Step 6 Push on the back of the tray while at the same time pressing on the chassis release screw
(shown in Figure 1) with the thumb of your right hand.
Step 7 Retighten the chassis release screw.
This completes the telco rack-mount procedure.
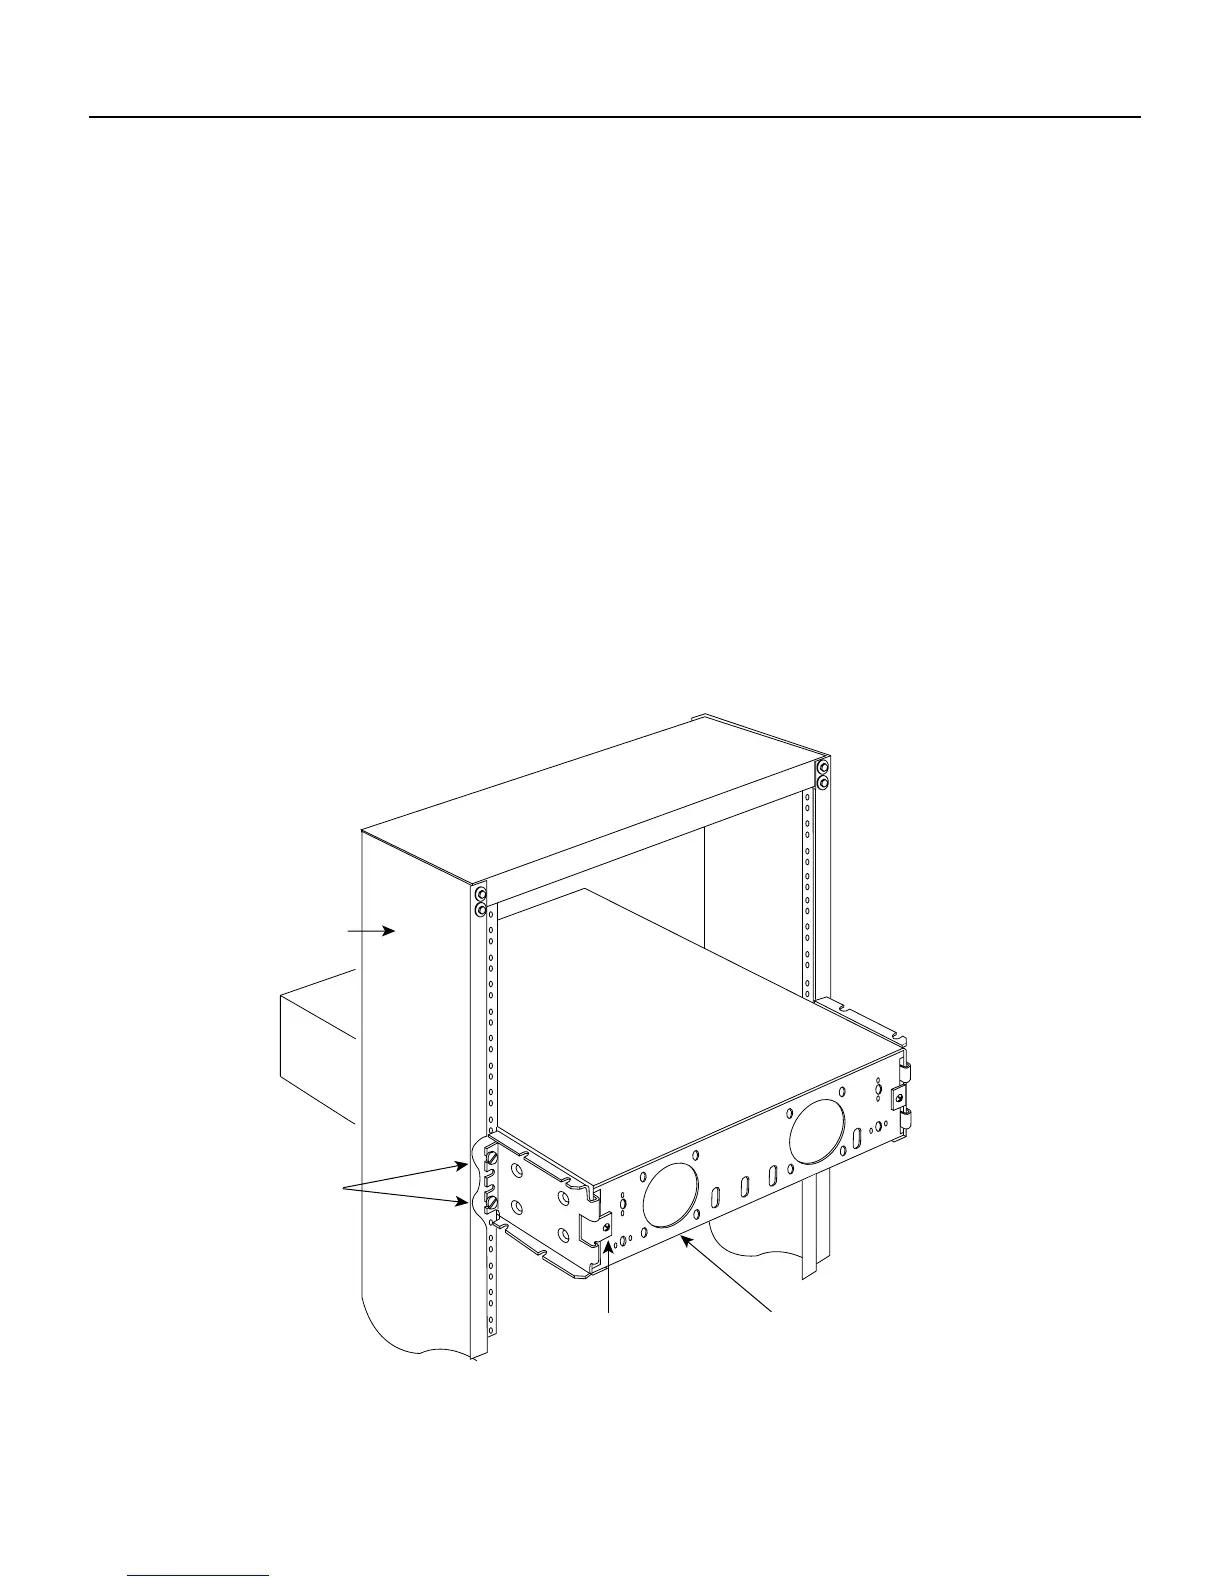
Figure 16 Telco Rack-Mounted Chassis
H6246
10-32
machine
screws
Telco rack
M3 machine screw Front of the chassis
 Loading...