4-9
Cisco ASA 5585-X Adaptive Security Appliance Hardware Installation Guide
OL-22567-02
Chapter 4 Maintenance and Upgrade Procedures
Installing and Removing Cisco ASA 5585-X Network I/O Modules
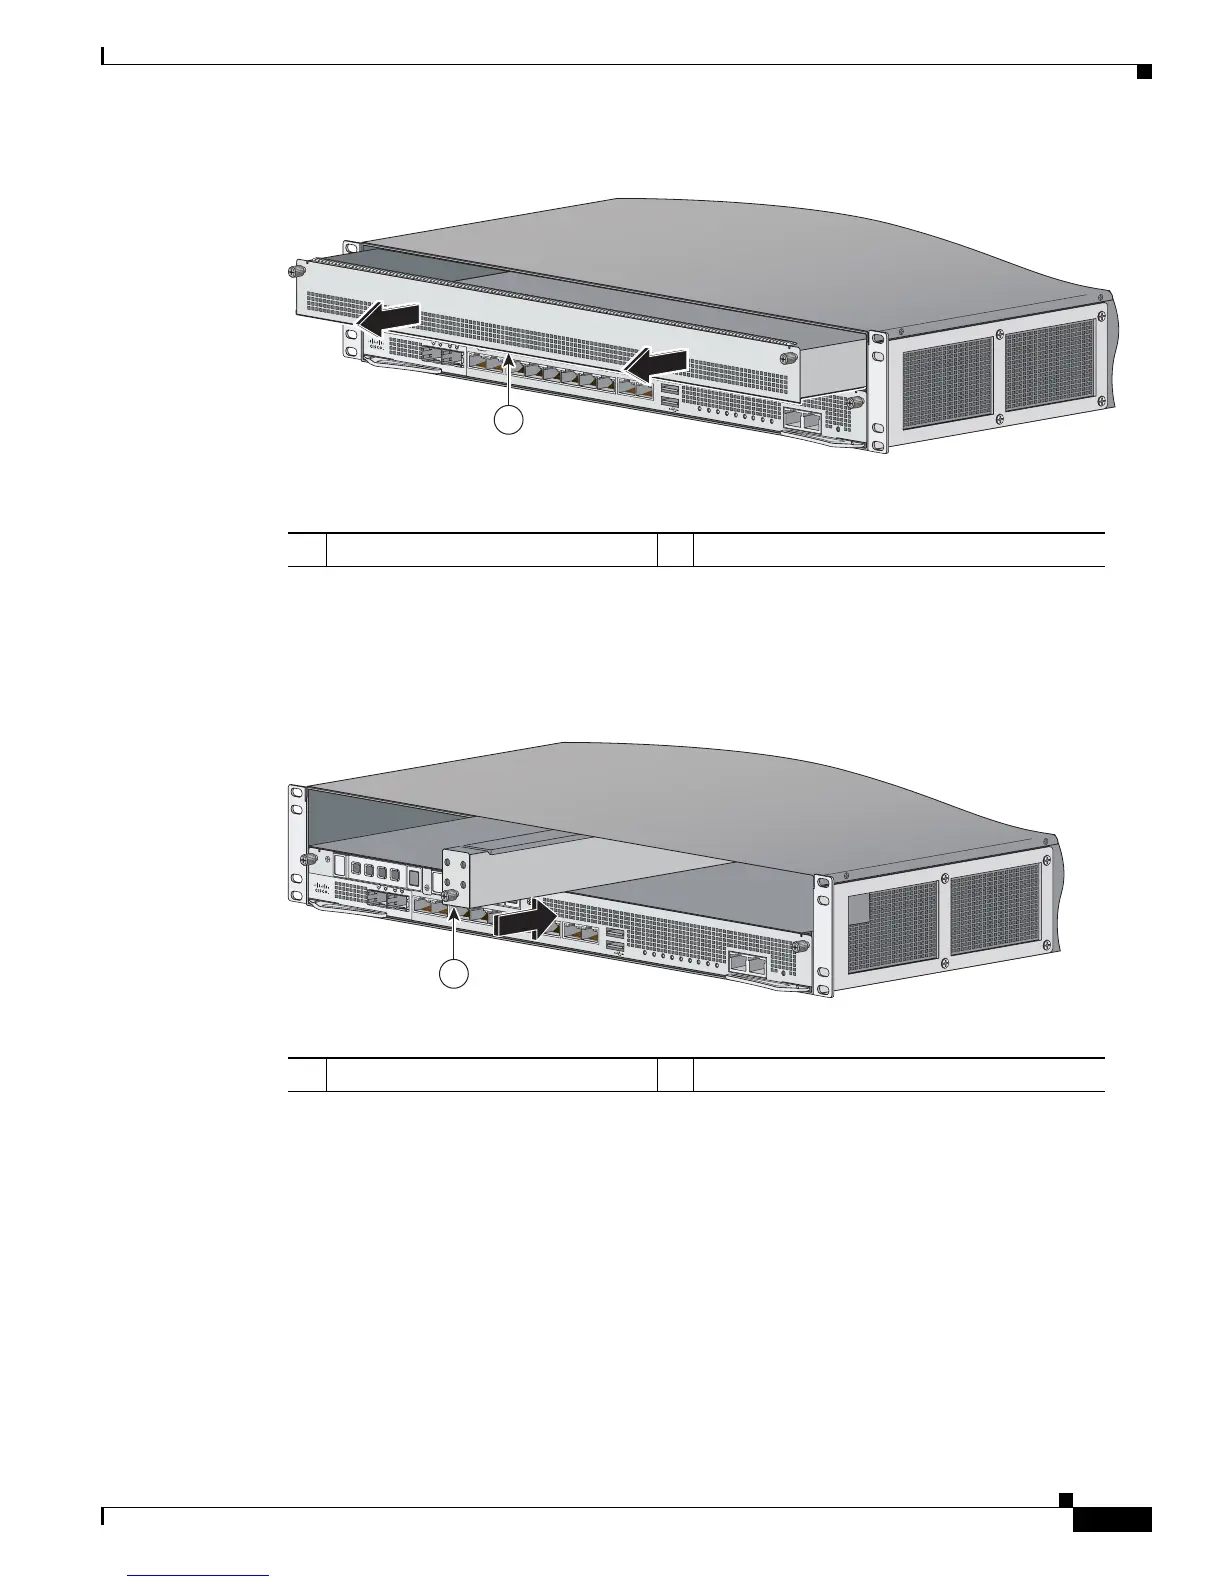
Figure 4-5 Removing the Empty Slot Tray
Step 4 Install the slot divider in the middle of slot 1 by lining up the groove on the top of the slot divider with
the inside track on the top of the security appliance and sliding it in until it is seated. Tighten the captive
screw with a Phillips head screwdriver (Figure 4-6).
Figure 4-6 Installing the Slot Divider
Step 5
Install a network I/O module by lining it up with either the left or the right bay of slot 1, making sure
the ejection levers are extended (Figure 4-7 and Figure 4-8 on page 4-10).
1 Empty slot tray
PWR
BOOT
ALARM
ACT
VPN
PS1
HDD1
PS0
HDD0
USB
RESET
0
SFP1
SFP0
1
01234567
MGMT
0
1
AUX CONSOLE
254861
1
1 Slot divider with captive screw
PWR
BOOT
ALARM
ACT
VPN
PS1
HDD1
PS0
HDD0
USB
RESET
0
SFP1
SFP0
1
01234567
MGMT
0
1
AUX CON SOLE
331652
1

 Loading...


