DETAILED STEPS
Step 1
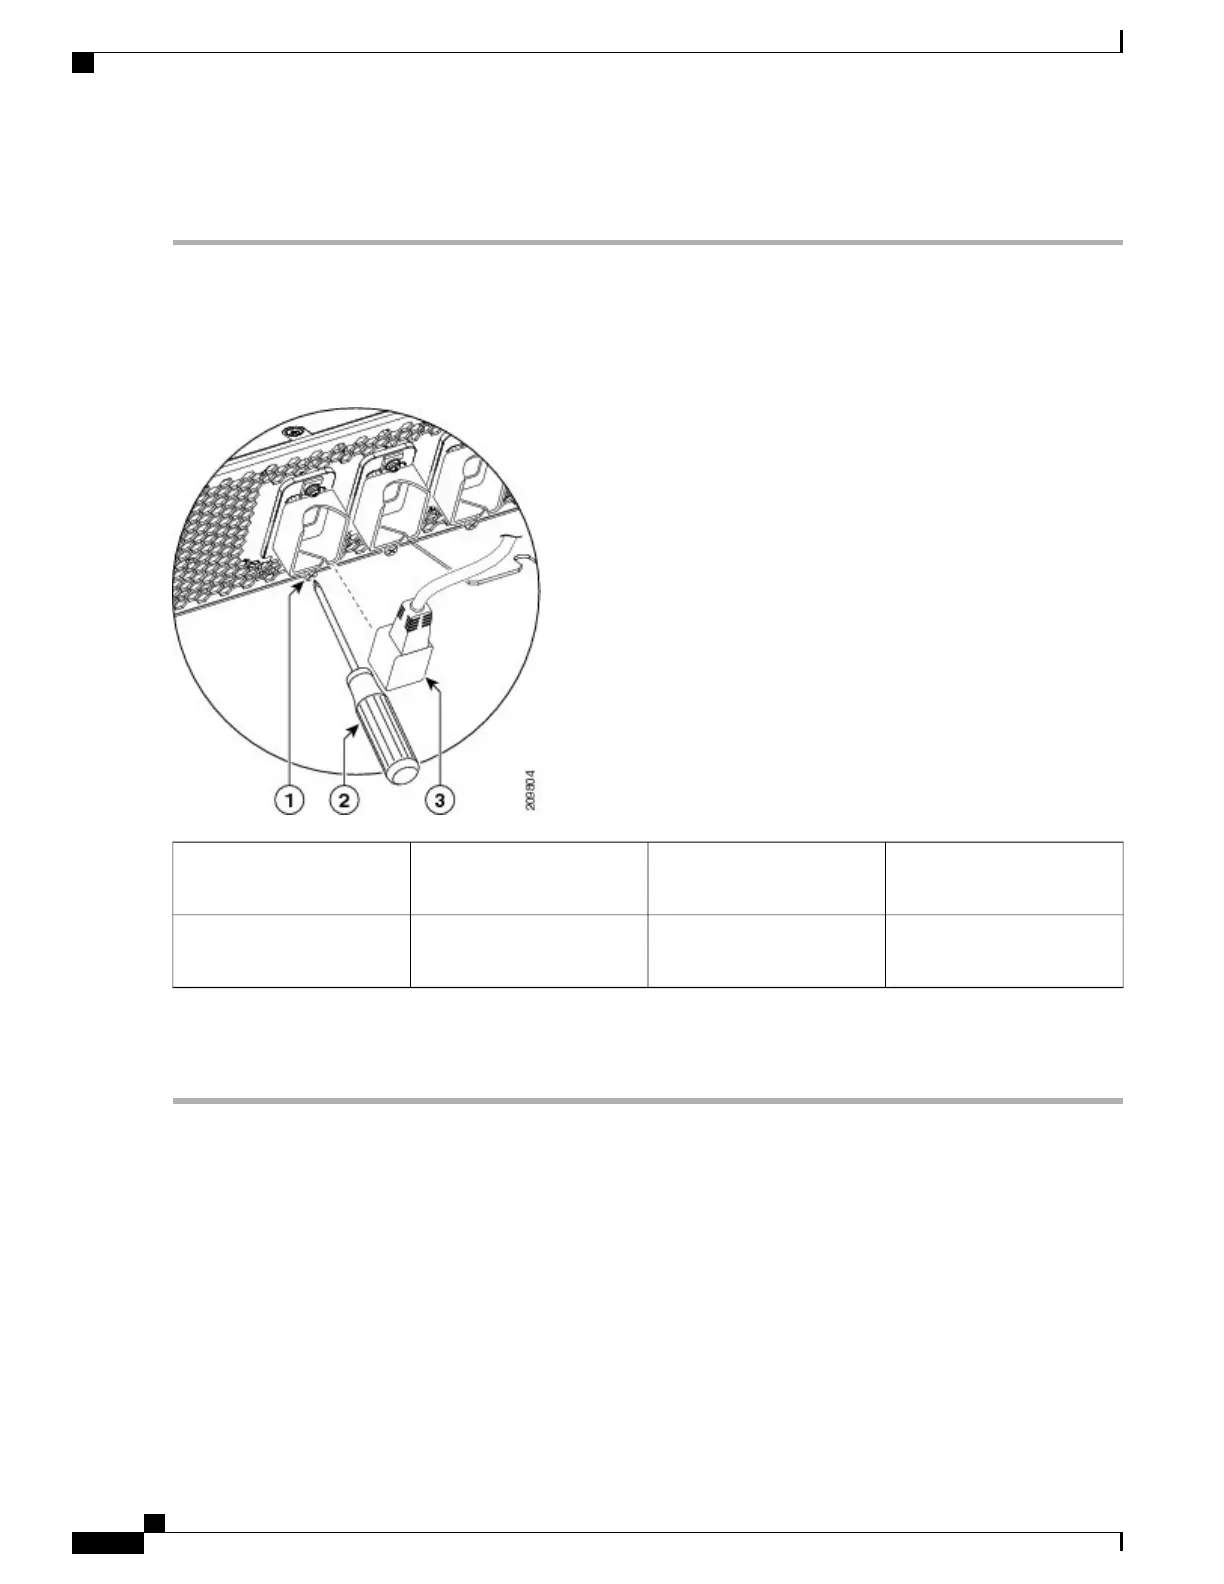
Insert the cord plug into the cord clamp (see Figure 24: Cord Being Inserted into Cord Clamp, on page 36) following
the labeling on the phase assignments from the PDU or the labeling on the single phase power cords. As viewed from
the front, the PDU on the right side is power shelf B and the PDU on the left side is power shelf A.
Figure 24: Cord Being Inserted into Cord Clamp
Cord plug to be inserted into
clamp
3Screw that secures the cord
clamp
1
Screwdriver tightening
screw
2
Step 2
Use the screwdriver to secure the screw that clamps the cord plug in place, see Figure 24: Cord Being Inserted into Cord
Clamp, on page 36.
What To Do Next
After you install the AC input cords, re-install the rear exhaust air deflector. Continue to the Installing the
Exhaust Air Deflector, on page 37 for instructions.
Cisco CRS Routers 16-Slot Line Card Chassis Enhanced Router Installation Guide
36
Installing Power Components
Installing AC or DC Power Shelf Wiring
 Loading...


