© Satellite Solutions Worldwide Ltd 2013
Initial Setup
Once the E1200 is taken from the packaging please follow these steps before connection to the internet is
attempted:
1. Connect power cable to wall socket and power connector. (Do not power the E1200)
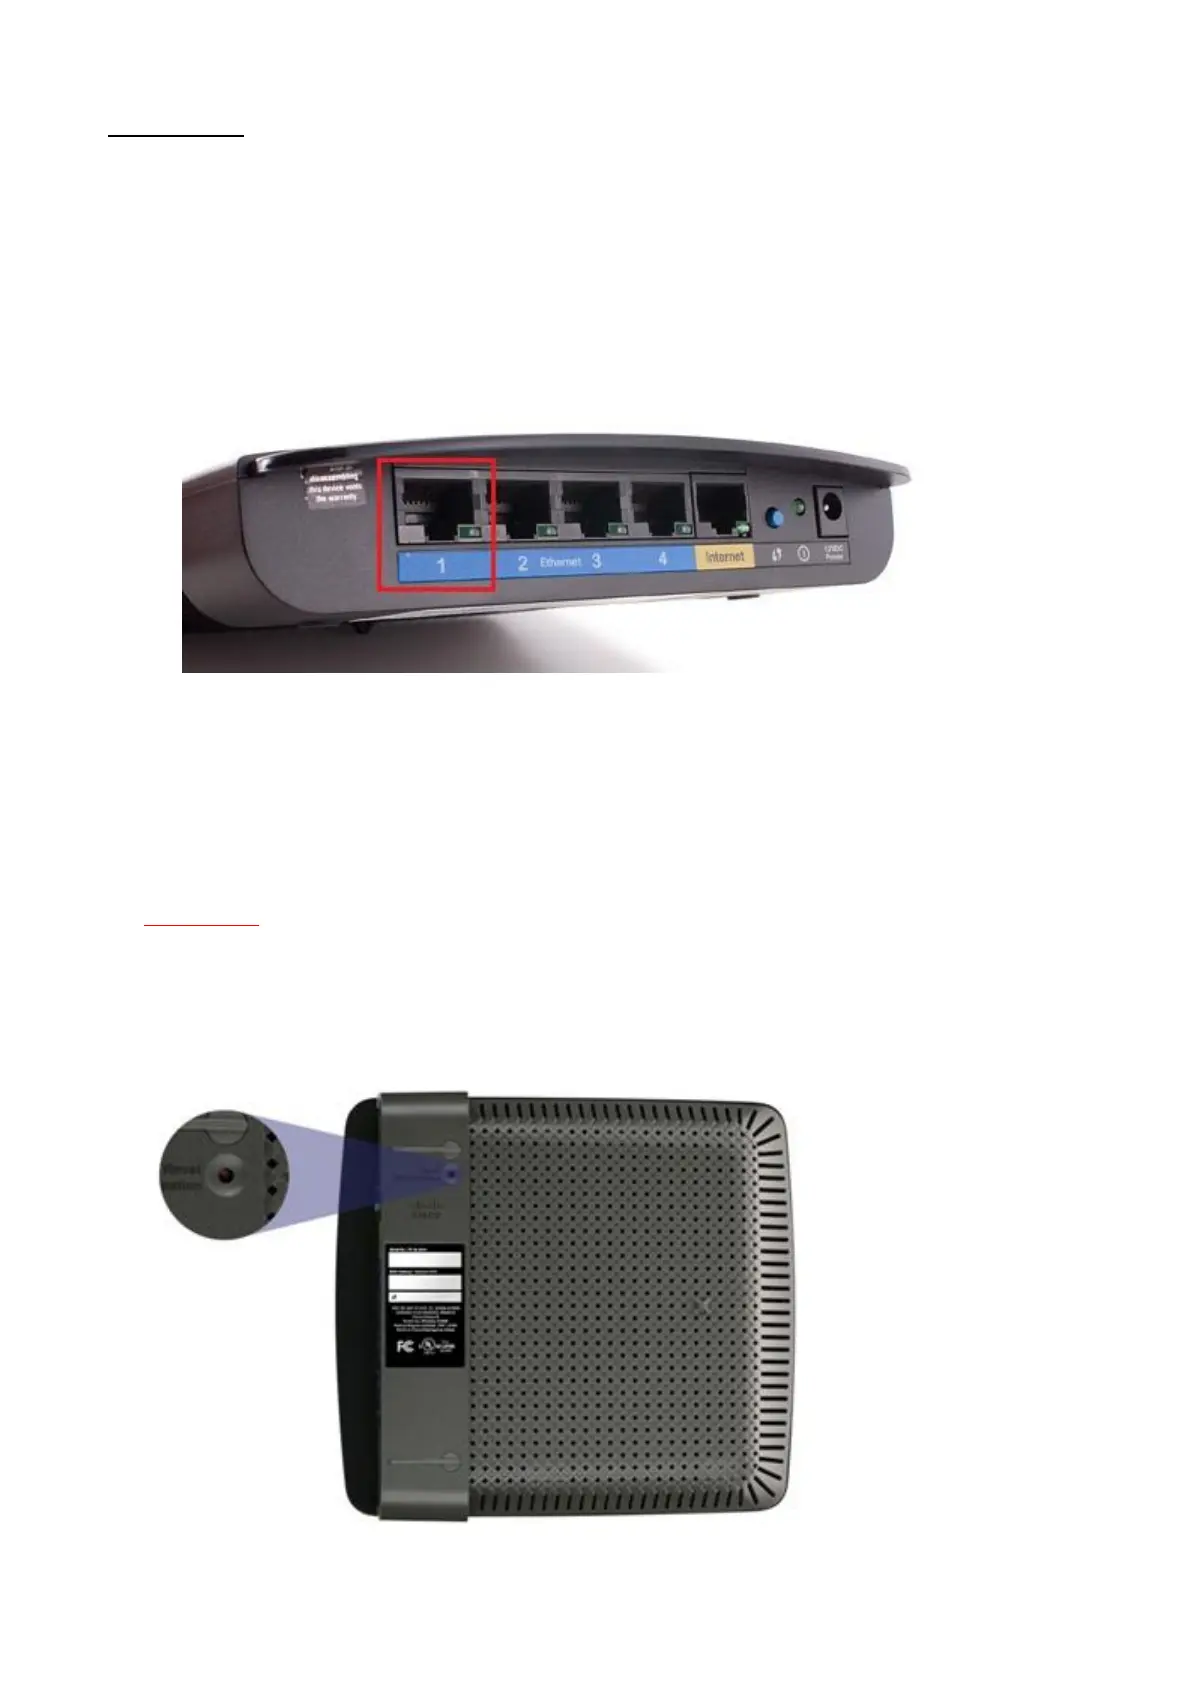
2. Connect provided Ethernet cable to port 1 on the E1200 and to Ethernet port on the computer.
Do not connect the Tooway modem to the Internet port on the E1200.
3. Power the E1200 and wait for approx 2min for the E1200 to start up.
4. Make sure you computer is set up for DHCP to receive an IP address from the E1200. (If you are not
sure if the computer is setup for DHCP, please refer to manual “Checking if your computer is setup
for DHCP”)
Please note: If it was previously attempted to install the E1200 with the provided installation disc, turn
the E1200 upside down while powered and hold the reset button in for 10 – 15 seconds then release the
button. Notice the lights on the E1200 slowly flashing; they will indicate the E1200 restarting. If this
manual setup is attempted please uninstall the “Cisco Connect” software provided on the installation
disc before continuing.