.s3"
ro<
{rop.
Ö..
O..
---
:°,
z
-V.
paj
r.,
fil.
.-+
F""
,s+
4^c.
,-.
r..
ALL
a-0
2 OPERATION N° MÅ.
4530
:
/ c iv wI
Iul;u
// (iu/i
i/
(mI)l
II.
BLEEDING THE
BRAK
ES
ON
ESTATE VEHICLES
(
-
1
LL
_
Rpons time
of
the
bake pre
ir
Iitiitet
depends
on tbc bcedtng of the front bake
-
Too mk
or
in cir-chomber
i
1
lows
clownth&
cut-out
of uppIy to the
er-Or
brakes
air in
air-chnibei-
(1
coues cut-t of
supply
to
recfl
bräkes-to
occut
too udderdy,
-
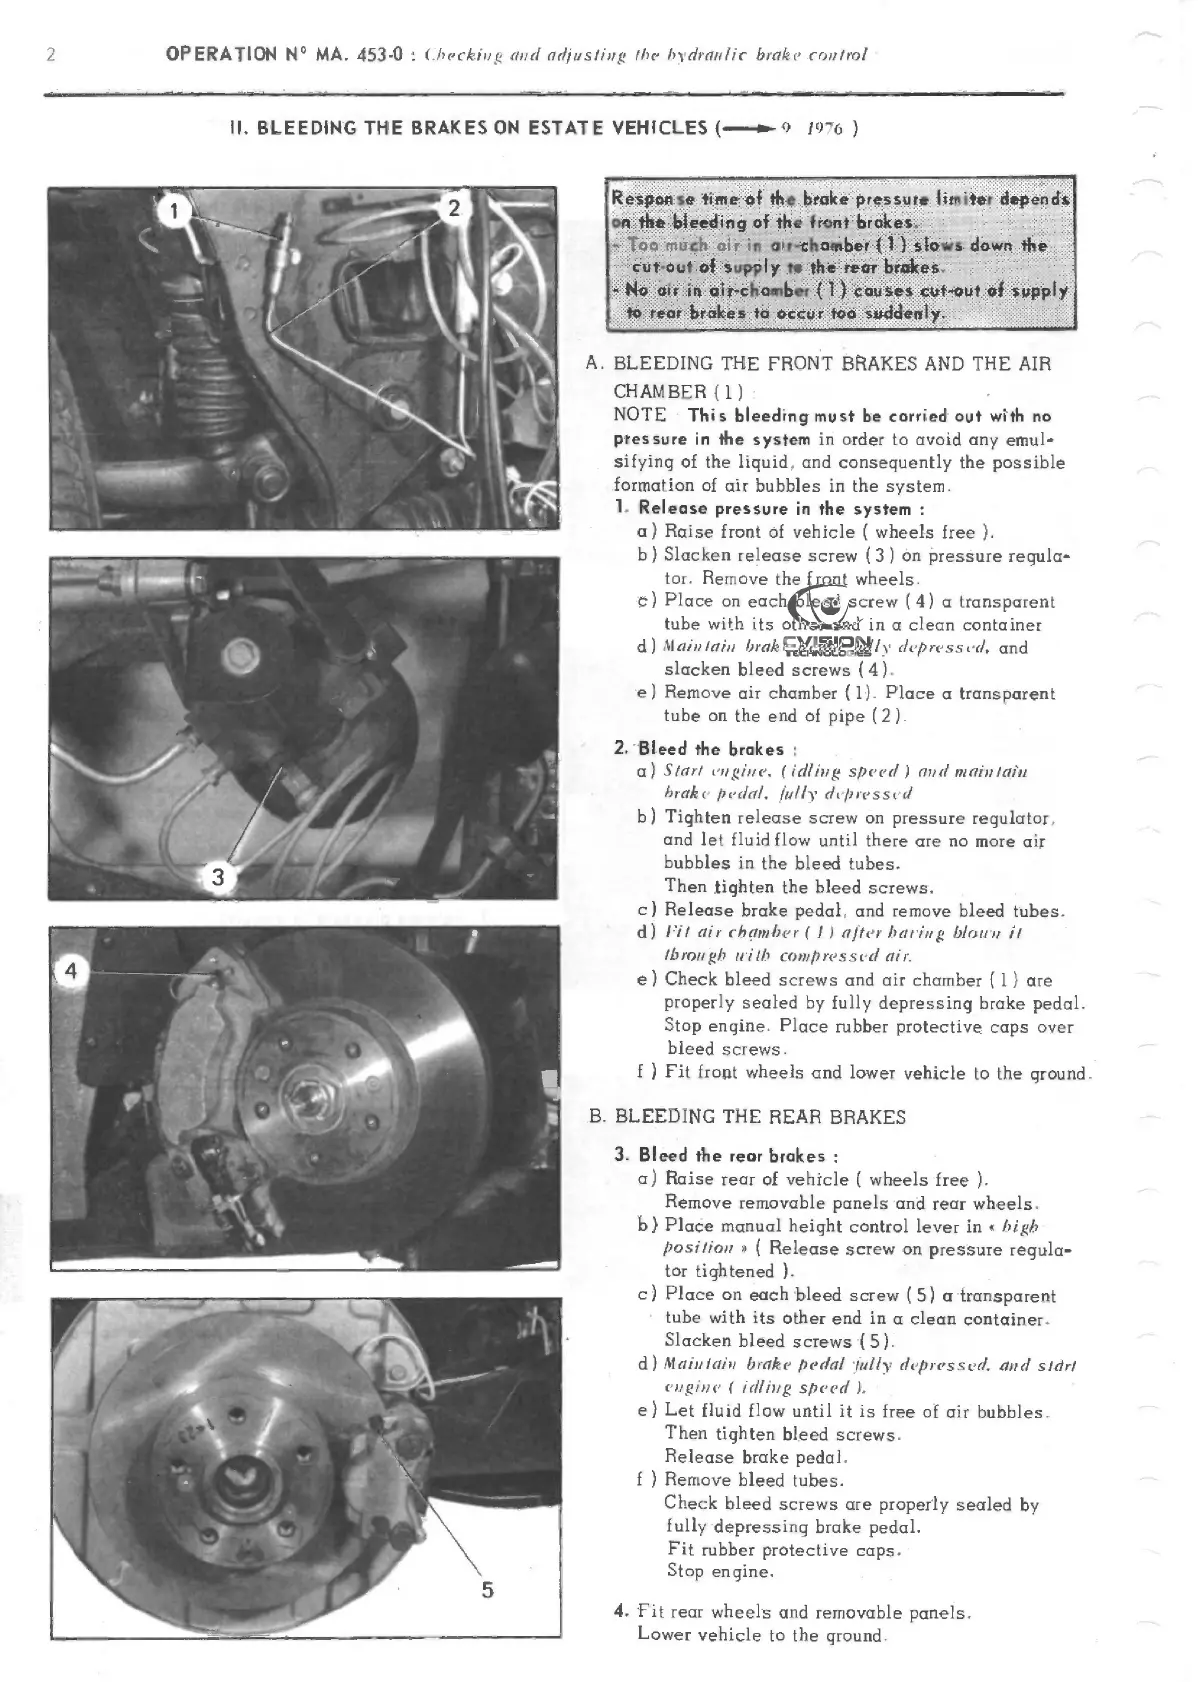
A.
BLEEDING
THE
FRONT
BRAKES AND THE AIR
CHAMBER(1)
NOTE
This
bleeding
must
be corried out with no
pressure in the
system in order to avotd any
emul-
sifying of
the liquid. ond consequently
the
possible
formation of
air bubbles in the system.
1.
Release
pressure
in
the system
a) Rise
front of vehicie
(
wheels free
b)
Slacken release
screw (3)
on
pressure regula-
tor.
Rernove the front
wheels.
c)
Place on
each bleed screw (4) a transpurent
tube with its other
end in a dean container
d
)
%law/,iI/
hrak ftr/af fl/liv
(//press(
d. and
slacken
bleed screws (4).
e)
Remove
air chamber (1). Place a transparent
tube on
the end
of
pipe (2).
2.
Bleed
the
brakes
a
)
Idel
'e /,i e. (id/le
r
s/
e
ed 1 dn
(1
ni din/din
hrdk(
ped/. ln/iv (/1
prc-SSt
d
b)
Tighten
release screw on
pressure regulator.
and
let fluid flow
until there
are
no
more air
bubbles in
the bleed tubes.
Then tiqhten
the bleed screws.
c)
Release
brake pedal, and
remove bleed tubes.
d
)
Iii
air
ehci,nher
(1) a t(er bce/u b/rju ii
fl
Il'
can
c/i
o / Iii / r;n,
res s
d
al r.
e) Check bleed
screws and air chamher
(
1)
are
properly
sealed by
fully depressing broke
pedal.
Stop
engine.
Place rubber protective
caps
over
bleed
screws.
f
Fit
front
wheels and lower
vehicle to the ground.
B.
BLEEDING THE REAR
BIRAKES
5
3.
Bleed the
rear
brakes
a) Raise
reur of vehicie
(
wheels free
).
Remove removable
panels and
rear wheels.
b)
Place manual
height
control
lever
in
blh
ii
(
Release screw on
pressure regula-
tor
tightened
).
c)
Place on
each bleed
screw (5) a transparent
tube with its
other
end
in
a dean container.
Slackeri
bleed
screws (5).
d
)
%
din /a/ii
fiiak
e er/al
in/iv
r/epres s -d. al/
d 5/dn
ir/iin'
spred ).
e) Let
fluid flow until it is
free of
air bubbles.
Then tiqhten
bl.eed screws.
Release
brake pedal.
f
)
Remove bleed tubes.
Check
bleed screws are properly
sealed by
fully
depressing brake
pedal.
Fit
rubber protective
caps.
Stop
engine.
4. Fit
rear
wheels and removable
panels.
Lower
vehicle
to
the ground.
-
___J
'
/
PDF compression, OCR, web-optimization with CVISION's PdfCompressor