8
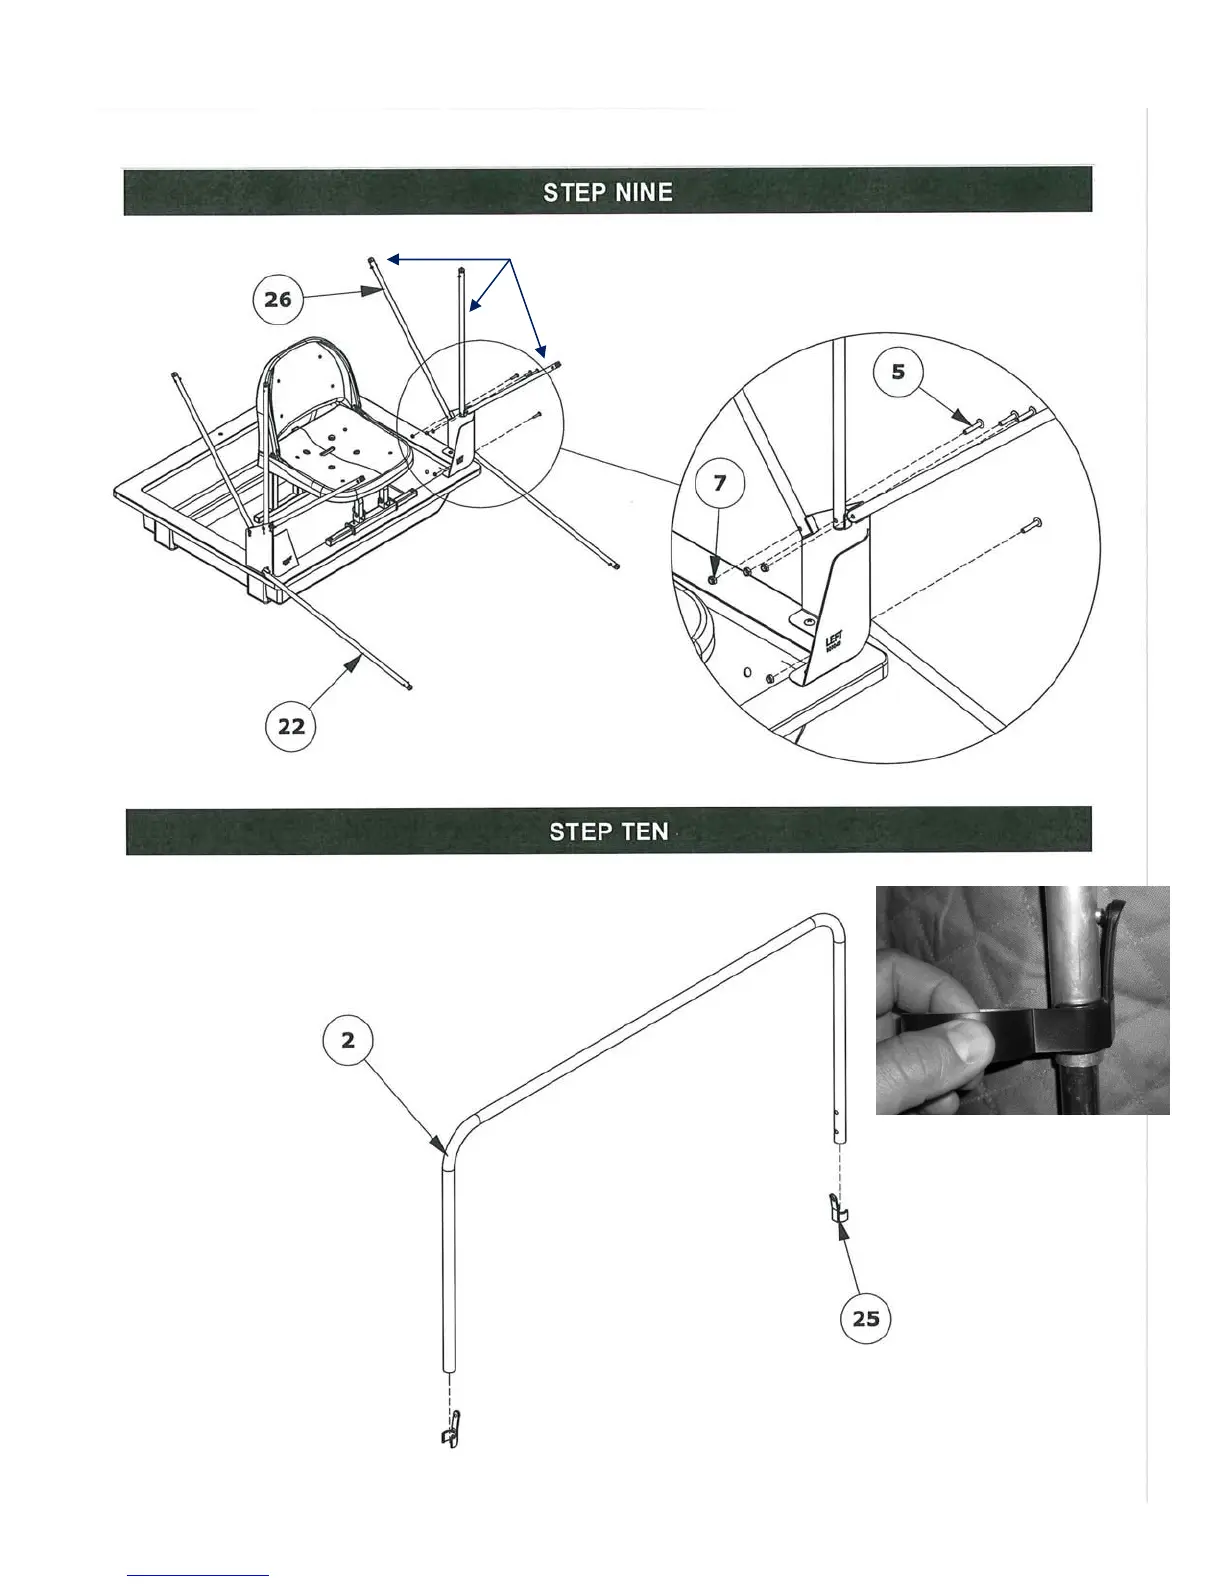
Install the EZ Glide side support poles
(item 26), three on each side, to the
mount brackets. The push buttons should
face inwards.
Install the porch EZ Glide support
poles (item 22), to the mount
brackets.
Advised: Secure all RPS
clips to the poles using
electrical tape.
Install RPS (Rapid Pole Slide) clips (item 25)
to the hoop poles (item 2) by snapping them
in the correct position as shown.