EN
ENGLISH
-10- FORM NO. 71376A - Clarke
®
American Sanders Operator's Manual (EN) - CE 7 Pro, SE7 Pro, CE7 Pro+, SE7 Pro+
Machine Set-up
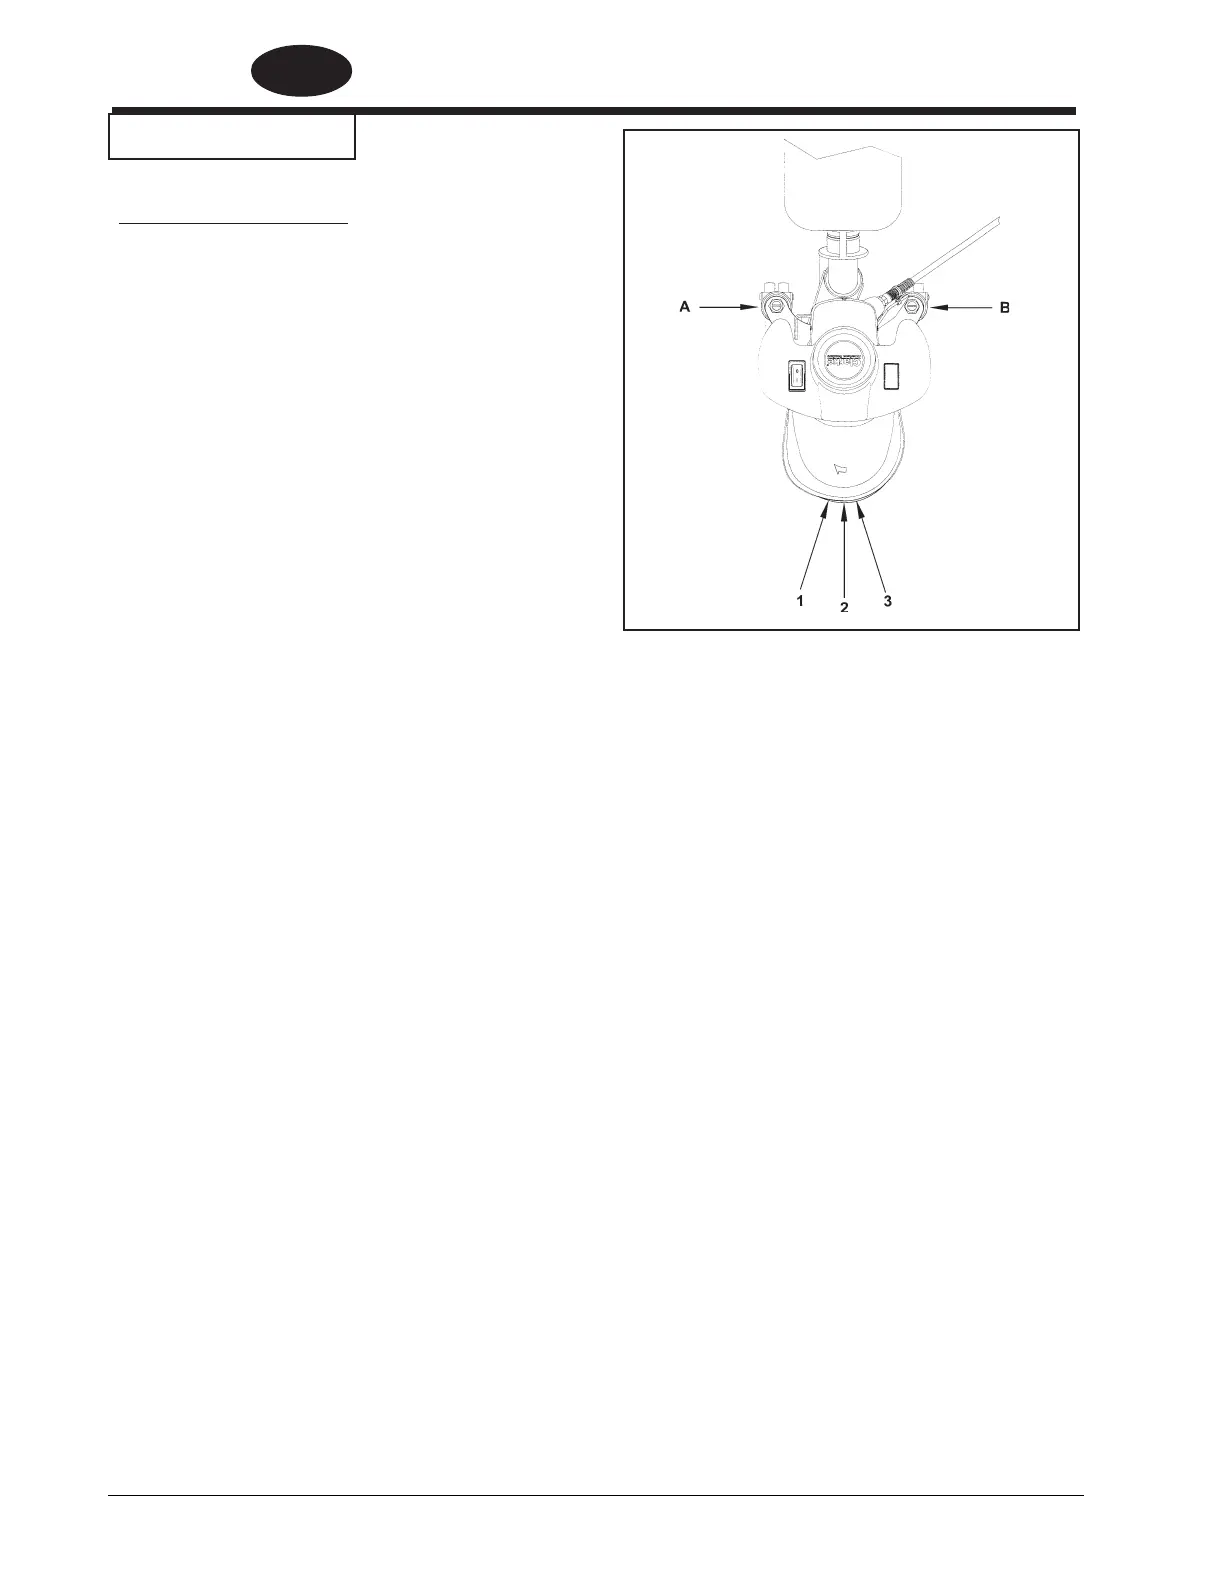
Fig. 6.1 Sanding Pattern
The unit is factory set to sanding pattern 2.
1. To alter the sanding pattern to 1:
a.) Loosen the locknuts on A & B.
b.) Turn stem A counter clockwise and stem B
clockwise in 1/4 turn increments until the
desired pattern is achieved.
c.) Tighten locknuts on A & B.
2. To alter the sanding patteren to 3:
a.) Loosen the locknuts on A & B.
b.) Turn stem A clockwise and stem B counter
clockwise until the desired pattern is
achieved.
c.) Tighten locknuts on A & B.
3. To move the pattern to the outer edge of the
sanding disc:
a.) Loosen locknuts on A & B.
b.) Turn stem A & B clockwise in 1/4 turn
increments until the desired pattern is
achieved.
c.) Tighten locknuts on A & B.
4. To move the pattern away from the edge on
the sanding disc:
a.) Loosen locknuts A & B.
b.) Turn stems A & B counter clockwise until the
desired pattern is achieved.
c.) Tighten locknuts on A & B.
5. To restore the pattern to factory setting, see
illustration in parts list 1 on page 34.
Figure 6.1