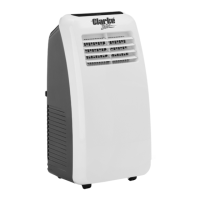
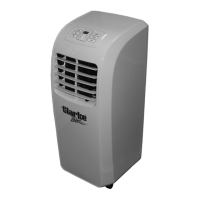
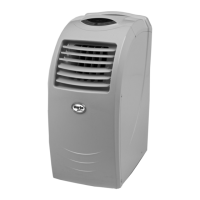
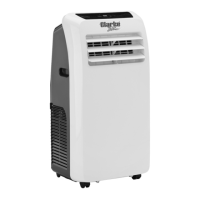
This document describes the Clarke Portable Air Conditioner, Model No: AC10050 (Part No: 3230575), an appliance designed for indoor use to provide cooling, fan operation, and dehumidification. It is accompanied by an operation and maintenance instruction manual.
Function Description
The Clarke Portable Air Conditioner is a versatile unit capable of operating in three distinct modes:
- Cooling Mode (COOL): This mode provides active cooling for the room. Users can adjust the desired temperature between 16°C and 30°C and select fan speeds (High, Mid, Low). The air outlet flap can be set to swing up and down to circulate air more freely.
- Fan Mode (FAN): In this mode, the unit functions solely as a fan, circulating air without active cooling. Fan speed can be set to High, Mid, or Low, but temperature adjustment is not available.
- Dehumidifying Mode (DRY): This mode is designed to remove excess moisture from the air. For continuous dehumidification, a drainage hose must be connected to the unit's drain port and directed into a bucket or a plumbing system. The fan operates at a low speed in this mode and cannot be adjusted, nor can the temperature setting. The unit has a self-evaporative function, which reduces the need to empty the water tank, as most water is reused to cool condenser coils and any excess is evaporated. Continuous drainage should not be used if the self-evaporating facility is intended.
The unit features a control panel and a remote control for convenient operation. The remote control requires 2 x AAA batteries. A timer function allows users to set the ON time (in standby mode) or OFF time (when the unit is on) for 1-24 hours. The display window shows the current settings and can switch between °C and °F.
Safety features include automatic shutdown and an "FL" display when the internal water tank is full, requiring manual drainage. The unit also has anti-freezing protection, which allows it to recover automatically when the temperature exceeds 8°C. Fault codes (E1, E2, E4, FL) are displayed on the control panel to indicate specific issues.
Important Technical Specifications
- Model Number: AC10050
- Power Supply: 230V/50Hz
- Weight: 25 kg
- Dimensions (L x W x H): 340 x 443 x 815 mm
- Water Sump Capacity: 0.55 L
- Air Flow Volume: 360 m³/h
- Operating Temperature Range: 15 - 35°C (recommended for unit protection)
- Exhaust Duct Diameter: 150 mm
- Exhaust Duct Length (expanded): 1500 mm (variable between 480 mm and 1500 mm)
- Permissible Excessive Operating Pressure (suction/discharge): 1.0 MPa/3.5 MPa
- Max Pressure (Low/High Pressure Side): 1.5 MPa/5.5 MPa
- Sound Pressure Level (LpA): 56 dB
- Sound Power Level (LwA): 62 dB
- Energy Efficiency: EU Class A
- Cooling Capacity: 2.6 kW
- Electrical Insulation Class: 1
- Energy Efficiency Rate (EER): 2.6
- Refrigerant Type: R290
- Refrigerant Volume: 235 g
- Global Warming Potential (GWP): 3
- CO2 Equivalent: 0.000705 kg
The unit uses R290 refrigerant gas, which complies with European environmental directives and has a low GWP. It is crucial to note that the unit must not be used or stored in an unventilated space smaller than 18m² per unit to prevent fire or explosion hazards should refrigerant gas leak and come into contact with ignition sources.
Usage Features
- Installation: The air conditioner should be positioned on a level, dry surface at least 50 cm away from surrounding objects. It must be connected to a 230 V / 50 Hz earthed outlet. The flexible exhaust duct, which is variable in length, screws onto the air outlet port and the other end is inserted into a window sealing plate. The duct should avoid tight curves and kinks for optimal performance.
- Control: The unit can be controlled via the integrated control panel or the supplied remote control. The remote control allows for power ON/OFF, swing function activation, fan speed selection, temperature/time adjustment, mode selection, and timer settings.
- Energy Saving Tips: To maximize performance, the unit should be placed at least 50 cm from walls or other objects. Keeping filters clean is essential, with cleaning recommended every two weeks or more frequently depending on air quality. For initial start-up, setting the fan speed to maximum and the thermostat 4-5 degrees lower than the current temperature is advised, then adjusting to low fan speed and desired temperature. Drawing curtains during sunny periods can also improve efficiency.
- Safety Precautions: The unit must always be stored and transported upright to prevent compressor damage. A minimum of 3 minutes should pass before restarting the unit after turning it off to protect the compressor. The ON/OFF button on the control panel should always be used, not the mains plug or an external timer. The unit should not be installed in laundry or wet rooms and must be placed in a room without ignition sources. Condensation may form on the base, so sensitive or absorbent floors should be avoided. Children aged 8 and above, and persons with reduced capabilities, can use the appliance with supervision and instruction. Cleaning and user maintenance should not be performed by children without supervision.
Maintenance Features
- Cleaning: Before any cleaning or maintenance, the unit must be shut off and unplugged from the mains. The exterior surfaces can be cleaned with a duster or a soft, moist cloth, avoiding solvents that could damage plastic components.
- Air Filters: The air filters should be cleaned every two weeks to maintain performance. This involves removing the rear grille, sliding out the three air filters (one attached to the grille), washing them gently in warm water with a mild detergent, rinsing, and drying them gently out of direct sunlight. Filters must be completely dry before re-installation.
- Draining Water:
- Manual Drainage: When the internal water tank is full ("FL" displayed), the unit will stop operating. It must be turned off, unplugged, and a tray placed under the drain port. The drain cap/plug is then removed to allow water to drain, after which it is replaced, and the unit can be switched back on.
- Continuous Drainage: For continuous operation without manual draining, the drain cap/plug can be removed, and a suitably sized water pipe connected to the drain port. This pipe can be plumbed into a system, led outside, or connected to a water pump. However, continuous drainage should not be used if the self-evaporating function is desired.
- End of Season Cleaning: For long-term storage, the internal water tank should be drained, and the unit run in fan mode for 2 hours to dry the interior. After switching off and disconnecting the power cable, the cable should be coiled around the storage hooks. The filters must be cleaned, the exhaust ducting dismantled and stored safely, and batteries removed from the remote control. Finally, the air conditioner should be covered with a plastic bag and stored in a dry place.
- Troubleshooting: The manual provides a troubleshooting guide for common issues such as the unit failing to operate, inefficient cooling, noise/vibration, compressor failure, and remote control malfunction, along with suggested solutions.
- Repairs: Any repairs or maintenance beyond regular cleaning or filter replacement must be carried out by a suitably qualified engineer. Failure to comply could void the warranty. The refrigerant system must not be perforated or punctured.