4
Parts & Service: 020 8988 7400 / E-mail: Parts@clarkeinternational.com or Service@clarkeinternational.com
ASSEMBLY & PREPARATION
Check to ensure that no damage has occurred during transit. Any damage
should be reported to your Clarke dealer immediately.
Using a clean, level area, unpack the equipment, laying out the loose items.
The motorcycle lift is packed flat in its lowest position. It is fully assembled,
except for ancillary items which are fitted as follows.
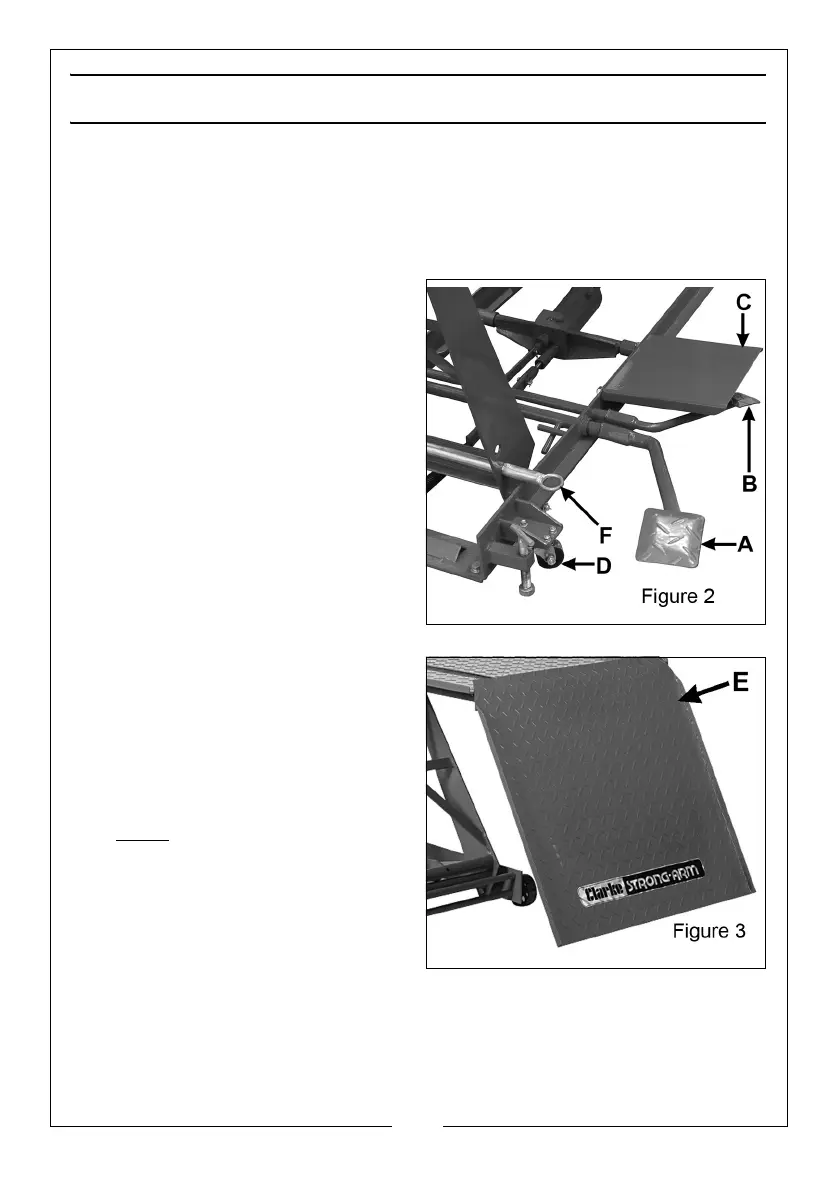
1. Attach the largest foot lever, (A),
to its square spigot on the base of
the unit, with the foot pedal
facing upwards and set at
approximately 10 o‘clock -
looking side on.
2. Attach the lowering pedal (B) in
the manner shown in Fig.2.
3. Attach the safety plate (C), using
the nuts, bolts and washers
provided. This plate is essential to
prevent accidental contact with
the lowering pedal which could
result in unexpected lowering of
the table.
4. Attach the two castors (D),
securing with the nuts bolts and
washers provided.
5. Attach the ramp (E) by dropping
the lugs into the holes in the table
and securing with the ‘R’ clips
provided.
6. CML3
- Pump the foot pedal very
gently to begin with, to ensure
that all parts are free. Continue to
pump the pedal and observe the
table rising. If any resistance is felt,
investigate to ensure that no part
is jammed by a loose or stray
ancillary component.


 To Next Page