17
--------------------------------------------------------------------------
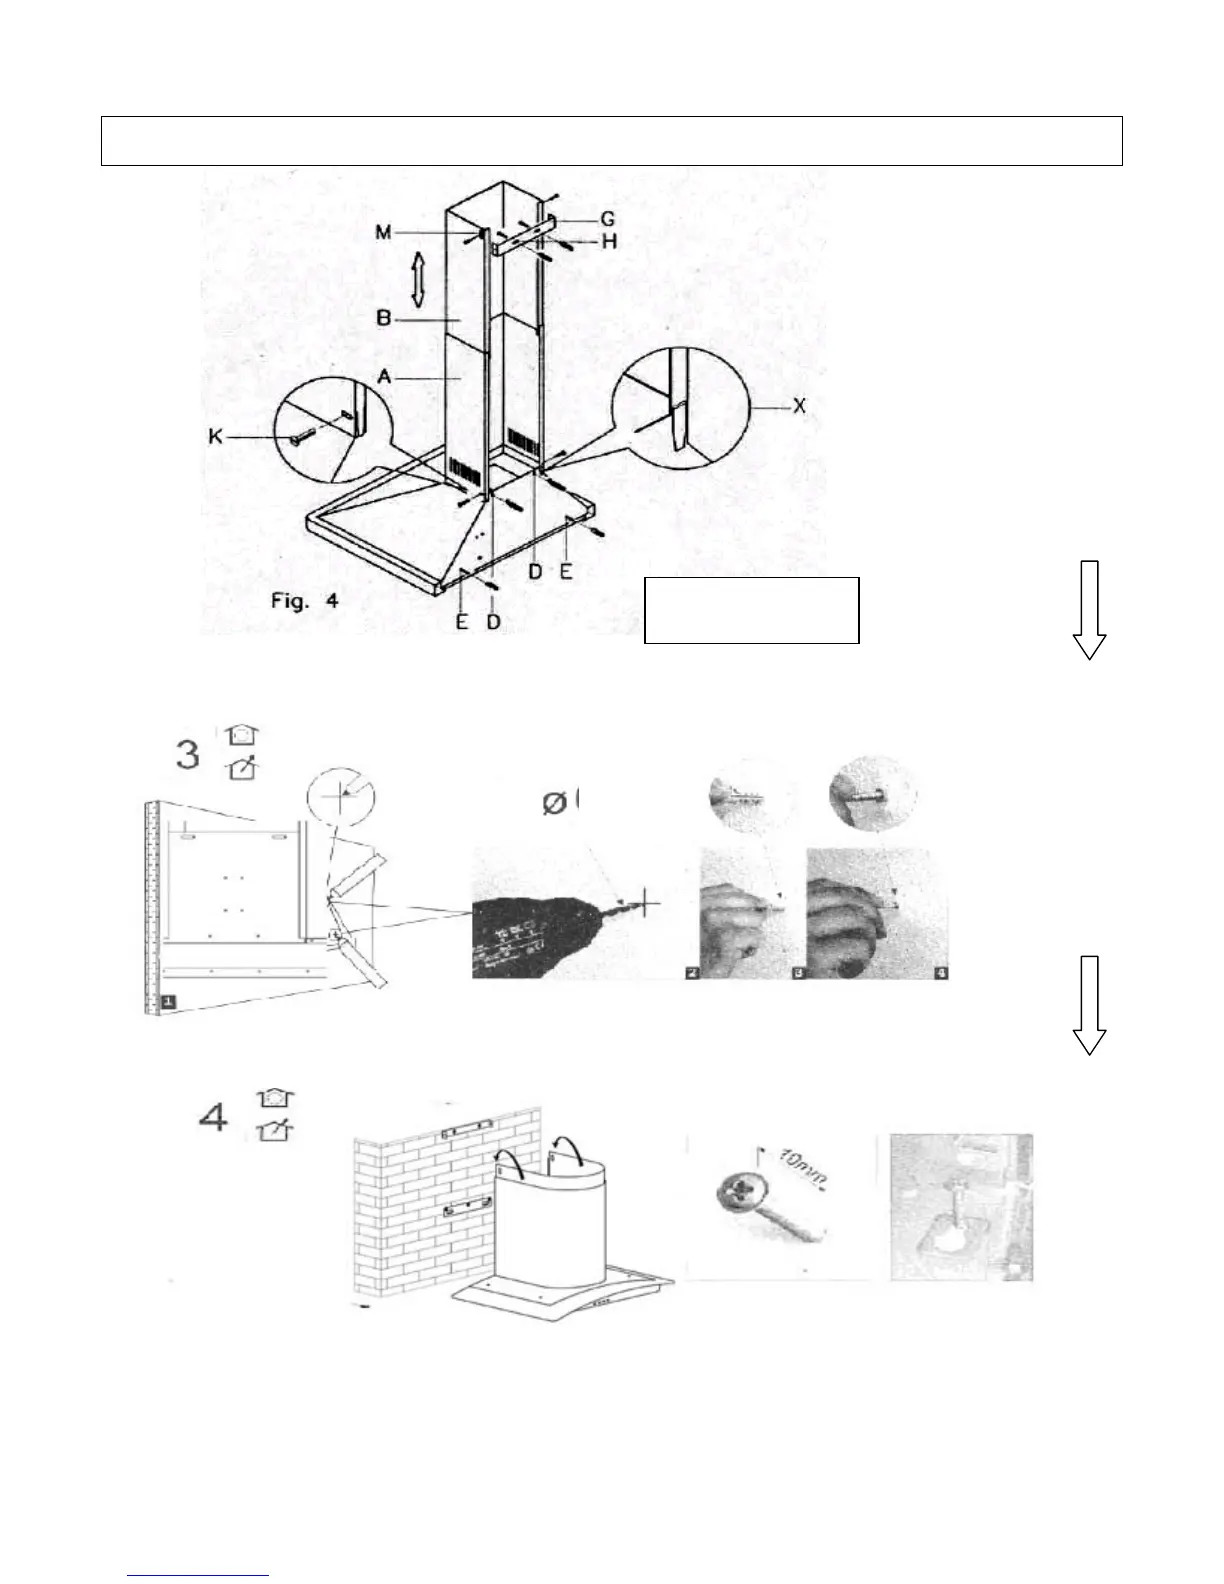
1) Using a drill bit with a 8 mm diameter, make holes in the wall where you have
marked these positions (see below).
--------------------------------------------------------------------------------------------------------------------------------------------------------------------------------------------------------------------------------------------------
2) Insert the expansion fixings (raw plugs) in the holes and then screw the
support screws halfway in (see below figure, at right).
3) Hook the hood onto the screws (see above figure) and fasten it onto the
wall, tightening the sup
port and anch
oring screws the rest of the way in (next
page, at top.)
Rear view of your
cooker hood.
INSTALLATION INSTRUCTIONS – Attachin