EN 16
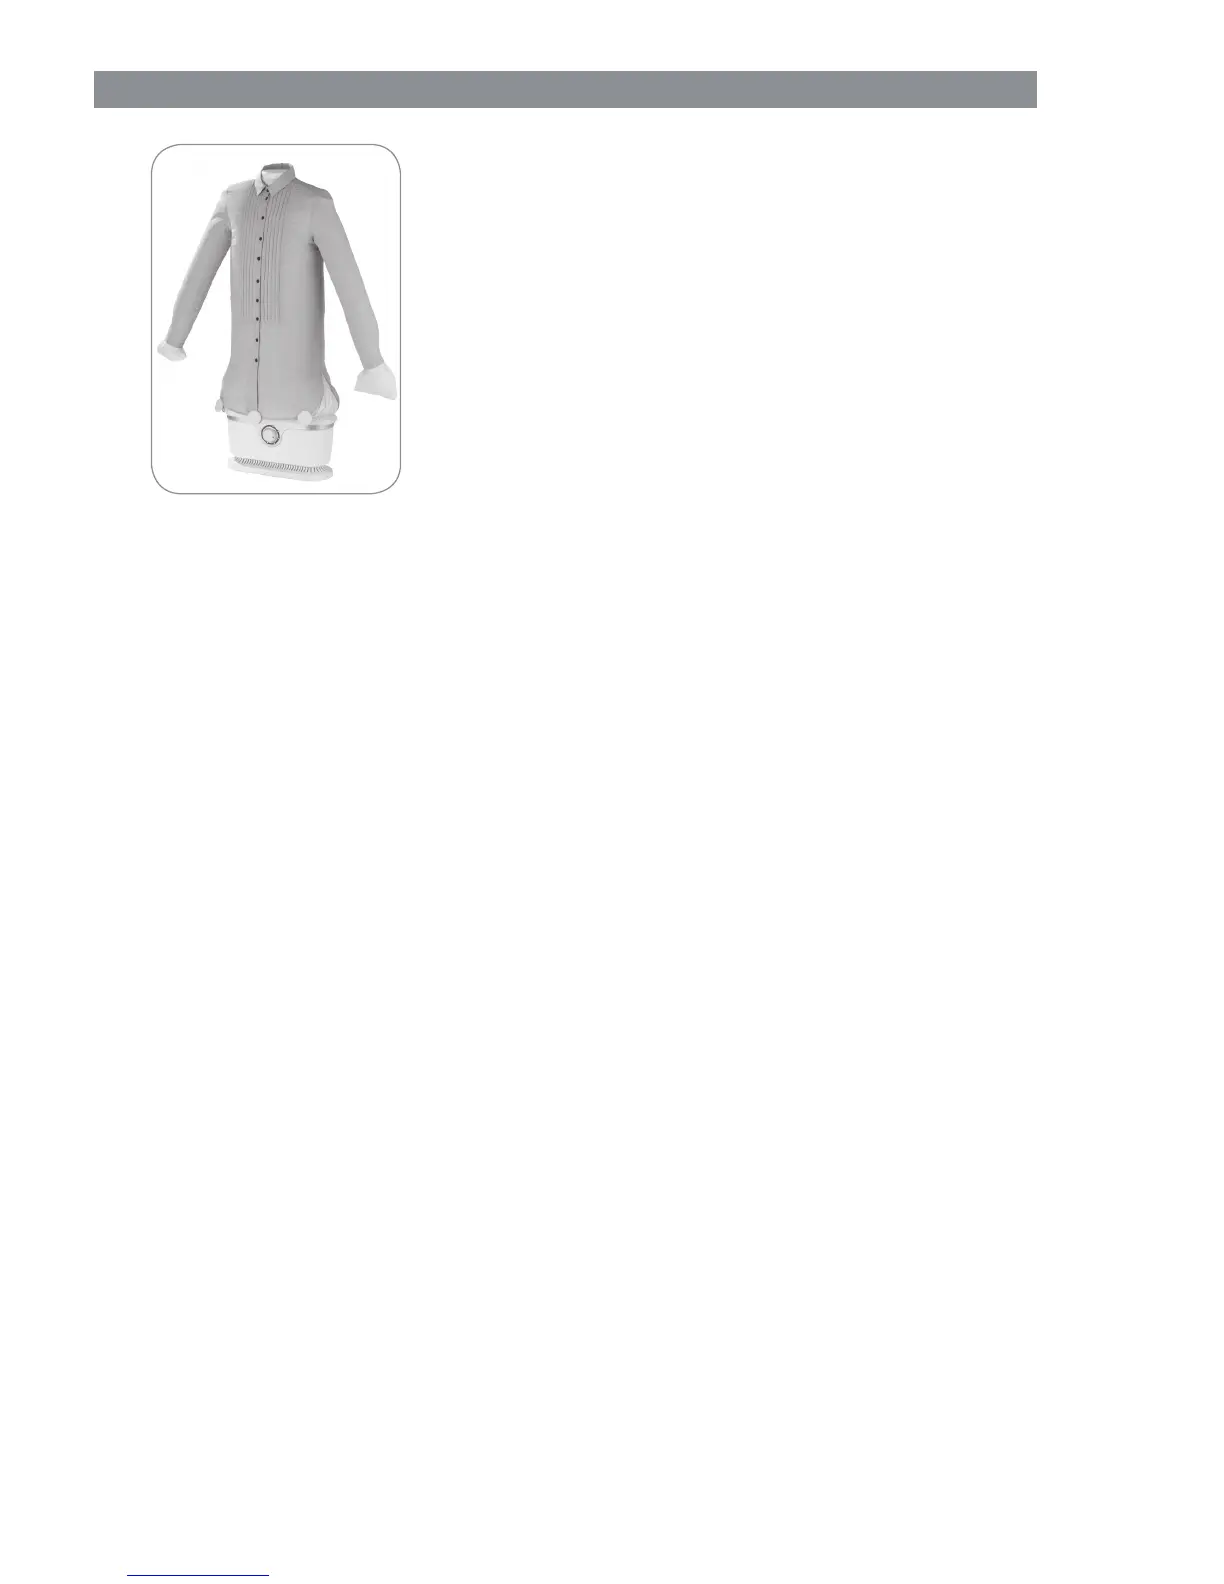
3. Pull the garment which is to be pressed over the nylon
balloon and the hanger (1) and do up the buttons if neces-
sary. Make sure that
– the collar is fi tted over the collar section (9) on the
hanger (1),
– any button strip is over the hole line on the nylon balloon,
– the arms of the nylon balloon fi t properly in the sleeves
of the garment and are not twisted or scrunched up,
– all buttons on the garment (including on the sleeves) are
done up.
4. Spread the clamps along the bottom of the garment (at
the front and back in each case on the outsides and in the
middle on the button strip at the front) so that it is weighed
down and will not go out of shape when the nylon balloon
is infl ated.
5. Insert the mains plug into an easily accessible socket.
6. Turn the timer (6) clockwise and set it to the length of time you want. Each LED light
represents 5 minutes.
7. Once the nylon balloon has infl ated, straighten out the garment and smooth it down
again.
8. When the set time elapses, the device switches off automatically. The drying / press-
ing process can be interrupted at any time by turning the timer (6) to the starting
position.
9. Remove the garment from the nylon balloon and hanger (1).
10. Pull the mains plug out of the plug socket and allow the device to cool down completely.
Tips
• The device is intended primarily for machine-spun laundry! If hand-washed or non-
machine-spun laundry is to be pressed, fi rst allow it to dry out a little fi rst.
• The drying / pressing process takes around 10 minutes for a spun-dried shirt.
However, the length of time can vary depending on the material and thickness of the
material. We recommend that you start with a shorter time and extend it if necessary.
• The nylon balloon can be enlarged or reduced in size with the aid of the zip fasten-
ers. For smaller sizes, the zip fasteners should be closed. For larger sizes, the zip
fasteners should be opened on both sides.
• Wide-apart buttons may result in the button strip crimping slightly during pressing.
Here it is advisable to smooth down the button strip again by hand immediately after
the pressing process.
 Loading...