9
If the exact size of your photo is not listed,
simply use a size option that is slightly larger
than your photo.
d. PHOTO SCANNING METHOD #1:
Scan photos WITHOUT the photo tray/holder.
The base of the scanner doubles as a photo
tray/holder. To scan photos without the base,
simply remove the base of the scanner. (This
option is best for scanning photos that are
mounted or in photo albums. The scanner can
be placed directly on top of the photo.)
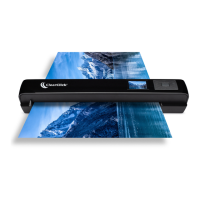
e. PHOTO SCANNING METHOD #2:
Scan photos WITH the photo tray/holder.
To scan photos with the photo tray, remove
the base of the scanner. Load a photo into the
tray (facing up) and replace the scanner onto
the base.
f. To SCAN AND SAVE your photo: first, simply
make sure your photo is aligned correctly on
the LCD screen. Then press the “OK”
button on the top of the scanner. Your photo
will be saved onto the SD memory card. (The