Do you have a question about the Clek Car Seat and is the answer not in the manual?
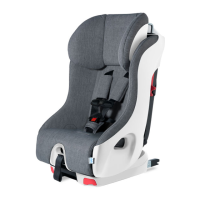
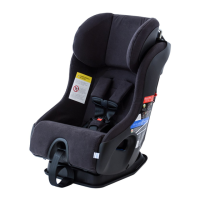
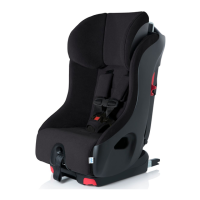
This car seat is designed for use either Rear-Facing or Forward-Facing.
Read and understand product labels and all instructions before installing or using this car seat.
Ensures correct rear-facing installation and use criteria are met.
Ensures correct forward-facing installation and use criteria are met.
Labels and identifies components on the front of the car seat.
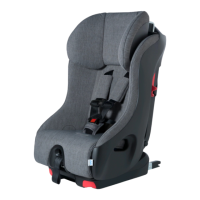
Labels and identifies components on the back of the car seat.
Child restraints could be recalled for safety reasons; registration is key.
Instructions on how to register your car seat via postcard or online.
Failure to properly install or use this car seat can result in injury or death.
Criteria for discontinuing Rear-Facing or Forward-Facing use.
Guidelines on using the buckle pad, headrest, and harness.
Warnings regarding product age, damage, accessories, and burn hazards.
Conforms to standards and lists compatible vehicle types.
Defines height, weight, and age limits for proper car seat use.
Specifies conditions for using the car seat in the rear-facing position.
Child's weight (10-29.5 kg) and height (76-124 cm) for forward-facing.
Ensures child's ears are below the top of the car seat's headrest.
Ensures shoulder harness straps are at or above the child's shoulders.
Insert the Headrest support rods into the Headrest guides in the seat back.
Press adjuster to raise or lower headrest to the desired position.
Verify Crotch Strap is through the correct slot and close to child's crotch.
Slide belt through the Crotch Strap Slot, ensuring buckle faces out.
Instructions for lengthening the crotch strap for larger children.
Choose harness slots at or below for rear-facing, at or above for forward-facing.
Loosen harness by lifting adjuster tab and pulling straps.
Steps to remove harness straps from the metal harness plate.
Thread harness straps through correct slots, ensuring no twists.
Attach harness strap loops to the metal harness plate.
Adjust webbing length for larger or smaller children.
Explanation of UAS, including anchors and tether.
Guidance on choosing safe seating positions for child restraints.
Warnings regarding the condition and safety of vehicle belts.
Rules for installing the car seat using vehicle belts.
Identifies belt systems that should not be used with the car seat.
Information on retractable lap belts and their compatibility.
Guidance on using manually adjustable lap belts.
Critical warnings for rear-facing installation, especially with airbags.
Ensures correct routing of UAS or vehicle belt and use of anchor bar.
Specifies required anchor spacing (280 mm / 11 in.) for UAS use.
Guidelines for securely connecting UAS connectors to vehicle anchors.
Rotate recline foot and ensure anti-rebound bar is attached.
Route UAS belt through the rear-facing belt path without twists.
Place seat in location and connect UAS lower connectors to anchors.
Tighten UAS belt by pressing down on seat and pulling belt end.
Loosen UAS belt by pressing adjuster button and pulling strap.
Remove UAS connectors by pressing release button.
Not all vehicle belts are safe; read requirements and route correctly.
Ensure belt is routed through rear-facing path and seat is upright.
Position seat according to level line and use belt lock-off.
Route belt through path, buckle, and tighten securely.
Tighten vehicle belt using the rear-facing lock-off mechanism.
Install without lock-off by engaging the vehicle's ALR.
Instructions for installing using a lap-only belt.
Unbuckle the vehicle belt, pressing down on seat to ease tension.
Open belt lock-off and remove the car seat from the vehicle.
Critical warnings for forward-facing installation, especially for infants.
Requires top tether and either UAS or vehicle seat belt.
UAS belt must route through forward-facing path and guides.
Use designated UAS locations and always install with a top tether.
Ensure recline foot is forward-facing and attach tether hook.
Route UAS belt through forward-facing path and connect anchors.
Connect UAS lower connectors to anchors and attach top tether.
Tighten UAS belt and top tether for secure installation.
Loosen top tether and UAS belt by pressing adjuster buttons.
Remove UAS connectors and then remove the car seat.
Belt must route through forward-facing path and guides.
Use forward-facing lock-off with lap/shoulder belt and always use tether.
Place seat forward-facing, route belt, and buckle securely.
Use forward-facing lock-off for lap/shoulder belt installation.
Attach tether hook and tighten vehicle belt and tether snugly.
Check for secure installation by pulling seat front-to-back and side-to-side.
Loosen top tether and vehicle belt by pressing adjuster buttons.
Open forward-facing lock-off and remove the car seat.
Check that harness fits snugly and is secured by an adult.
Guidelines on clothing, blankets, and never leaving a child unattended.
Position shoulder harness straps correctly for rear-facing/forward-facing.
Verify headrest and crotch strap positions meet safety criteria.
Separate chest clip and unbuckle harness by pressing release button.
Loosen harness by lifting adjuster tab and pulling out straps.
Rotate recline foot and insert anti-rebound bar into seat holes.
Remove locking pins and clips, then remove the anti-rebound bar.
Remove seat cushion, then UAS adjuster and belt from storage.
Remove seat cushion, then store UAS belt and connectors.
Hook tether hook around storage bar and fold belt into storage.
Store manual in the shoulder harness access panel for future use.
Follow lap belt installation for forward-facing aircraft use.
Follow lap belt installation for rear-facing aircraft use.
Instructions for placing and attaching the seat cushion cover.
Seat back cover removal is not recommended unless necessary.
Steps for cleaning fabric spots with water and mild detergent.
Wash exterior plastics with warm water and soap.
Surface clean harness straps with a damp cloth and mild detergent.
Rinse buckle with warm water; do not use detergents or lubricants.
Provides a link for instructions on how to recycle the child seat.
Provides a link to instructions for troubleshooting the child seat.
Details the one-year limited warranty for defects in material/workmanship.
Exclusions from warranty and consumer legal rights.