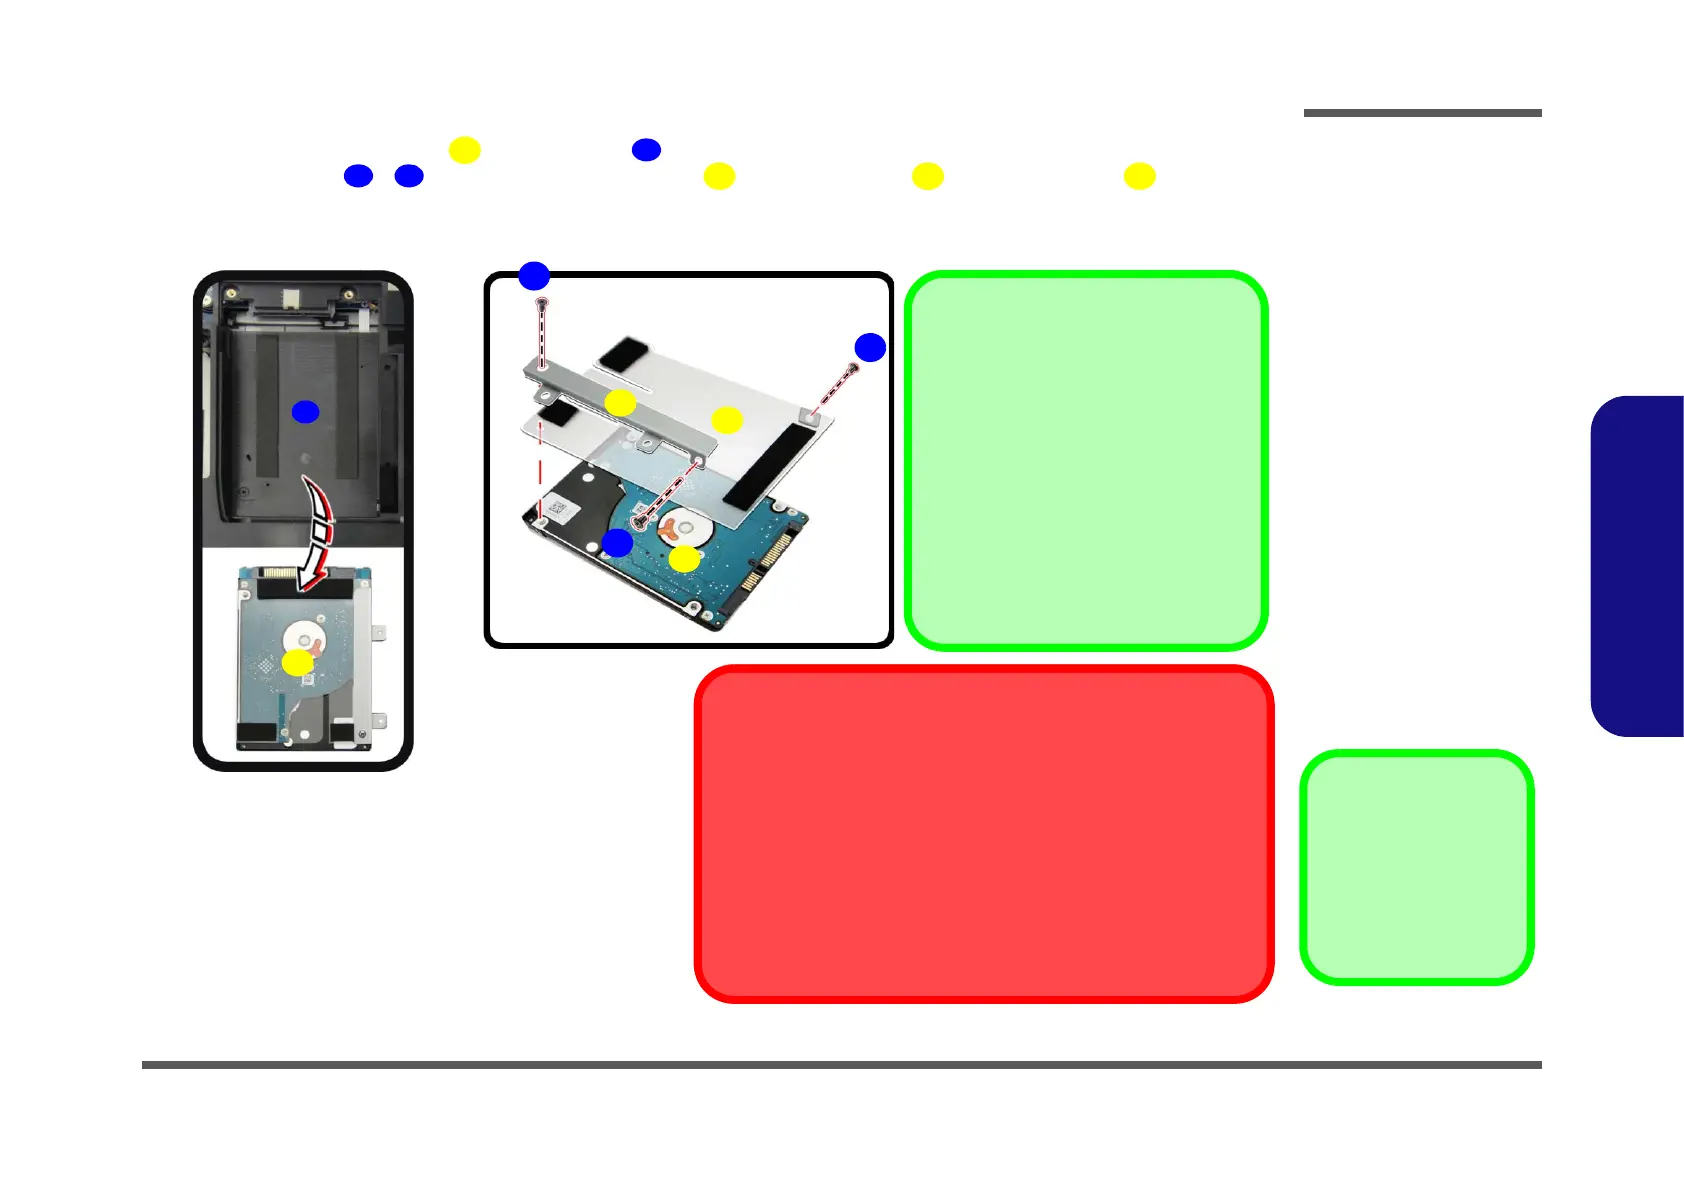
4. Lift the hard disk assembly out of the bay (Figure 5c).
5. Remove screws - and separate the hard disk from the bracket and mylar cover (Figure 5d).
6. Reverse the process to install a new hard disk (do not forget to insert the mylar cover between the bracket and
c.
28
12
9
10
11
14
13
Installing 9.5mm or 7mm HDD
Note that the hard disks pictured on
these pages are all 9.5mm(h) hard disk
drive.
In some cases, a 7.0mm(h) hard disk
drive will be installed. Do pay attention
on the alignment of the hard disk and
bracket when tightening the screws.
For more information, contact your dis-
tributor/supplier, and bear in mind your
warranty terms.
25
d.
HDD System Warning
New HDD’s are blank. Before you begin make sure:
You have backed up any data you want to keep from your old HDD.
You have all the CD-ROMs and FDDs required to install your oper-
ating system and programs.
If you have access to the internet, download the latest application
and hardware driver updates for the operating system you plan to in-
stall. Copy these to a removable medium.
7
8