5
Securing steps for Shade Light:
The light can be ceiling mounted, ceiling hanging and wall mounted
Ceiling hanging installation :
1. Select suitable location that can support the weight of the fixture and make sure it is within the reach of
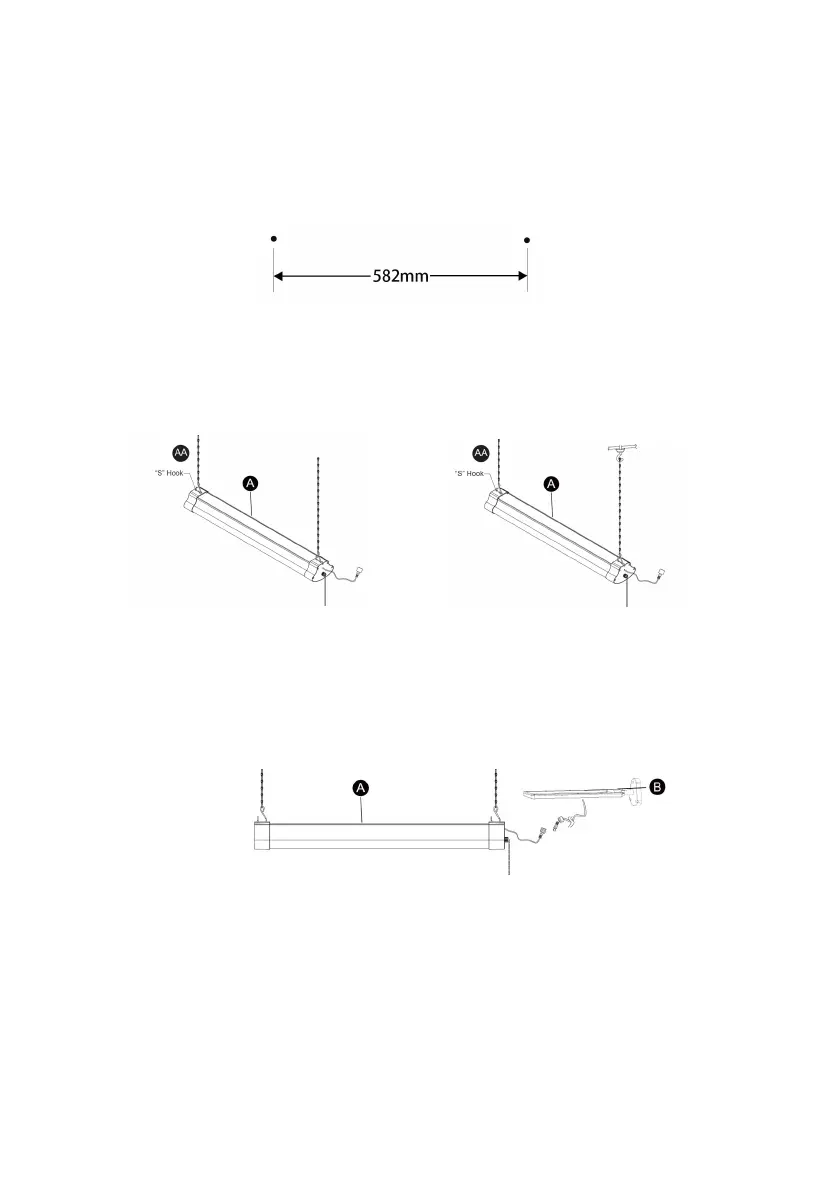
the power cord of the solar panel. Determine method of mounting before drilling. Mark two spots on the
ceiling 582mm apart for the mounting hardware (not included).
. Attach the “S” hook at the bottom of the mounting chain (AA) to the hanger on the light fixture (A). Repeat
this step on the other side of the light fixture (A).
. Hang fixture body (A) by placing one mounting chain (AA) over each hook (not included) that has been
installed in the ceiling. You may need to adjust the mounting chains (AA) slightly on the hooks for light
fixture (A) to hang level.
. Carefully route the power cord of the solar panel (B) to the light fixture (A) and plug into the socket located
on the light. Use the solar panel (B) only for charging the light fixture (A). It is not designed to charge other
equipment or devices. Pull the chain once to turn on the light on low brightness mode (600 lumens). Pull
the chain twice for a higher brightness mode (1200 lumens). To turn the light off, pull the chain three times.
NOTE: Solar panel needs to charge in direct sunlight for 10-15 hours to fully charge the
battery. The light will charge in the ON or OFF position.