CLKTS02
24/7 DIGITAL TIMER
OPERATING IN TRUCTIONS
Introduction
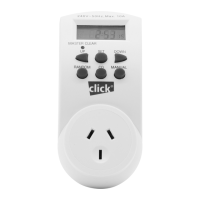
The CLKTS02 Electronic Timer is a plug-in time switch suitable
for continuous indoor use to switch ON and OFF household
appliances. The timer also incorporates a NiMH rechargeable
battery. If a power failure occurs or the unit is removed from the
mains outlet, the battery will power the unit, avoiding the loss of
any preset programs.
NOTE: The rechargeable battery is a non-replaceable type.
The battery will not provide power to any appliance during
a power failure.
Safety Information
DO NOT IMMERSE TIMER IN WATER OR ANY OTHER LIQUID.
DO NOT
use the device if any signs of damage to the device
are observed.
DO NOT plug in an appliance where the load exceeds 10A.
DO NOT use solvents or detergent to clean the timer.
ALWAYS remove timer from mains socket outlet and clean with a
damp rag if cleaning is needed.
ALWAYS ensure the plug of any appliance is fully inserted
into the timer outlet.
Heaters and similar appliances should never be left unattended
during operation. The manufacturer recommends such
appliances not be connected to timers.
READ INSTRUCTIONS CAREFULLY BEFORE INITIAL USE.
Keep in a convenient place for future reference.
This product is for indoor use only.
1
Initial Set-Up
1) Plug the timer into a mains outlet. All segments of the display
should flash on momentarily if the screen was blank prior to
power up.
NOTE: If screen remains blank after connection to mains
supply, leave the unit for approx. 14 hours to fully charge the
battery before operation.
2) Clear all current information b pressing MASTER CLEAR button
using a paperclip or pen. The display segments should all illuminate
and the unit will reset to Monday at 0:00 in 24-hour format.
3) The timer is now ready to be set up for use.
Setting Current Time
1. Press UP or DOWN button to select clock mode. While in clock
mode, "CLOCK" appears on the bottom left of the LCD.
·2. Press
SET and CD buttons simultaneously to toggle between
12-hour and 24-hour format.
3. Press and Hold SET button to enter set mode. While in set
mode,
"SET" appears and flashes on the bottom left corner of
the LCD and the day starts to flash.
4. Press
UP and DOWN buttons tb change and press SET button
to continue selecting hour and minute, successively.
5. Press
SET button again to exit set mode. If no button is pressed
after
1 minute, it will exit from
set mode automatically.
6. Repeat step 1 to 5 until current time is correctly set.
Example: Set current time at 4:10 pm on Wednesday.
1. Reset by pressing MASTER CLEAR, clock is reset to time
0:00:00 on MONDAY in 24-hour format. Alternatively, Press
UP
or DOWN button to select clock mode.
2. Press SET and CD buttons simultaneously to change to 12-hour
format.
3. Press and Hold SET button to enter set mode.
4. Press UP and DOWN buttons to change day to WE, i.e.
Wednesday.
5. Press
SET button to select hour.
6. Press
UP and DOWN buttons to change hour to 4 PM.
7. Press
SET button to select minute.
8. Press
UP and DOWN buttons to change minute to 10.
9. Press
SET button again to exit set mode.
2
Setting Timer Programs
1. Press UP or DOWN button to select program mode. While in
-program mode, "PROGRAM" appears at the bottom centre of
the LCD.
2. Press
UP or DOWN button to select desired program number and
action, i.e., number 1-10, ON or OFF, that are shown on the left
of the LCD.
3. Press
SET to enter set mode. While in set mode, "SET" appears
and flashes on the bottom left corner of the LCD and the day
starts to flash.
4. Press
UP and DOWN buttons to change and press SET button
to continue selecting day, hour and minute. (Refer the TIP 1
below for selectable combination of days)
5. Press
SET button again to exit set mode. If no button is pressed
after 1 minute, it will exit from
set mode automatically.
6. Press
SET and CD buttons simultaneously to toggle between
12-hour and 24-hour format.
7. Check "AUTO" is shown on the bottom right of the LCD. If not,
press
MANUAL button while in clock mode until "AUTO" is
shown. (Refer to Manual Operation Section for more details.)
8. Repeat step 1 to 7 until current time is correctly set.
TIP1
16 SELECTABLE DAY OR COMBINATION OF DAYS ARE AS
FOLLOWED
INDIVIDUAL DAY
LCD displays one of "MO, TU, WE, TH, FR, SA, SU'
ALL DAYS LCD displays "MO TU WE TH FR SA SU"
WEEKDAYS
LCD displays "MO TU WE TH FR"
WEEKEND LCD displays "SA SU"
ALL
DAYS EXCEPT LCD displays "MO TU WE TH FR SA"
FOR SUNDAY
DAYS GROUPING 1
LCD displays "MO WE FR"
DAYS GROUPING 2 LCD displays "TU TH SA"
DAYS GROUPING 3
LCD displays "MO TU WE"
DAYS GROUPING 4
LCD displays "TH FR SA"
DAYS GROUPING 5 LCD displays "MO WE FR SU"
TIP 2: The timer ON or OFF will be executed according to preset time
not to program number. When setting timer programs, ensure the
settings do not overlap. If there are program settings overlapping,
program OFF always has the priority over program ON. In order to
activate the preset timer programs, the timer must be working in
AUTO mode.
3