go green pay less no mess
8. EXCESS LIQUID DRAIN INSTALLATION.
The excess liquid fittings are to be installed after the tank is in final position.
STEPS FOR INSTALLATION
1. Smear some sealant around the washer (both sides) that is provided
with the plug-and-waste fitting.
2. Put the washer over the plug and waste and then from the inside of
the tank, push the plug and waste through the hole in the tank.
3. From the outside of the tank, screw the clamping collar onto the
protruding thread. This collar should only be hand tightened.
4. Screw on the female pipe adapter.
The tank is now ready to have the 40mm PVC excess liquid drain pipe connected.
The optional Vent and Drain Kit available from Clivus Multrum provides a length of
trenching arch, end-caps, 1mtr of 40mm waste pipe and 2 x 45º elbows. (Shown on
page 5).
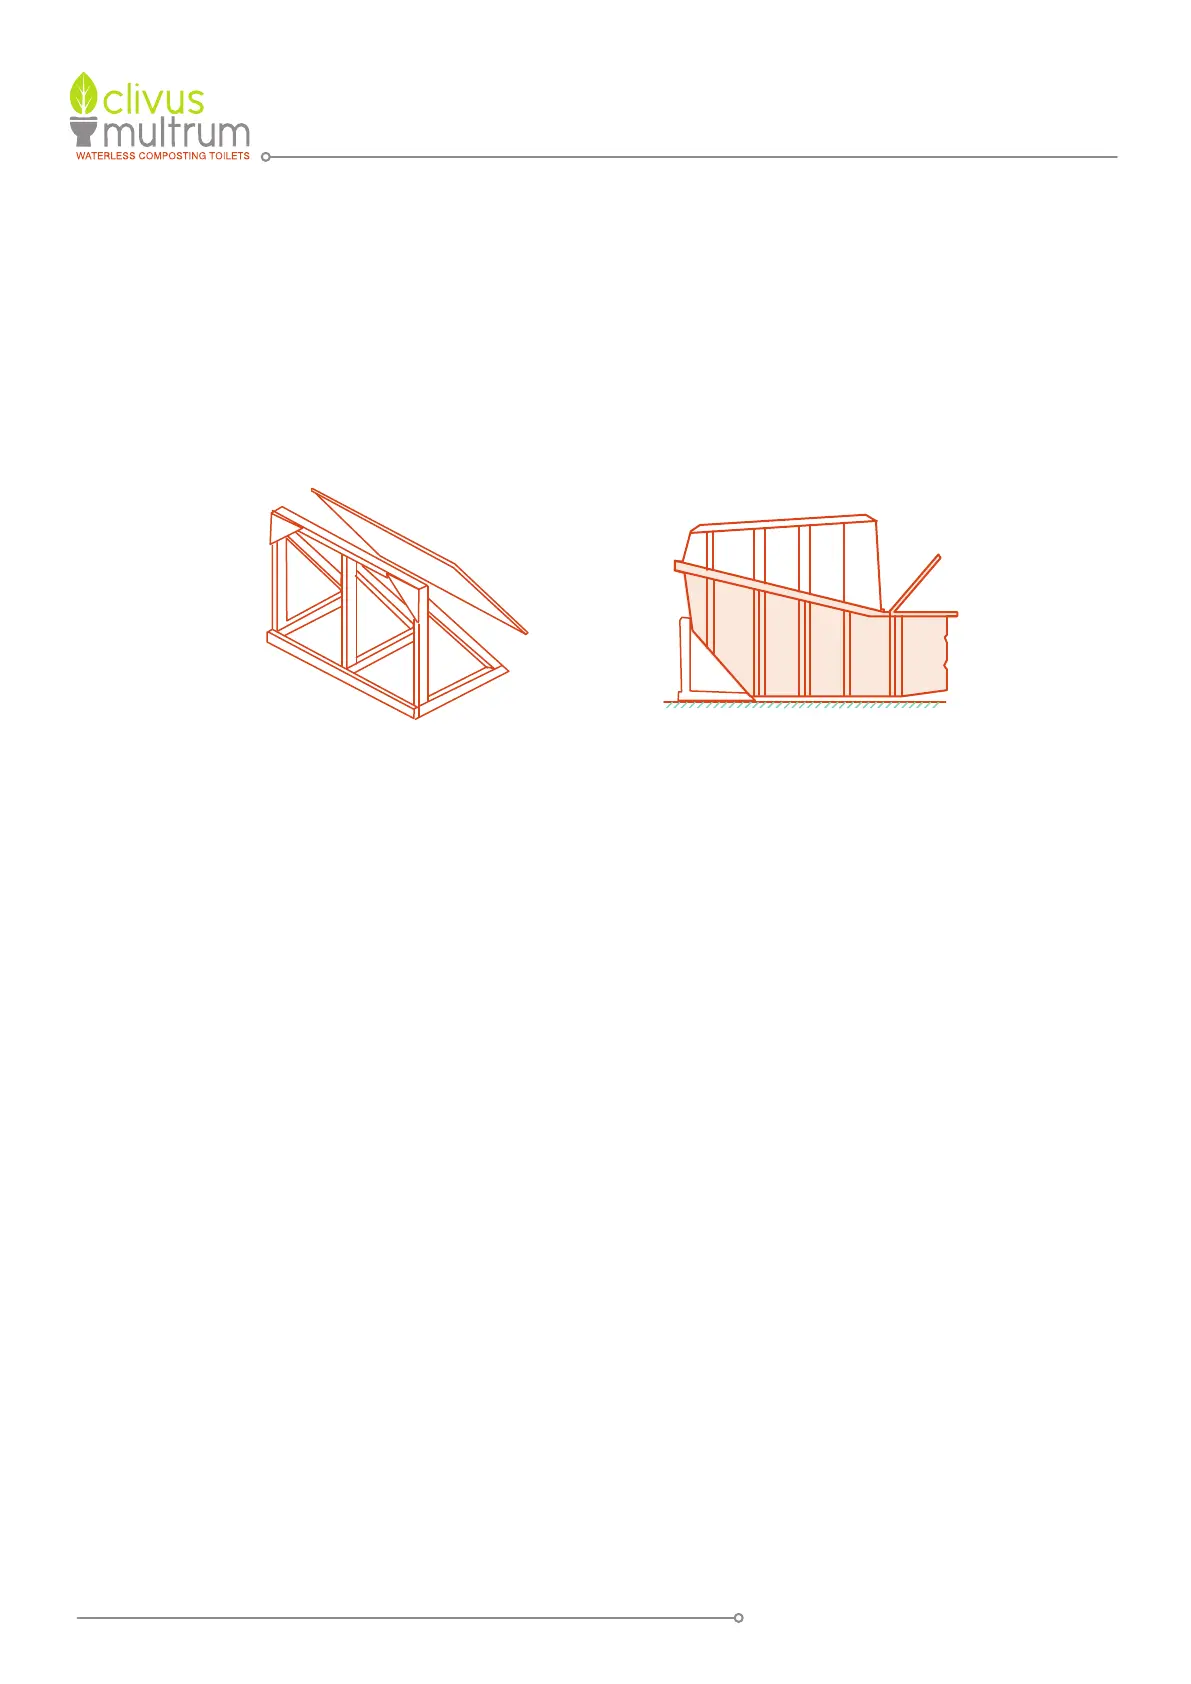
7.2 WOODEN SUPPORT
This is required only for the CM60 tanks, in installations where the sloping
rear wall is not buried or supported by a soil mound. Build a wooden full-
width support for the sloping bottom of the tank. Ensure the stand cannot
move backwards and that the tank cannot move forward. Attach wooden
locks to the floor in front of the tank, or connected back to the rear frame
so the tank will not move away from the rear support.
Wooden support
on a solid base
Rear support
PAGE 9