FIG. 22 FIG. 23
NOTE: It is very important that you leave the bolts, clamps and clevis feet
loose when attaching the tower to the boat. The clevis feet and clevis pins
must be able to swivel. The 3/8”-16 x 1 socket head cap screws on the
header must be loose to allow for any adjustments that may need to be
made.
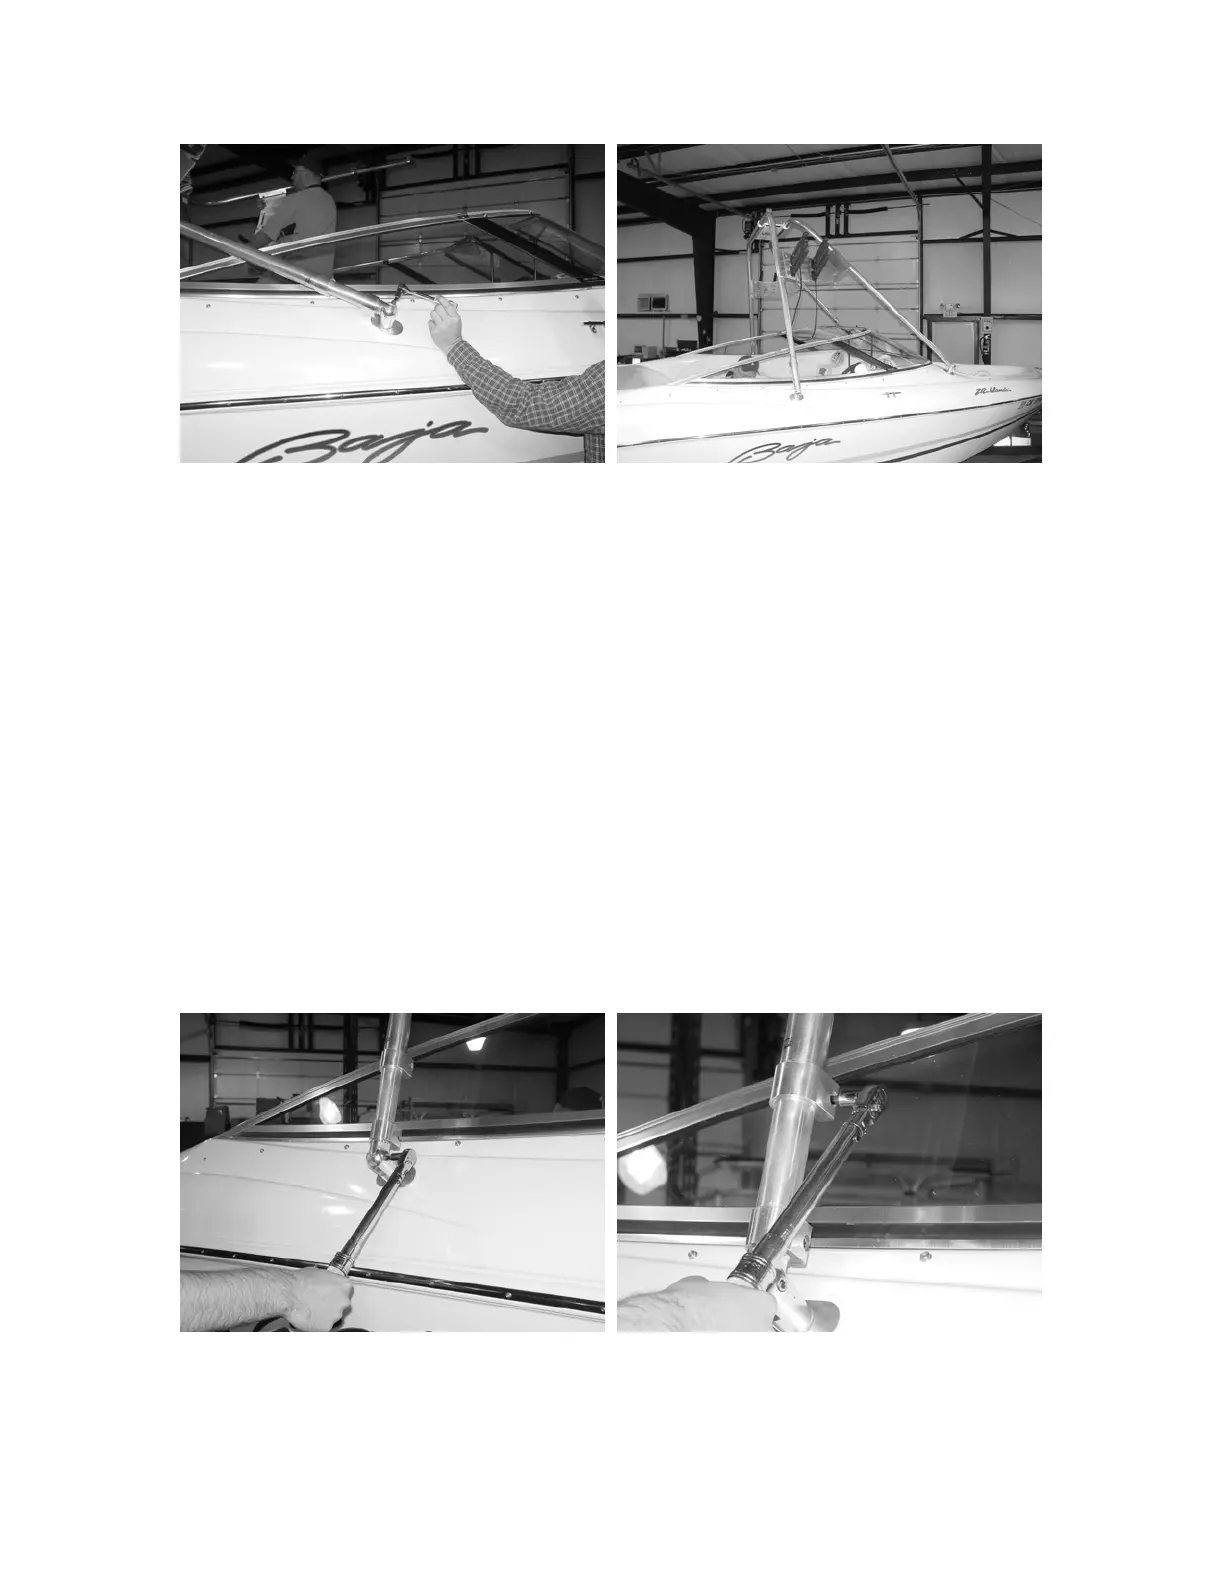
Connect (loosely) the clevis pins of the two clevis feet that are now mounted to
the boat to the port and starboard rear tube assemblies using the 3/8”-16 X 1-
1/2” bolts that were previously removed. See Fig. 22. Tilt the tower forward and
connect the front clevis pins to the front clevis feet that were previously mounted
as shown in Fig. 23.
Tighten all 3/8” bolts to 30 foot pounds of torque each. This includes the clevis
feet, the clamps and the header bolts as shown in Fig. 24, 25, 26, and 27.
Mount the panel that was removed from the bottom of the header in step 1 and
place the decals on the tower if so desired.
FIG. 24 FIG. 25
10