42
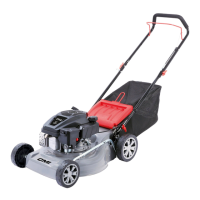
6. Protective flap
7. Bag for cuttings
8. Pull starter holder
►P.3, item2
9. Pull starter
10. Fuel filter nozzle
11. Fuel pump
12. Air filter casing
13. Ignition cable with spark plug
14. Exhaust silencer
15. Motor oil filling screw
Scope of delivery
• Operating manual
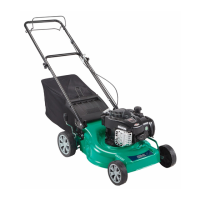
• Lawn-mower
• Handle
• Handle, lower section
• Assembly wrench
• Bag for cuttings
• Bag containing small parts
Assembly
Mounting the handle
►P.4, item3
– Position the bottom part of the handle
bar(3) into the locators on the product
and push through the carriage bolts(16).
– Position the toggle nuts(17) and tighten.
►P.4, item4
– Position the handle bar(2) onto the bot-
tom part(3) of the handle bar and push
through the carriage bolts(18).
– Position the toggle nuts(19) and tighten.
– Tighten the pull starter holder(8) as illus-
trated and attach the pull starter(9).
►P.3, item1
– Affix Bowden cables with clamps to the
handle(2) as illustrated.
Commissioning
Filling with fuel
►P.3, item2
– Unscrew the tank lid(10) and remove.
– Carefully pour fuel into the tank (tank
capacity: ►Technical data– p.46). Do
not spill!
– Check the seal in the tank lid for dam-
ages, and clean if necessary. Immedi-
ately replace damaged seals!
– Tighten the tank lid(10) by hand.
Filling with motor oil
►P.3, item2
– Unscrew the motor oil filling screw(15)
and remove.
– Fill with motor oil carefully (tank capacity:
►Technical data– p.46). Do not spill!
– Tighten the motor oil filling screw(15) up
again by hand.
Set the cutting height
►P.5, item5
The cutting height can be set to several dif-
ferent heights (Cutting heights: ►Technical
data– p.46).
– Pull the lever(5) to the right.
– Set the cutting height to the value you
require, and let the lever slot back into
place.
Attaching the cuttings bag
►P.5, item6
– Lift the protective flap(6) and hold.
– Slot the cuttings bag(7) into place.
– Ensure that the bag has slotted into place
securely.
Note: Place the bottom part of the
handlebar on the machine as shown
in such a way that the bottom pull
starter holder is on the right side.
DANGER! Risk of injury! Petrol is
extremely flammable!
Switch off the motor and allow to
cool down before refilling.
Observe all of the safety notes for
handling fuels.
NOTICE! Risk of damage to the
device! The unit is delivered without
motor oil.
Motor oil must be filled before start-
ing the machine.
Note: Only use suitable fuels (►Fuel
and lubricants to be used– p.46).
GB
Rasenmaeher_Benzin_401165.book Seite 42 Freitag, 8. April 2016 2:32 14
 Loading...