3
ENGLISH
2. Product description
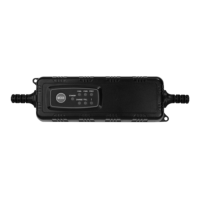
• Automatic battery charger for 12 V lead batteries.
• Intended for use with lead batteries (WET, GEL, AGM etc.) with acapacity of
1.2Ah to 120Ah.
• Protection against spark emissions and short circuiting.
• LED indicates charging status and incorrect connection.
• Protection against damp and dust - IP65.
• Charging at 0.8/4A.
• Switches automatically to maintenance charging when thebattery is fully charged.
• Insulated battery clamps with quick-connector pole clamps.
3. Use
Attention!
Read thevehicle’s manual before commencing charging or loosening abattery cable.
Checkif there are any particular instructions for charging batteries in your vehicle.
1. Alwaysremove thepower supply plug from thewall socket before connecting
thecharging clamps to thebattery.
2. Checkthat thebattery can be charged before charging commences. Thecapacity
of thebattery ought to be between 1.2 Ah and 120 Ah. Cleanthebattery terminals
if necessary. Useprotective goggles when cleaning.
3. Connect positive (RED) battery clamp to thebattery’s positive terminal (+) and
negative (BLACK) battery clamp to thebattery’s negative terminal (-).
Note: When charging a battery that is mounted to a vehicle, mount the cables in
the following order:
a.) Connect the charger’s red plus clamp to the battery’s positive terminal (+).
b.) Connect the battery’s negative black clamp somewhere on the vehicle’s chassis.
This area should be a fair distance away from the battery itself and any fuel lines.
c.) Connect the charger to a power point.
4. Connect thepower supply plug to asocket when STANDBY flashes.
5. Press[ MODE ] several times to select thedesired charge setting. Inthis order:
• STANDBY
• Charge setting 1 <14Ah
• Charge setting 2 >14Ah
• Charge setting 3COLD
• STANDBY etc.
6. TheLED on thecharger shows thecharging status.
7. Interrupt charging in thecorrect way. Doas follows:
a.) Firstremove plug from thesocket.
b.) Thenremove thecharger clamp connected to theminus terminal (-) (or to thechassis).
c.) Lastlyremove thecharger clamp connected to theplus terminal (+).
8. Once charging is complete, remove the charger clamps from the vehicle in the
following order:
a.) Remove the mains lead from the power point.
b.) Remove the charger’s black clamp from the chassis.
c.) Remove the charger’s red plus clamp from the battery’s positive terminal (+).


 To Next Page