Gather the following items:
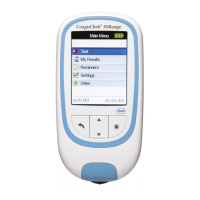
• CoaguchekXSProMeter
• ContainerofTestStrips
• TestStripCodeChip
• Safe-T-ProPlusLancet
• AlcoholWipe
• CottonBallorTissues
1.
Makesureyouhavethecodechip
readytoinsertifyouareopening
anewboxofstrips.Thecodekey
needstobeinsertedintothemeter
everytimeyouuseanewlotofstrips.
2.
Cleanthengertipwithanalcohol
wipe.Orhavethepatientwashhisor
herhandsinwarmsoapywater.
Drythoroughly.
3.
Before continuing, review these
tips for getting a good drop of
blood.
Increasingthebloodowinthe
ngerwillhelpyoutogetagood
dropofbloodsokeepinmindthese
tips:
Warmthehand.Havethepatient•
holditunderhisorherarm,and/
orwashwithwarmwater.
Havethepatientletthatarm•
hangbyhisorherside.
Massagethengerfromitsbase.•
Use these techniques until the
fingertip has increased in colour.
4.
Takeateststripoutofthecontainer.
Close the container tightly.
You have 10 minutes to use the test
strip once you remove it from the
container.
5.
Slidetheteststripintotheteststrip
guideinthedirectionofthearrows
untilitstops.
The meter turns on and the main
menu appears.
If you insert a strip from a new lot
number for the first time, the meter
will display the number of the test
strip code chip required. Remove
the old code chip and insert the new
one.
6.
TouchtheScan buttonandholdthe
operatorIDbarcodeapproximately
10cmfromthebuilt-inscanner.The
meterbeepsoncethebarcodehas
beensuccessfullyread.
7.
PressPatient Test onthemainmenu
screen.
8.
TouchtheScanbuttonandholdthe
patientIDbarcodeapproximately
10cmfromthebuilt-inbarcode
scanner.Themeterbeepsoncethe
barcodehasreadsuccessfully.
An hour glass symbol appears.
The test strip symbol appears after a
few seconds with a flashing drop of
blood. You have 180 seconds to apply
the sample.
9.
Twisttheprotectivecapoffthe
lancet.
Massage the finger until you see
increased colour in the fingertip.
Keepingthehanddown,pressthetip
ofthelancetrmlyagainstthesideof
thengertip.Pressthepurpletrigger
button.
Gently squeeze from the base of the
finger to develop a drop of blood.
10.
Within15secondsoflancingthengertip,
applythebloodtothetargetareaonthestrip.
Findthecleartargetareaontheteststrip.You
candosefromthesideorthetop.
Hold the blood drop to the test strip until you
hear a beep. The flashing blood drop symbol
will disappear and an hourglass symbol appears
and the test begins.
Do not add more blood to the test strip.
Do not touch the test strip while the test
is in progress.
Themeterperformsanautomaticquality
controlcheckonthestripbeforeitdisplays
theresult.
QC √ appears in the display briefly following a
successful QC check. The result appears in less
than a minute.
11.
Recordyourresultasinstructedby
yourfacility.
Note: If during testing the meter
displays an error message, refer to
the Error Messages section of the
user manual for an explanation and
steps on how to proceed.
12.
Quick Reference Guide