Page 5 of 12
The use of this or any warning device does not ensure that all drivers can or will observe or react to an emergency warning signal.
Never take the right-of-way for granted. It is your responsibility to be sure you can proceed safely before entering an intersection,
driving against trac, responding at a high rate of speed, or walking on or around trac lanes.
The eectiveness of this warning device is highly dependent upon correct mounting and wiring. Read and follow the manufacturer’s
instructions before installing or using this device. The vehicle operator should insure daily that all features of the device operate correctly.
In use, the vehicle operator should insure the projection of the warning signal is not blocked by vehicle components (i.e.: open trunks or
compartment doors), people, vehicles, or other obstructions.
This equipment is intended for use by authorized personnel only. It is the user’s responsibility to understand and obey all laws regarding
emergency warning devices. The user should check all applicable city, state and federal laws and regulations.
Code 3, Inc., assumes no liability for any loss resulting from the use of this warning device. Proper installation is vital to the performance of
this warning device and the safe operation of the
emergency vehicle. It is important to recognize that the operator of the emergency vehicle is under psychological and physiological stress
caused by the emergency situation. The warning device should
be installed in such a manner as to: A) Not reduce the output performance of the system, B) Place the controls within convenient reach of the
operator so that he can operate the system without losing eye
contact with the roadway.
Emergency warning devices often require high electrical voltages and/or currents. Properly protect and use caution around live electrical
connections. Grounding or shorting of electrical connections can cause high current arcing, which can cause personal injury and/or severe
vehicle damage, including re.
PROPER INSTALLATION COMBINED WITH OPERATOR TRAINING IN THE PROPER USE OF EMERGENCY WARNING DEVICES IS ESSENTIAL
TO INSURE THE SAFETY OF EMERGENCY PERSONNEL AND THE PUBLIC.
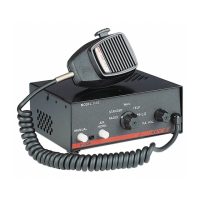
Power Distribution Connections (“L4” Models):
A #8 stud is provided on the rear of the unit and is intended for use ONLY as a convenient ground (earth) “ tie-point “ for the light bar wiring.
Note: It is not an adequate ground (earth) for the siren or the light bar. It is recommended all ground (earth) wires attached here be
terminated with a crimp-on ring terminal.
11-Position Terminal Block Connections - Lighting Control - (See Wiring Diagram)
IMPORTANT! Remember auxiliary outputs A, B & D on L4 models can supply a maximum of 20 Amps each for a combined total
of 30 Amps. Install appropriate fuses in each output wire as close to the siren as possible.
T1 - SW C COM - Common or power feed for Auxiliary Switch “C”. Terminals are a SPDT circuit that may be connected as a momentary
(or latching depending on the switch ordered) ignition controlled circuit, or used for switching auxiliary circuits. It will Handle 10 Amps,
and should be protected with a fuse at the battery if individually fed.
T2 - SW C NC - Connect to the load to be controlled by the normally-closed contact on Auxiliary Switch “C”.
T3 - SW C NO - Connect to the load to be controlled by the normally-open contact on Auxiliary Switch “C”.
T4 - AUXILIARY SW A - connect to the load to be controlled by Auxiliary Switch “A”.
T5 - AUXILIARY SW B - Connect to the load to be controlled by Auxiliary Switch “B”.
T6- AUXILIARY SW D - Connect to the load to be controlled by Auxiliary Switch “D”.
IMPORTANT! The total combined current for the auxiliary outputs A,B & D Must not exceed 30 Amps total.
T7 - +12VDC - Connect to the positive terminal of the battery with 30 Amp circuit protection. Locate the fuse or circuit breaker at the
battery and use size 10 AWG wire minimum. This terminal powers switches A,B & D only.
T8 - LEVEL 1 - connect to the rst level of warning lights (Green LED) position “1” on level switch.
T9 - LEVEL 2 - connect to the second level of warning lights (Yellow LED) position “2” on level switch.
T10 - LEVEL 3 - connect to the third level of warning lights (Red LED) position “3” on level switch.
T11 - +12VDC - Connect to the positive terminal of the battery with 30 Amp circuit protection. Locate the fuse or circuit breaker at the
battery and use size 10 AWG wire minimum. This terminal powers the 3-Level lighting control switch only.
Note: LEVEL 1, LEVEL 2, LEVEL 3, switch progressively. Switch position 1 provides +12 volts at terminal T8. Switch position 2
provides +12 volts at terminals T8 & T9. Switch position 3 provides +12 volts at terminals T8, T9 & T10.
 Loading...