Page 6 of 12
Set-up and Adjustment:
Make these adjustments and position the set-up switches prior to nal mounting.
Audio Adjustments:
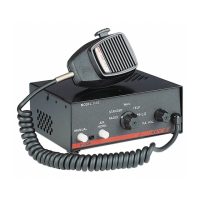
PA/RRB Volume Adjustment - This is the main volume control located on the right side of the front panel. This control sets the PA and RRB
volume. Set the front panel volume control to the point that the PA volume from the siren speaker is such that there is no feedback and the
PA audio is intelligible.
Radio Re-broadcast Adjustment - Place the selector switch in the RADIO position. The MAX RRB trimmer located on the rear panel of
the siren and is accessible through the small hole labeled RRB. This control sets the maximum RRB level that will reach with the front panel
volume control. To adjust properly, set the volume knob fully clockwise and adjust the RRB trimmer such that with the two-way radio volume
inside the vehicle set to it’s normal level, the the desired volume level is produced outside the vehicle by the siren speaker.
Remote Input Adjustments:
The Remote input can be congured to activate in one of three modes: 1) Tri-State Input - accepts a positive (+12V) signal or a ground
(earth) signal, 2) Positive Only Input – accepts only a positive (+12V) signal or 3) Ground Only Input – accepts only a ground (earth) signal.
All 3600 series sirens are factory set as a Tri-State Input. To recongure the Remote input to accept a Positive Only Input, power up the
siren while pressing the MANUAL button and holding it for approximately three (3) seconds. When the MANUAL button is released the siren
will be recongured to accept a Positive Only Signal. To recongure the Remote input to accept a Negative Only Input, power up the siren
while pressing the AIR HORN button and holding it for approximately three (3) seconds. When the AIR HORN button is released the siren
will be recongured to accept a Negative Only Signal. To restore the Remote input to the factory setting, power up the siren while pressing
the MANUAL and AIR HORN buttons and holding them for approximately three (3) seconds. When the MANUAL and AIR HORN buttons are
released the siren will be restored to the factory setting (Tri-State Input). Note: The siren will not generate the MANUAL or AIR HORN
tones during the conguration process.
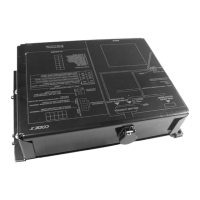
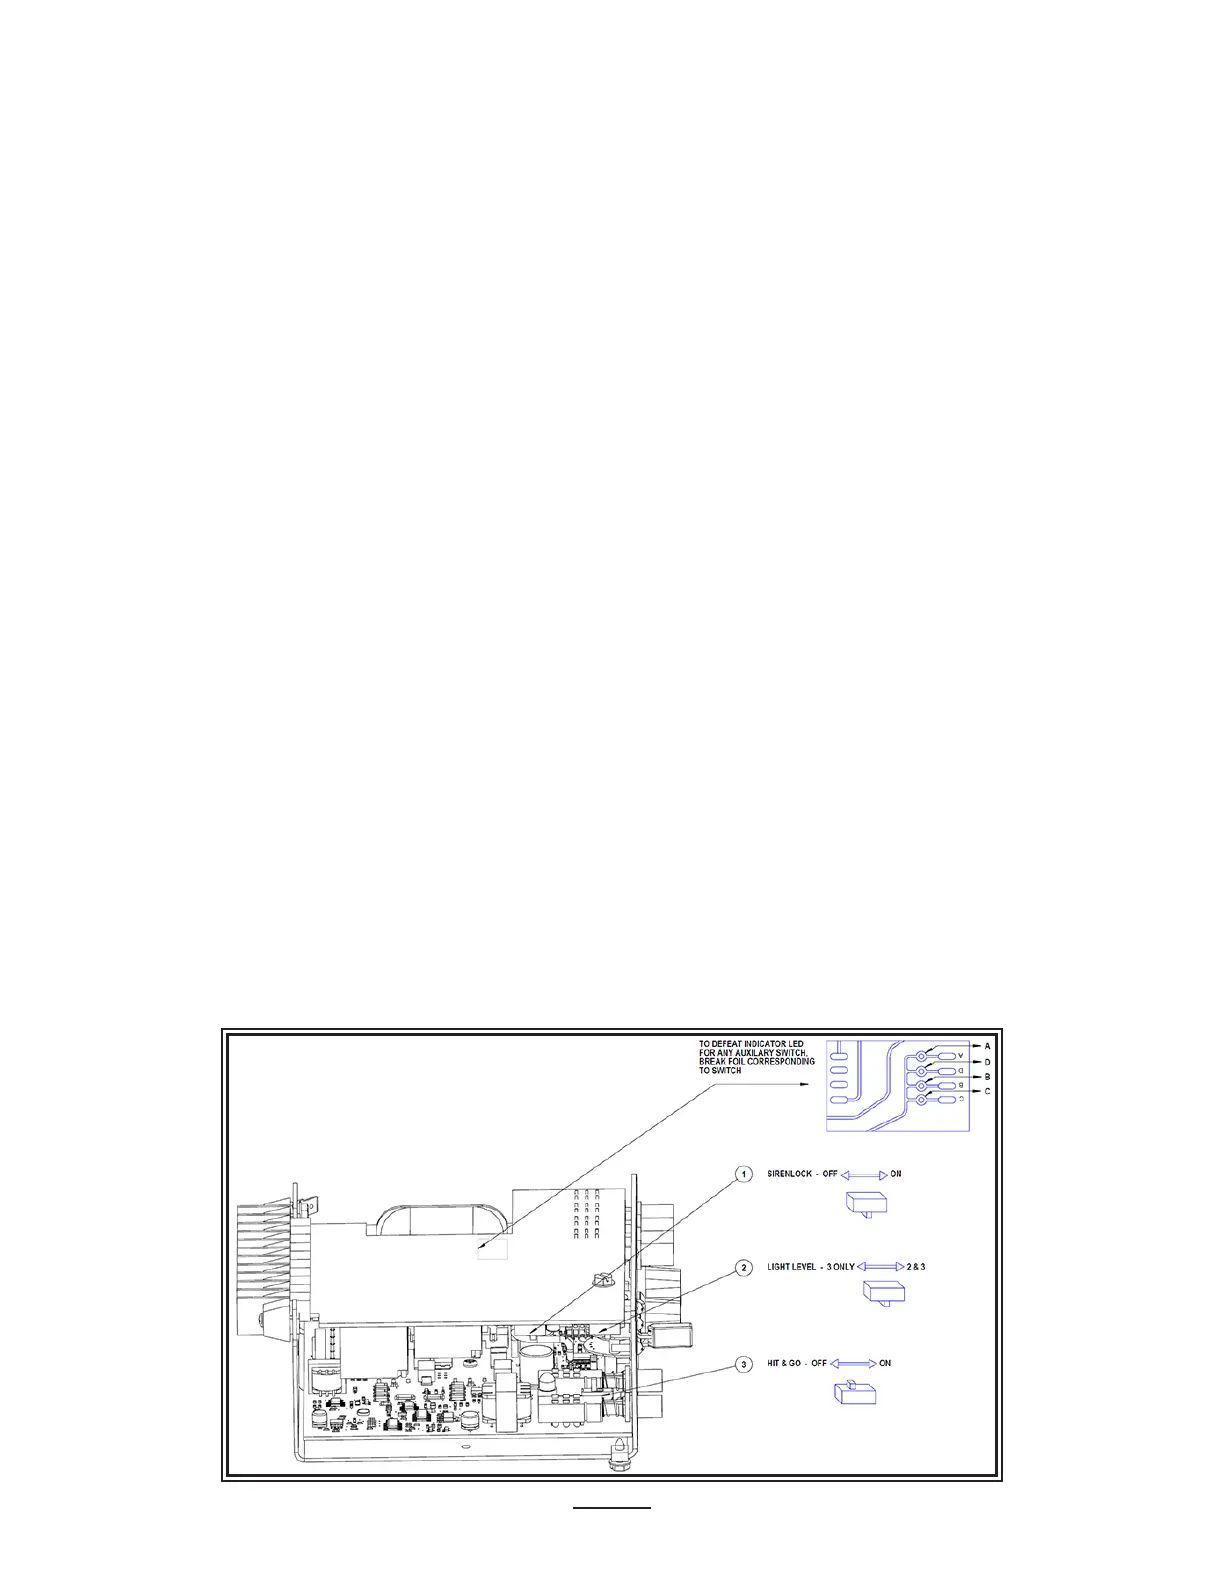
Conguration Switch Adjustments:
Referring to Figure 3, gently set the Hit & Go, LightAlert, and SirenLock set-up switches to the desired position. These switches are
present even if the options were not purchased. If the SirenLock option was purchased and is switched on, all of the tones except AIR
HORN, are disabled until the 3-Level Warning Light Switch is moved to either the Level-2 or the Level-3 positions.
Hit & Go - Slide the switch (#4) forward to allow the feature to operate, to the rear to defeat it.
SirenLock - The SirenLock option, when not defeated by means of the internal switches, allows siren tones (Wail, Yelp, and Hi-Lo) to be
produced only when the 3-Level Warning Light Switch is in the Lighting Level 2 (Green and Yellow LED’s) or Lighting Level 3 (Green, Yellow,
and Red LED’s) position. Air Horn, Radio Rebroadcast, and Public Address are unaected by this option.
Slide the switch (#1) forward to allow the feature to operate, to the rear to defeat the feature.
To select SirenLock in level 3 only, slide the level select switch (#2) toward the rear of the siren; slide it toward the front of the siren to enable
siren tones operation in both Levels 2 and 3.
Figure 3
 Loading...