EasyManua.ls Logo

Code 3 ARROWSTIK AS-10 - User Manual

Code 3 ARROWSTIK AS-10
12 pages
Print Icon
To Next Page IconTo Next Page
Loading...
Contents:
Introduction (with
warnings
) .................................................... 2
Unpacking & Pre-installation .................................................... 2
Installation & Mounting ............................................................. 2
Permanent Mounting ............................................................... 2
On Code 3
®
LP 6000
TM
Series Frame .................................... 3
On Code 3
®
XL 5000
TM
Series Frame .................................... 3
Wiring Instructions .................................................................... 6
Operations ................................................................................ 6
Options & Specifications ........................................................... 7
Maintenance ............................................................................. 7
Changing the Lamps & Optic Filters ......................................... 8
Trouble Shooting Guide ............................................................ 8
Parts List (Replacement parts / Exploded View) ................. 9-10
Notes....................................................................................... 11
Warranty ................................................................................. 12
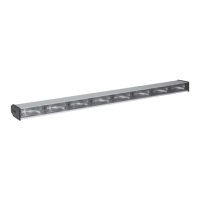
AND SPLIT ARROWSTIK
®®
®®
®
SYSTEMS
MODELS AS-10,
AS-847, AS-839, AS6FL
INSTALLATION
& OPERATION
MANUAL
AS-10/AS-847/AS-839
ARROWSTIK
®
Read all instructions and warnings before installing and using.
INSTALLER:
This manual must be delivered to the end user of this equipment.
IMPORTANT:

Questions and Answers

  • J
    Jennifer BryantJul 31, 2025
    Why is my Code 3 Automobile Electronics ArrowStik not turning on?
    • A
      Anthony NicholsonAug 1, 2025
      If your Code 3 ArrowStik isn't functioning when turned on, several factors could be responsible. It might be due to a loose or disconnected plug in the rear of the control box, so try reconnecting the plug. Another potential cause is a faulty ground (earth) or power connection; therefore, verify both the ground (earth) and +12Vdc connections. Lastly, the control box itself might be damaged. If checking the connections doesn't resolve the issue, further assistance is needed.
  • B
    Bill MoodyAug 8, 2025
    What to do if the light output of my Code 3 ARROWSTIK AS-10 Automobile Electronics appears dim?
    • D
      David EdwardsAug 8, 2025
      If the light output of your Code 3 device appears dim, there are a few things to check. First, low voltage could be the culprit, so check the connections and battery. Secondly, verify the ground (earth) connections. Lastly, ensure that the product is not in "Dim" Mode; if it is, select the appropriate mode.
  • M
    Michael JordanAug 15, 2025
    What to do if some lamps on my Code 3 Automobile Electronics don't light but the LEDs function?
    • K
      Kathleen BarnesAug 15, 2025
      If one or more lamps on your Code 3 Automobile Electronics aren't lighting up while the LEDs on the control box are functioning correctly, it could be due to a few reasons. The lamp(s) may have failed, in which case you should replace them. Alternatively, there might be a bad wiring connection, so verify all connections.
  • E
    Emily TurnerAug 23, 2025
    What does it mean if LEDs on my Code 3 ARROWSTIK AS-10 control box burn continuously?
    • W
      William GonzalesAug 23, 2025
      If the LEDs on your Code 3 Automobile Electronics control box are burning continuously, it indicates that the control box is damaged.

Summary

Introduction

Installation & Mounting

Unpacking & Pre-installation

Inspect unit and parts for transit damage and report issues.

Permanent Mounting

Consider cable location and lamp replacement clearance before mounting.

Mounting to LP 6000 Series Frame

Instructions for mounting the ArrowStik to LP 6000 Series lightbar frames.

Mounting to XL 5000 Series Frame

Instructions for mounting the ArrowStik to XL 5000 Series lightbar frames.

Wiring Instructions

Electrical Safety and Wiring Precautions

Warnings about electrical connections, grounding, fuses, circuit breakers, and wire types.

Control Head Wiring

Connect ArrowStik lighthead cable, control head, and power/ground.

Special Wiring Instructions Reference

Refers to special wiring instructions for 9-wire cable and AS6FL.

External Flash Wiring

Special Wiring Instructions

Front Facing or Passenger Side Wiring

Details wiring order changes for front-facing or passenger-side ArrowStik systems.

AS6 FL 9 Wire Cable Wiring

Operations

Control Head Operation and Indicators

Explains how the rotary switch controls modes and LED indicators on the control head.

Options and Specifications

Split ArrowStik Supplemental Instructions

Supplemental instructions for AS3SP and ASSP split ArrowStik systems.

Maintenance

Maintenance Safety Precautions

Warnings regarding power disconnection and hot lamps during maintenance.

Changing Lamps or Optic Filters

Troubleshooting Guide

Parts List and Exploded View

Notes

Warranty Information

Product Returns Procedure

Code 3 ARROWSTIK AS-10 Specifications

General IconGeneral
BrandCode 3
ModelARROWSTIK AS-10
CategoryAutomobile Electronics
LanguageEnglish