d
5
Take time to be precise
and nish the job
quicker.
Installation holes must be
drilled in exactly the
correct positions and
precisely at right angles to
the door surface. Lock
components must be
vertically and horizontally
accurate in relation to each
other and to the door.
WEDGE THE DOOR
FIRMLY TO PREVENT
MOVEMENT WHILST
DRILLING AND
CHISELLING.
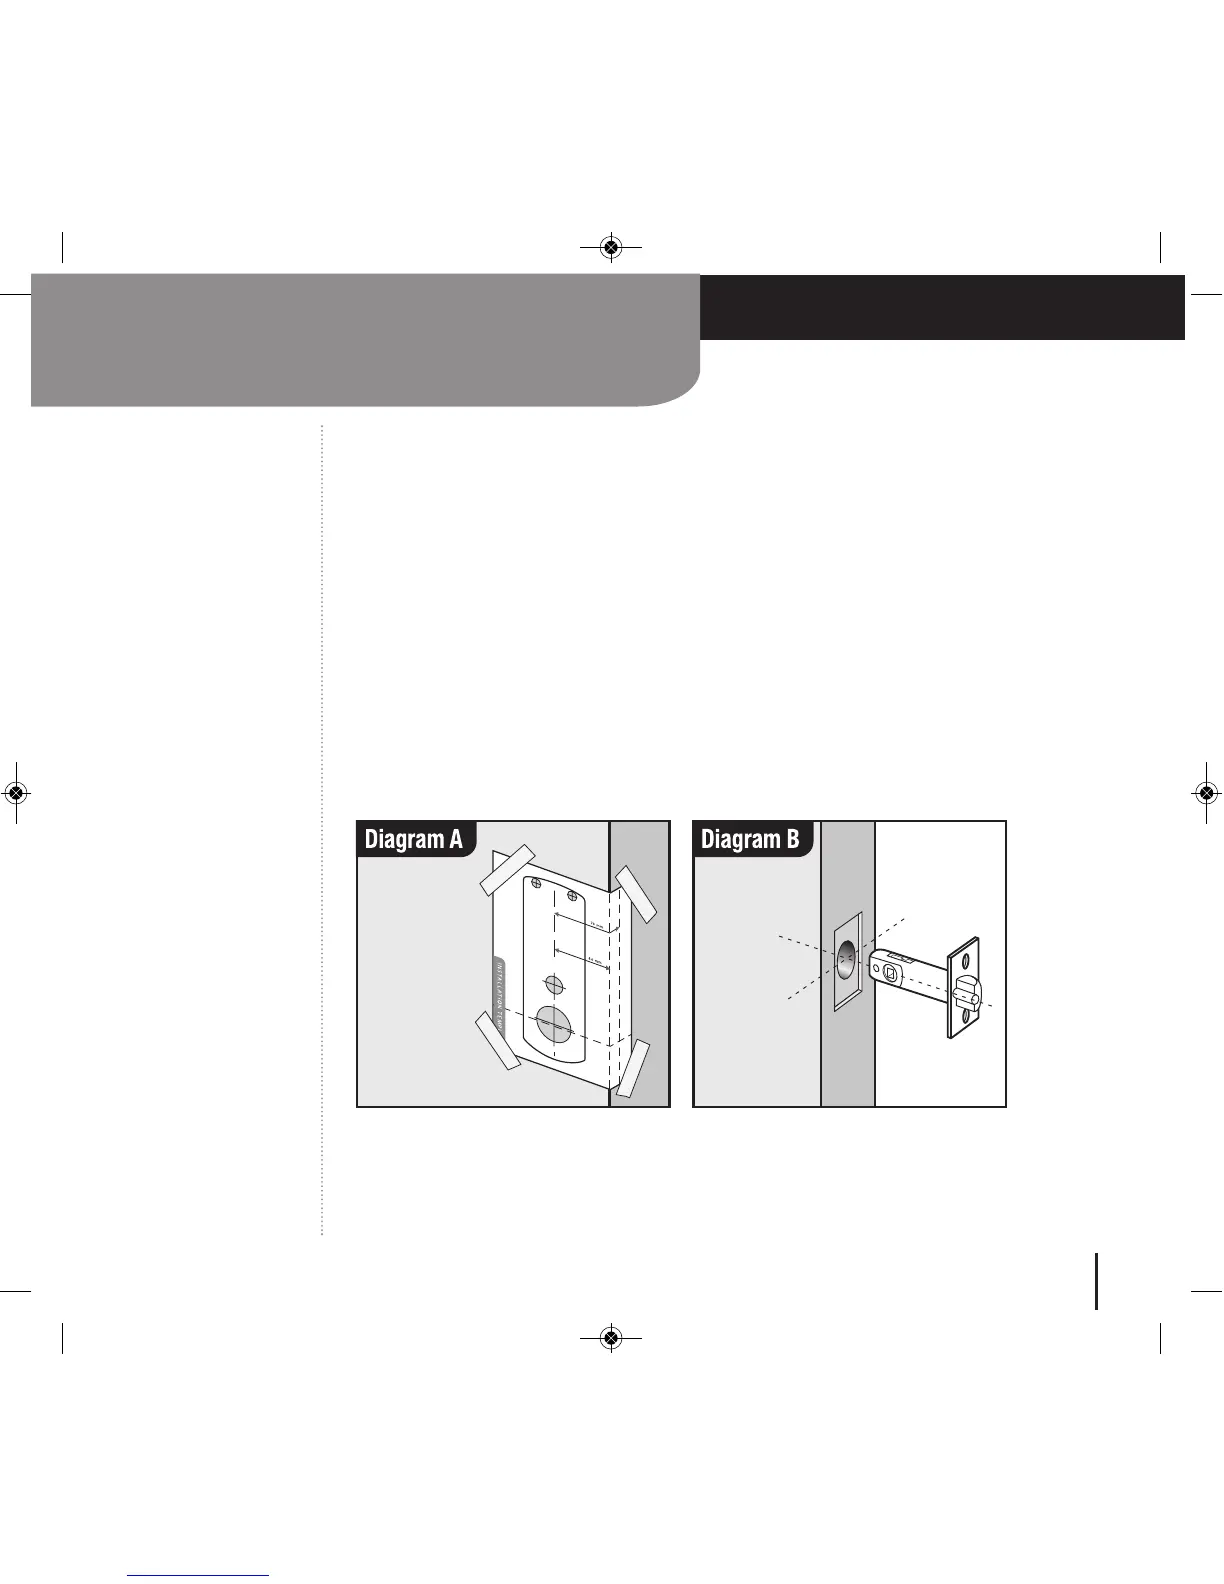
1 Lightly mark a height line on the edge and both faces of the door to indicate the top of the lock when fitted.
Crease the template along one of the dotted lines (60mm (2
3
/8”) or 70mm (2
3
/4”) latch) and tape it to the
door with the top in line with the height line. Mark the holes to be drilled. Mark the centre line of latch on
to the door edge. Apply the template to the other side of the door precisely against the height line and the
centre line of latch mark. Mark the holes to be drilled again. (See diagram A).
2 Keeping the drill level and straight, drill a 25mm (1”) hole in the centre of the door edge to accept the latch.
Put the latch into the hole and holding it square to the door edge, draw around the faceplate. Starting with
the top and bottom cuts, chisel a rebate to allow the latch faceplate to fit flush with the door edge. Remove
the latch.
3 Keeping the drill level and straight, drill the holes in the door face. Drill from both sides of the door to
increase accuracy and to avoid damage to the other side when a drill goes right through.
4 Insert the fire cup into the 54mm (2
1
/8”) hole. N.B. open side of the fire cup to face code side with small
bolt through hole at the bottom.
CL5210
Template
INSTALLATION OF CL5210 LOCK
re
 Loading...