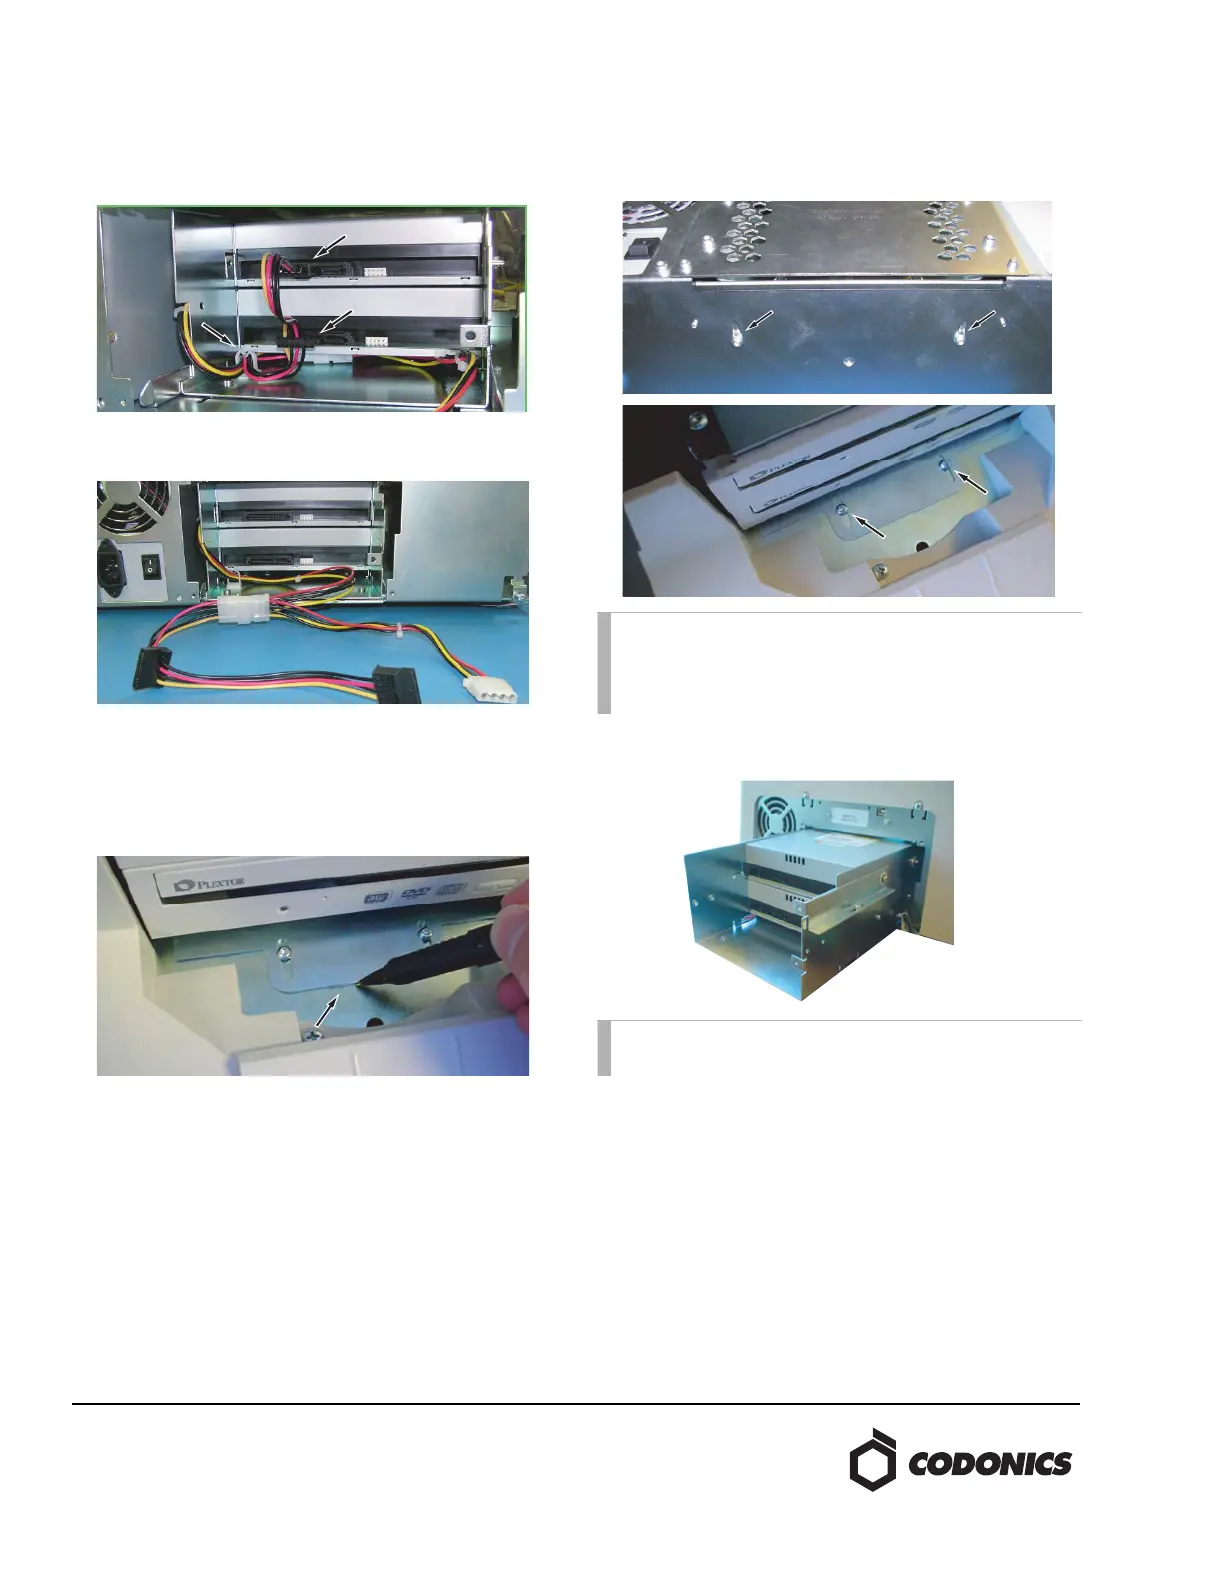
2. Unplug the SATA power converter cable from the optical
drives. Pull power cables out of the cable guide.
3. Mark the location of the drive bay bracket on the chassis
using a felt-tip pen at the front of the Recorder as shown.
4. Remove the two screws and washers securing the back of
the drive bay from the underside of the Recorder. Use the
Torx driver to remove the two screws and washers
securing the drive bay at the front of the Recorder.
5. Move the power connectors to the side and slide the
drive bay out of the Recorder.
NOTE: The two screws securing the front of the drive
bay bracket are shorter than the other screws. Set these
aside for re-use in securing the front of the drive bay
bracket or replace with the screws provided.
NOTE: Use care when removing the drive bay, the
power supply cables are easily pinched.