EasyManua.ls Logo

COLBOR CL60 - User Manual

COLBOR CL60
14 pages
Print Icon
To Next Page IconTo Next Page
Loading...
Thank you for choosing COLBOR product. Please read this manual
carefully before use and follow all instructions mentioned herein.
CL60
Video Light User Manual
Safety Instructions
Please read and fully understand this manual before using the product.
Please remove the COB protective lm to avoid damage by overheat before
rst use.
Please remove the COB protective cover to avoid damage by overheat
before every use.
Do not use the product under moist environment or with wet hands. Do not
allow the product to be splashed or soaked in water.
Keep the product away from corrosive chemicals and liquid to avoid
damage.
Keep the product out of children’s reach during use. Do not leave the
product unattended.
When the product is working, the COB and heat sink will produce high
temperature. Do not block, turn upside down and touch with hands.
To ensure the service life, the cooling system still runs for a while after
shutdown until the COB is below 45℃ .
Please disconnect the power supply and put away the power cord when it is
not in use.
During use, arrange the power cord in order to avoid tripping and cutting o
the power or damaging the product.
Let the product cool completely before storage. Remove the power cable
from the product and put it in the corresponding position of carrying bag
after cooling down.
Do not disassemble the product by yourself, otherwise the warranty will be
invalid. If any fault occurs, please refer it to an authorized technician for
inspection or maintenance.
Recommend to use the original parts of COLBOR. If the product is damaged
due to the use of the non-original parts, it is not included in the warranty of
our products.
Drop or external impact may cause product failure. Articial damage is not
covered by warranty.
COLBOR reserves the right of nal interpretation of the products. The
product design and specications are subject to change without notice.
Product Instructions
COB Bead
Bead Heat Sink
Bowen Mount Adapter
Ejector Pin
Rail
Vent
Quick-mount Holder
LCD Display Screen
Brightness Control
Wheel
Color Temperature
Control Wheel
Settings Button
EFF Rate Option
Button
EFF Mode Button
CCT Mode Button
Type-C Power
Input
Power Button
Installation & Disassembly
Hold the COB protective cover and pull it out as the
arrow shows.
Note: Make sure remove the cover before every use
to avoid heat damage.
Align the inner frame of adapter ring with the outer frame of light, and
push the adapter ring into the light from the head. Fasten two marbles on the
adapter ring to the chute.
When disassembling, push the adapter ring towards the head of the light.
Slide the quick-mount holder into the chute under the light and rotate the
knob a tightly.
Install tripod into the quick-mount holder and rotate the knob b tightly.
Adjust the light to the desired angle and rotate the knob c tightly.
Slide the rail of one light into the chute of the other until the pins inlay.
When disconnecting, slide the light out of the chute.
Slide VM2 into the chute of light, determine the xed position and adjust the
lever to lock.
When removing, adjust the level to unlock and slide out of the light.
(1) DC power supply
Connect power adapter with Type-C power input and turn on.
(2) Battery power supply
Turn on power after installing V-mount and battery.
Operation Instructions
1. Remove COB protective cover
2. Install adapter and reector
3. Fixing of the video light
4. Multi-light connection & disassembly
5. Install VM2
6. Power supply
1. Before using the product for the rst time, please be sure to tear o the
protective lm in front of the COB bead.
2. Power On: connect the power cord with the power adapter, plug the
connector of adapter into the xture’s power input, then attach to an
electricity supply.
3. Function: long press the power button, then the power button lights up. The
product enters operation interface.
(Factory default mode: CCT)
4. Power O: press the power button.
After selecting wireless connection in Settings menu, the
icon will be displayed dynamically.
The icon is always on to indicate successful pairing with
mobile APP.
The icon disappears to indicate mobile APP pairing
failure, or the product is unpaired.
Smart Mode. The product will adjust the fan speed
according to the internal detected temperature to ensure
that it is in optimal working condition.
Status Icon Description
APP Connection Status Icon
Fan Status Icon
Quiet Mode. The fan keeps running at low speed for
minimum noise, and overheating protection will be
activated if the product temperature is higher than the
alarm value.
None grouping status. The product defaults to the factory
status, and will not be aected by other groups.
If the icon is always on, it means that Repeater function
is turned on, and if the icon disappears, it means the
function is turned o.
If the icon ashes, it means that the internal temperature
of the product is too high, and cooling measures need
to be taken. If the icon disappears, it means that the
operation is normal.
Group Status Icon
Repeater Status Icon
Product Overheated Alarm Icon
A stands for Group A. There are fteen groups (A~O). T
stands for Tx.
A stands for Group A. There are fteen groups (A~O). R
stands for Rx.
A stands for Group A. There are fteen groups (A~O). TR
stands for TxRx.
Brightness
Color
Temperature
Roll the wheel upwards
or downwards to adjust
brightness (DIM) within
0%~100%
Press down the wheel to
quickly switch the preset
brightness, 0%, 25%, 50%,
75%, and 100%
Roll the wheel upwards or downwards to adjust color temperature (CCT)
within 2700K~6500K
Press down the wheel to quickly switch the preset color temperature,
2700K, 3200K, 4000K, 5600K, and 6500K
CCT Mode (Short press CCT Mode Button to enter)
Brightness Control Wheel
Color Temperature Control Wheel
Rolling the wheel will enlarge the current setting parameter value, and
it will automatically return to the main screen after 1.5 seconds of no
operation
Brightness
Rate
Special
Eect
Color
Temperature
Roll the wheel upwards
or downwards to adjust
brightness (DIM) within
0%~100%
Press down the wheel to
quickly switch the preset
brightness, 0%, 25%, 50%,
75%, and 100%
Roll the wheel upwards or
downwards to adjust color
temperature (CCT) within
2700K~6500K
Press down the wheel to
quickly switch the preset
color temperature, 2700K,
3200K, 4000K, 5600K, and
6500K
Press the button to switch eect rate
from Lv.1 to Lv.5. Max rate: Lv.5
Press the button to switch special
eect: Fire CCT Chase Pulsing
TV Explosion Faulty Bulb
Welding Strobe Lightning
SOS
EFF Mode (Short press EFF Mode Button to enter)
Brightness Control Wheel
Color Temperature Control
Wheel
EFF Rate Option Button
EFF Mode Button
Align the reector with the adapter ring and insert it. The ejector pin is
pinched by reector. Rotate the reector tightly clockwise and the ejector pin
springs back.
When disassembling, push the ejector pin and rotate the reector
anticlockwise.
Question and Answer IconNeed help?

Do you have a question about the COLBOR CL60 and is the answer not in the manual?

Summary

Safety Instructions

Product Overview and Installation

Remove COB Protective Cover

Guide on removing the COB protective film before first use and cover before every use.

Install Adapter and Reflector

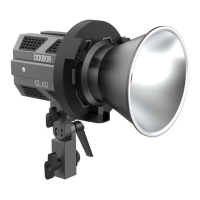
Detailed steps for attaching the adapter ring and reflector to the COLBOR CL60 light.

Product Assembly and Connection

Fixing the Video Light

Instructions on mounting the light to a quick-mount holder and tripod.

Power Supply and Operation

Status Icon Guide

Operational Modes

Advanced Settings

Settings Configuration

Warranty Information

Warranty Period

Duration and conditions for the limited warranty service.

Warranty Exclusions

Limitations and conditions that void the product warranty.

Warranty Claim Process

Steps to follow for making a warranty claim.

Overview

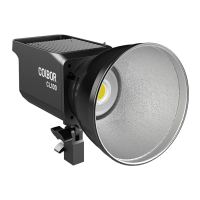
The COLBOR CL60 Video Light is a professional lighting solution designed for various video production needs, offering a range of features for precise control over illumination.

Function Description

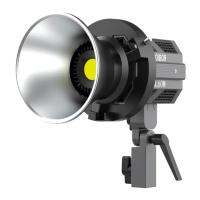
The COLBOR CL60 is primarily a video light that utilizes a COB (Chip-on-Board) bead to produce high-intensity illumination. It supports both DC power supply via a Type-C input and battery power through a V-mount and battery setup, providing flexibility for studio and on-location shoots. The device features an LCD display screen for easy monitoring of settings such as brightness (DIM), color temperature (CCT), and special effects (EFF).

The light offers two main operational modes: CCT Mode and EFF Mode. In CCT Mode, users can adjust the color temperature from 2700K to 6500K, allowing for adaptation to different ambient lighting conditions or creative preferences. Brightness is also adjustable from 0% to 100%. EFF Mode provides a selection of special effects, including Fire, CCT Chase, Pulsing, TV, Explosion, Faulty Bulb, Welding, Strobe, Lightning, and SOS, each with adjustable effect rates from Lv.1 to Lv.5.

A key feature of the CL60 is its multi-light connection capability, allowing multiple units to be linked together via a rail system. This enables the creation of larger light matrices for more extensive lighting setups. The device also incorporates a quick-mount holder for easy installation onto tripods and a Bowen Mount Adapter for compatibility with a wide range of light modifiers such as reflectors.

For enhanced control, the CL60 supports wireless connection via an APP, allowing users to remotely manage settings. It also includes a Repeater (RP) function to extend the effective distance of light control in multi-light setups, particularly useful when lights are spread across a larger area.

Usage Features

Before initial use, it is crucial to remove the COB protective film and the COB protective cover to prevent overheating and potential damage. The light is designed for easy installation and disassembly of accessories. The adapter ring is pushed into the light head and fastened, while reflectors are aligned with the adapter ring, inserted, and rotated clockwise until the ejector pin springs back, securing them in place. Disassembly involves pushing the ejector pin and rotating anticlockwise.

Fixing the video light involves sliding the quick-mount holder into the chute under the light and tightening a knob. A tripod can then be installed into the quick-mount holder and secured. The light's angle can be adjusted and locked with another knob.

Powering the device can be done through a DC power adapter connected to the Type-C input or by installing a V-mount and battery. To power on, a long press of the power button is required, which illuminates the button and brings up the operation interface. A short press of the power button turns the device off.

In CCT Mode, the brightness control wheel allows for continuous adjustment of brightness (0-100%) or quick switching between preset levels (0%, 25%, 50%, 75%, 100%) by pressing the wheel. Similarly, the color temperature control wheel adjusts CCT (2700K-6500K) or quickly switches to preset temperatures (2700K, 3200K, 4000K, 5600K, 6500K) when pressed. Rolling the wheel temporarily enlarges the parameter value, returning to the main screen after 1.5 seconds of inactivity.

In EFF Mode, the EFF Rate Option Button switches between effect rates (Lv.1 to Lv.5). The EFF Mode Button cycles through the various special effects. Brightness and color temperature adjustments in EFF Mode follow the same procedure as in CCT Mode.

The CL60 offers a settings menu, accessed by a short press of the Settings Button. Here, users can configure wireless connection, fan mode (Smart or Quiet), group settings (NULL, A-O), communication mode (TX, RX, TXRX), and repeater function (ON/OFF). The fan status icon indicates whether the fan is in Smart Mode (adjusts speed based on temperature) or Quiet Mode (runs at low speed with overheating protection). The group status icon shows if the light is part of a group and its role (Tx, Rx, TxRx). The repeater status icon indicates if the RP function is active.

For multi-light setups, lights are connected by sliding the rail of one light into the chute of another. The Repeater (RP) function is crucial for maintaining stable control over multiple lights, especially when the distance between them exceeds 10 meters. It is recommended to place a light with RP function enabled in the middle of a group to extend control distance. If more than five lights are connected, one RP light is suggested; for more than ten, two RP lights are recommended.

Maintenance Features

The COLBOR CL60 is designed with safety and longevity in mind. Users are advised to keep the product away from corrosive chemicals, liquids, and moist environments. It should not be used with wet hands, nor should it be splashed or soaked in water. During operation, the COB and heat sink can become hot, so users should avoid blocking them, turning the product upside down, or touching them directly.

To ensure the service life of the device, the cooling system continues to run for a short period after shutdown until the COB temperature drops below 45℃. Before storage, the product should be allowed to cool completely, and the power cable should be disconnected and stored properly.

The manual strongly advises against disassembling the product by oneself, as this will invalidate the warranty. Any faults should be addressed by an authorized technician. Using original COLBOR parts is recommended, as damage from non-original parts is not covered by the warranty. Artificial damage due to drops or external impacts is also excluded from warranty coverage.

The device includes an overheated alarm icon ([!]) that flashes if the internal temperature is too high, prompting the user to take cooling measures. The icon disappears when the temperature returns to normal. Factory settings can be restored by long-pressing both control wheels together for 5 seconds, which reboots the product to its default mode.

COLBOR CL60 Specifications

General IconGeneral
Power Output65W
Color Temperature2700K-6500K
CRI97+
TLCI97+
Dimming0-100%
Beam Angle120°
ControlOn-board
Power SupplyAC Adapter
Operating VoltageDC 20V

Related product manuals