Note 9
Digital Filtering (Filt): Filt=0, filter disabled; Filt=1, weak filtering effect; Filt=3, strongest
filtering effect; Stronger the filtering, more stable the readout, but has more readout display delay.
C) To enter temperature and alarm parameter setting mode press (SET), then enter code “0001”,
press (SET) again.
Table 4. Temperature Setting and Alarm Related Parameters:
Symbol Description Range Default Comment
SV
Target
Temperature (SV)
With testing
range
80.0
AH1
Relay Closed With testing
range
80.0
AL1
Relay Opened With testing
range
90.0
AH2
Relay Closed With testing
range
80.0
AL2
Relay Opened With testing
range
90.0
End
Exit
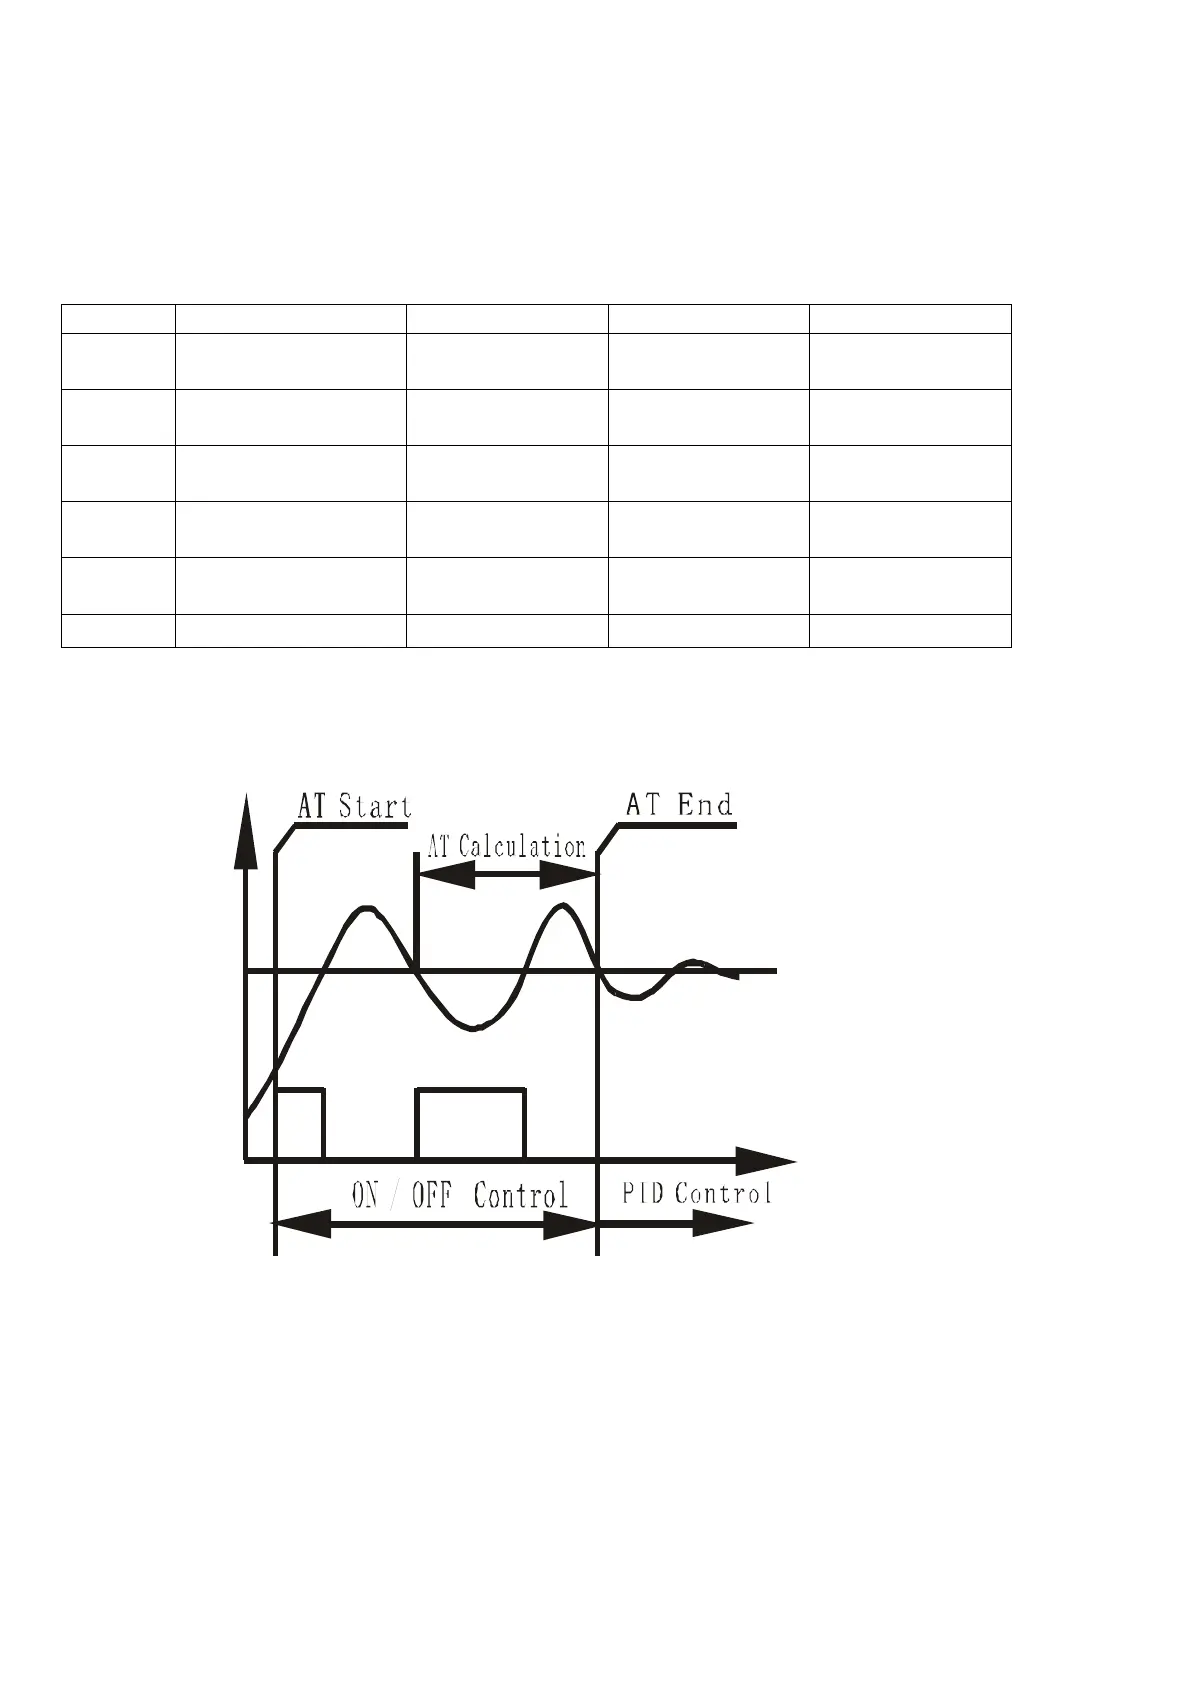
5. Auto-Tuning
By simply press a single button the built-in artificial intelligent is activated to automatically
calculate and set parameters (P, I, D, SouF, ot) that fit the condition to be controlled.
ON OFF ON
OFF
Measuri ng
Cur ve
SV
Figure 6.
a) How to Start and stop auto-tuning process:
i. To activate auto-tuning, press and hold (>) until “AT” indicator blinks, which indicates auto-
tuning is in progress. When auto-tuning finish, “AT” indicator is off. Now newly calculated PID
parameters are remembered and start to be used.
a) ii. To EXIT during auto-tuning process, press and hold (>) until “AT” indicator turns off. Then
previous PID parameters values are resumed. . Note, in order to have auto-tuning to work
properly, a closed-loop system must be established; that is a SSR, heater, thermocouple are
all connected. It may take an hour or up to 24hrs to complete the Auto-tuning. The amount of
time it take is totally depends on how complicated the environment that the controller being
installed.
 Loading...