EasyManua.ls Logo

Coleman 9330C755 User Manual

Coleman 9330C755
13 pages
To Next Page IconTo Next Page
Page #1 background imageLoading...
Page #1 background image
RV Products Division
INSTALLATION INSTRUCTIONS
FOR
9330F4552 FREE DELIVERY PLENUM KITS
8330-752 CONTROL BOX KIT (12 VDC COOL ONLY)
9330C755 CONTROL BOX KIT (12 VDC HEAT READY)
8530-750 CONTROL BOX KIT (24 VAC COOL ONLY)
9530A751 CONTROL BOX KIT (12 VDC HEAT PUMP)
9430A751 ZONE CONTROL KIT (12 VDC COOL ONLY)
9430A755 ZONE CONTROL KIT (12 VDC HEAT READY)
9630A751 ZONE CONTROL KIT (12 VDC HEAT PUMP)
Airxcel, Inc.
RV Products Division
P.O. Box 4020
Wichita, KS 67204
Coleman is a registered trademark of The Coleman Company, Inc. used under license. Mach is a registered trademark.
1976N350 (9-14) PP
Question and Answer IconNeed help?

Do you have a question about the Coleman 9330C755 and is the answer not in the manual?

Coleman 9330C755 Specifications

General IconGeneral
BrandColeman
Model9330C755
CategoryControl Unit
LanguageEnglish

Summary

Warnings and Safety Information

Shock Hazard Warning

Warning about electrical shock hazard during installation, emphasizing power disconnection.

Wiring Routing and Specifications

Securing the Upper Unit to the Roof

Mounting Frame Installation

Steps for securing the upper unit to the roof using the supplied mounting frame.

Bolt Tensioning and Gasket Compression

Guidance on achieving proper bolt tension and gasket compression for secure mounting.

Installing the Control Box

Control Box Cover and Strain Relief

Procedure for removing cover, feeding wires, and securing strain relief.

Power Wire Connections

Attaching black, white, and ground conductors using wire nuts.

Wire Pinching Prevention

Ensuring no bare wires contact live parts or get pinched.

115 Volt Conduit Connection

Connecting the roof unit 115V electrical conduit to the wirebox receptacle.

Securing Control Box to Upper Unit

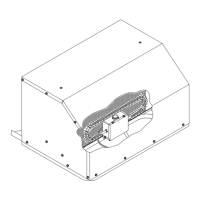
Using machine screws and wing nuts to fasten the control box to the upper unit.

Evaporator Freeze Sensor Installation

Detailed steps for inserting the freeze sensor into the evaporator fins.

Installing the Control Box (Zone)

Control Box Cover Removal

Removing the control box assembly cover.

Zone Jumper Setting

Setting the 'zone' jumper for the correct zone position (e.g., Zone 1).

Heat Pump Jumper Setting

Setting the 'HP'/'NON HP' jumper based on unit type (heat pump or not).

Field Wire and Ground Routing

Feeding field lead wires and ground through the strain relief and box hole.

Field Power Connections

Wire nutting black, white, and ground field power conductors to control box wires.

Wire Pinching Prevention (Zone)

Ensuring wires are not pinched between box sides and lid.

Wiring Diagrams and Connections

Installing the Heater Assembly

Heater Assembly Installation (48000/49000 Series)

Steps for positioning and securing the heater assembly in the return air opening.

Related product manuals