This document provides assembly and pre-ride inspection instructions for the Coleman AT200-B ATV (All-Terrain Vehicle). It emphasizes safety and proper setup before operation.
Function Description
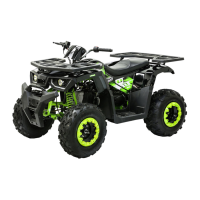
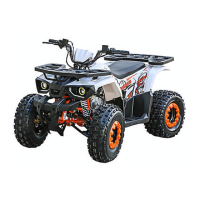
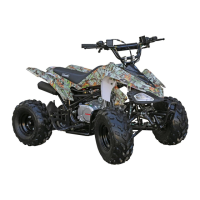
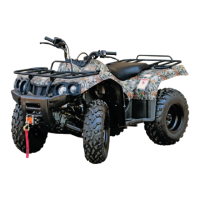
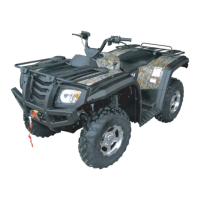
The Coleman AT200-B is an all-terrain vehicle designed for off-road use. It requires assembly and a thorough pre-ride inspection before its first use and before each subsequent ride to ensure safe and optimal operation. The manual guides users through the installation of key components such as handlebars, display console, wheels, front bumper, rear carrier, and battery. It also outlines critical pre-ride inspection points to check for mechanical issues, fluid levels, and overall operational readiness.
Important Technical Specifications
While the manual does not list comprehensive technical specifications, it provides details relevant to assembly and initial setup:
- Tire Pressure: All tires should be filled to 10 PSI of air before assembly.
- Bolt and Nut Sizes:
- Handlebar Installation: M10 x 30 bolts, M10 Lock Washers, and M10 Lock Nuts are used for attaching bottom clamp brackets to the steering assembly bracket.
- Display Console Installation: M6 x 16 bolts are used to attach the display console to its bracket.
- Front Bumper Installation: M8 x 20 bolts are used to attach the front bumper to the front frame.
- Rear Carrier Installation:
- Rear Carrier Support is installed with 4 - M8 x 16 bolts to the rear frame.
- The Rear Carrier is attached to the Rear Carrier Support with 2 - M8 x 16 bolts and 2 - M8 x 30 bolts.
- Wheel Installation:
- Rear Wheels: Large M20 Washers, M20 Lock Washers, and M20 Castle Nuts are used. Cotter Pins are installed through the axle end.
- Front Wheels: M10 Washers and M10 Lock Nuts are used. The nuts should be torqued to 25 ft. lbs.
- Engine Oil: The ATV is shipped without engine oil. It must be filled with the correct amount and grade of engine oil as listed in the owner's manual before starting.
- Battery:
- Positive (+) cable is red in color.
- Negative (-) cable is black in color.
- The Coleman Powersports AT200 ATV has two positive (+) cables, both red, which attach to the positive terminal on the battery.
Usage Features
The manual highlights several usage-related features and warnings:
- Pre-Ride Inspection: A critical step before each ride to ensure the ATV is in good operating condition. This includes checking steering, brakes, tires, fuel tank, throttle, kill switch, engine oil, drive chain, and general condition (nuts and bolts).
- Safety First: The document repeatedly warns against starting the ATV without first reading and understanding the Owner's/Operator's Manual. This manual provides essential information on safety, parts, functions, pre-ride inspection, starting, and maintenance.
- Battery Safety: Specific warnings are provided regarding battery electrolyte, which is poisonous and corrosive sulfuric acid. Users are advised to avoid contact with skin, eyes, or clothing, shield eyes when working near batteries, keep out of reach of children, not open the battery, ventilate when charging or using in an enclosed space, and keep away from sparks, flames, cigarettes, or other sources of ignition.
- Tire Orientation: During wheel installation, ensure the tread faces forward and valve stems face out for both front and rear wheels.
- Throttle Operation: The pre-ride inspection includes checking that the thumb throttle snaps back to idle when released and operates freely.
- Kill Switch: The kill switch should shut off the engine when activated.
Maintenance Features
The manual emphasizes the importance of maintenance and provides initial setup maintenance instructions:
- Engine Oil Fill: The ATV is shipped dry of engine oil. Users must fill it with the correct amount and grade of engine oil as specified in the owner's manual before starting the engine.
- Tire Pressure Check: Maintain 10 PSI in all tires. This is a pre-assembly and pre-ride check.
- Battery Installation: Detailed steps are provided for installing the battery, including securing it in the tray, attaching straps, connecting positive and negative cables correctly, and reinstalling the seat.
- Pre-Ride Checklist: This serves as a regular maintenance check, covering:
- Steering: Smoothness and no restriction of movement.
- Brakes: Correct fluid level, no leaks in hoses, and checking brake pad wear.
- Tires: Proper tire pressure, tread depth, and no cracks in the rubber.
- Fuel Tank: Sufficient fuel, secure fuel cap, and no cracks or leaks in hoses.
- Engine Oil: Correct oil level and a tight/secure dipstick.
- Drive Chain: Proper tension, lubrication, and no excessive wear or damage.
- General Condition: All nuts and bolts are tight, and no rattles from the engine or frame while running.
- Warning on Running Engine Maintenance: A strict warning is issued against performing maintenance or inspection checks while the engine is running, with the exception of checking the ignition switch or throttle. This is due to the risk of severe injury from moving parts or hot surfaces.
The document serves as a crucial guide for the initial setup and ongoing safety of the Coleman AT200-B ATV, stressing the importance of adherence to instructions and regular checks.