4
ASSEMBLY:
1) Carefully remove all parts from the cardboard cartons and lay them on a table, floor or
other flat surface in order to take an inventory of all the pieces. Keep your box for storage
or in case you ever need to ship your telescope.
2) Remove the tripod (1) from the box. Set the tripod on a level surface and fully spread
the legs.
3) Remove the telescope optical tube (7) from the box.
4) Position the telescope optical tube (7) on top of the tripod head, aligning it to the fixing
screw (9). Connect the telescope optical tube to the tripod and secure it in place by
tightening the fixing screw. DO NOT OVERTIGHTEN.
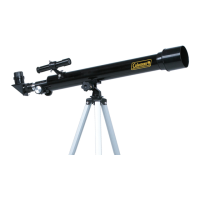
5) Remove the diagonal mirror (4) from the box. Insert it
into the focusing tube (3). Secure
the diagonal mirror in place by tightening the set screw. (See Illustration 1)
(Illustration 1)
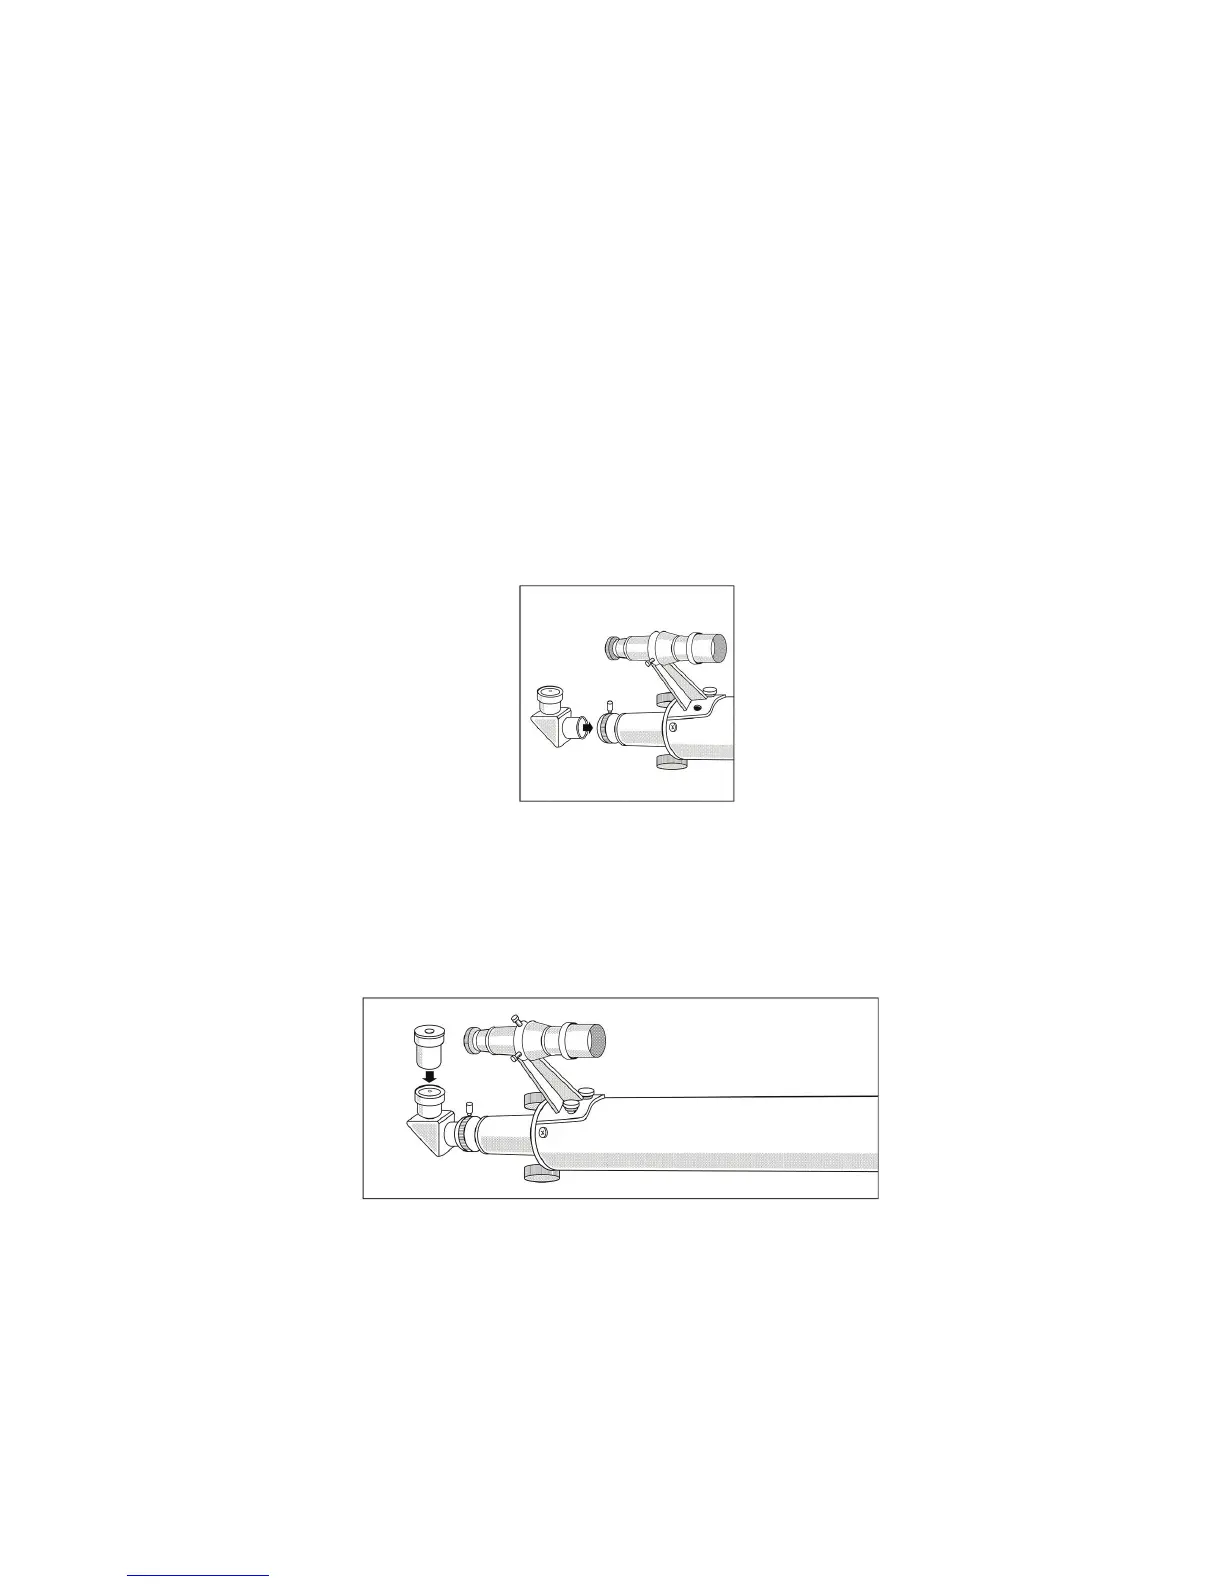
6) Remove either the H12.5 or SR4 eyepiece (5) from its protective case. Insert the
eyepiece into the diagonal mirror. Secure the eyepiece in place by tightening the set screw.
(See Illustration 2)
(Illustration 2)
7) Remove the accessory tray (12) from the box. Attach it to the tripod’s support brackets with
the included screw. The accessory tray may be used to hold the eyepieces and accessories
not in use at the time you are viewing an object.