EasyManua.ls Logo

Coleman MACH 9 User Manual

Coleman MACH 9
12 pages
To Next Page IconTo Next Page
Page #1 background imageLoading...
Page #1 background image
INSTALLATION, OPERATION AND
MAINTENANCE INSTRUCTIONS
FOR
230/240 VAC, 1ø, 50Hz
MACH 9 RV ROOF TOP AIR CONDITIONER /
HEAT PUMP AND REMOTE CONTROLLER
P/N: 1980-040 01-12-2016
RV Products Division
TABLE OF CONTENTS
I.
General Information 2
II.
Heat Pump Sizing 2
III.
Selecting an Installation Location 2
I V.
Installing the Roof Top Unit 2
V.
Securing the Heat Pump to the
Roof
4
VI.
Electrical Wiring 4
VII.
System Wiring Diagram 5
VIII.
Installing the 9430A451 Ceiling
Assembly
6
IX.
Operation and Maintenance 8
i.
Model & Serial Numbers 8
ii.
Operating Guidelines 8
iii.
Adjusting the Air Flow 8
iv.
Hand Held Controller 8
v.
Initial Conguration of the Hand Held
Controller
8
vi.
Selecting the Manual Mode of
Operation
8
vii.
Follow Me 10
viii.
Fahrenheit or Celsius (F/C) 10
ix.
Time and Day Set Up 10
x.
7-Day Programming 10
xi.
LED Lights & Buttons on Ceiling
Assembly
11
xii.
Routine Maintenance 11
xiii.
Warranty 11
SERVICE CONTACT:
Coast RV Pty Ltd.
PO BOX 6287 • SILVERWATER NSW 1811 Australia
Tel: +61-2-9645 7600 • technical@coastrv.com.au
Question and Answer IconNeed help?

Do you have a question about the Coleman MACH 9 and is the answer not in the manual?

Coleman MACH 9 Specifications

General IconGeneral
BrandColeman
ModelMACH 9
CategoryAir Conditioner
LanguageEnglish

Summary

General Information and Initial Setup

OEM and Installer Responsibilities

Ensures documentation accompanies the heat pump and is presented to the consumer.

Product Identification Inquiries

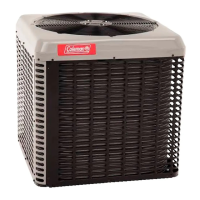
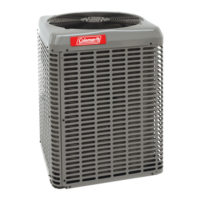
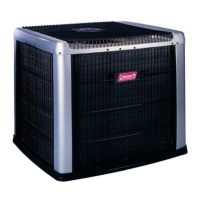
Details where to find model and serial numbers for inquiries about the AC unit.

Heat Pump Sizing and Installation Location

Heat Pump Sizing Considerations

Explains heat gain variables and strategies to reduce them for effective cooling.

Selecting Installation Location

Guidelines for choosing a suitable roof location in RVs, motorhomes, and travel trailers.

Installing the Roof Top Unit

Roof Vent Installation

Steps for removing existing vents, preparing the opening, and sealing.

New Opening Installation

Procedure for cutting a new roof opening and installing a support structure.

Leveling and Mounting

Ensuring the unit is level and properly secured after mounting preparation.

Securing and Wiring the Heat Pump

Securing the Heat Pump to the Roof

Instructions for installing the mounting frame, tensioning bolts, and condensate drain.

Electrical Wiring

Guidance on routing 230/240 VAC supply wiring and high voltage specifications.

System Wiring Diagram

Installing the Ceiling Assembly

Ceiling Assembly Preparation

Includes removing grilles/filters, attaching duct assembly and chute.

Sensor and Patch Cord Connection

Connecting the room temperature sensor and patch cord to the ceiling assembly.

Final Assembly and Holster Mount

Aligning shroud, attaching sensor, replacing filters, and mounting remote holster.

Operation and Maintenance

Model and Serial Number Identification

Locating and recording the unit's model and serial numbers for reference.

General Operating Guidelines

Tips for optimizing cooling, heating, and dehumidification performance.

Air Flow Adjustment

How to adjust supply louvers for optimal air distribution.

Hand Held Controller Overview

Controls the unit via infrared signal; alternative buttons exist on the ceiling assembly.

Remote Controller Configuration

Steps to configure the remote for Heat ELE or Auto-changeover modes.

Selecting Operation Modes

Details on Cooling, Heating, Auto, Dry, and Fan modes and fan speed selection.

Follow Me Mode

Switches temperature sensing from ceiling to handheld controller.

Fahrenheit or Celsius Selection

How to switch the temperature display between Fahrenheit and Celsius.

Time and Day Setup

Instructions for setting the current time and day on the remote controller.

7-Day Programming

Enables setting custom temperatures for different times and days.

Ceiling Assembly LED Lights and Buttons

Explains the LED indicator and manual override buttons on the ceiling assembly.

Routine Maintenance and Warranty

Routine Maintenance

Focuses on cleaning and replacing air filters for optimal unit performance.

Warranty Information

Provides details on warranty terms and conditions for Australia/New Zealand.

Related product manuals