17
6
Maintaining
Your
Snowthrower
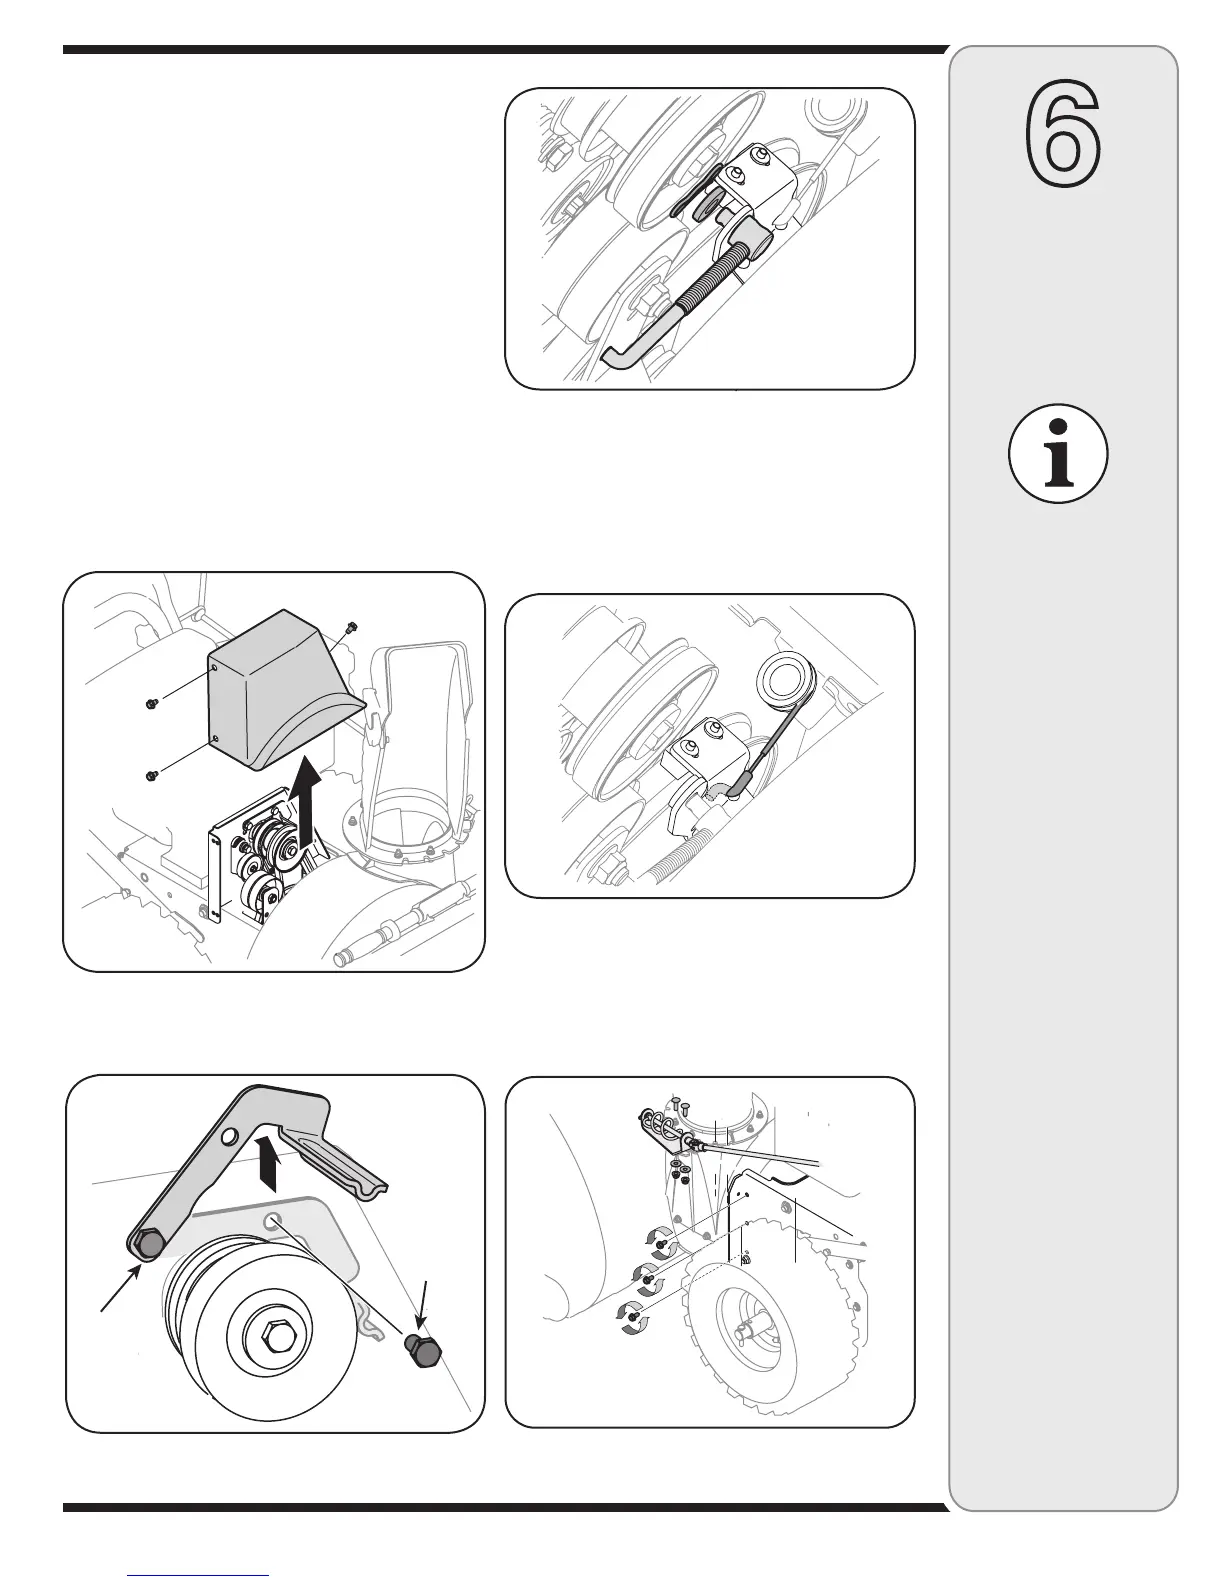
3. a. Loosen the bolt shown in Figure 6-5 securing the
belt keeper bracket and remove the other bolt.
b. Push the belt keeper and bracket up off the engine
pulley. See Figure 6-5.
Auger Belt
4. Remove the clip and flat washer from the ferrule in
order to disconnect the auger idler rod from the brake
bracket assembly. See Figure 6-6.
5. Slip the auger belt (the front belt) off the engine pulley.
6. Pull the brake bracket assembly towards the cable
guide roller and unhook the auger cable “Z” fitting.
See Figure 6-7.
7. From both sides of the the frame assembly, use a 1/2”
wrench to remove the three hex tap screws securing
the frame to the auger housing assembly. See Figure
6-8.
NOTE: Do not remove the lower hex flange lock nut
on each side.
IMPORTANT
NEVER replace the
auger shear pins
with standard pins.
Any damage to the
auger gearbox or
other components, as
a result of doing so,
will NOT be covered
by your snowthrower’s
warranty.
Check the condition
of both auger belt and
drive belt every 25
hours of snowthrower
operation. Replace if
either shows signs of
wear and tear.
Specifications are
subject to change
without notification or
obligation. Images may
not reflect your exact
model and are for refer-
ence purposes only.
Figure 6-5
Figure 6-6
Figure 6-7
Figure 6-4
Figure 6-8
Loosen
Remove
 Loading...