8
3
Setting Up
Your
Snowthrower
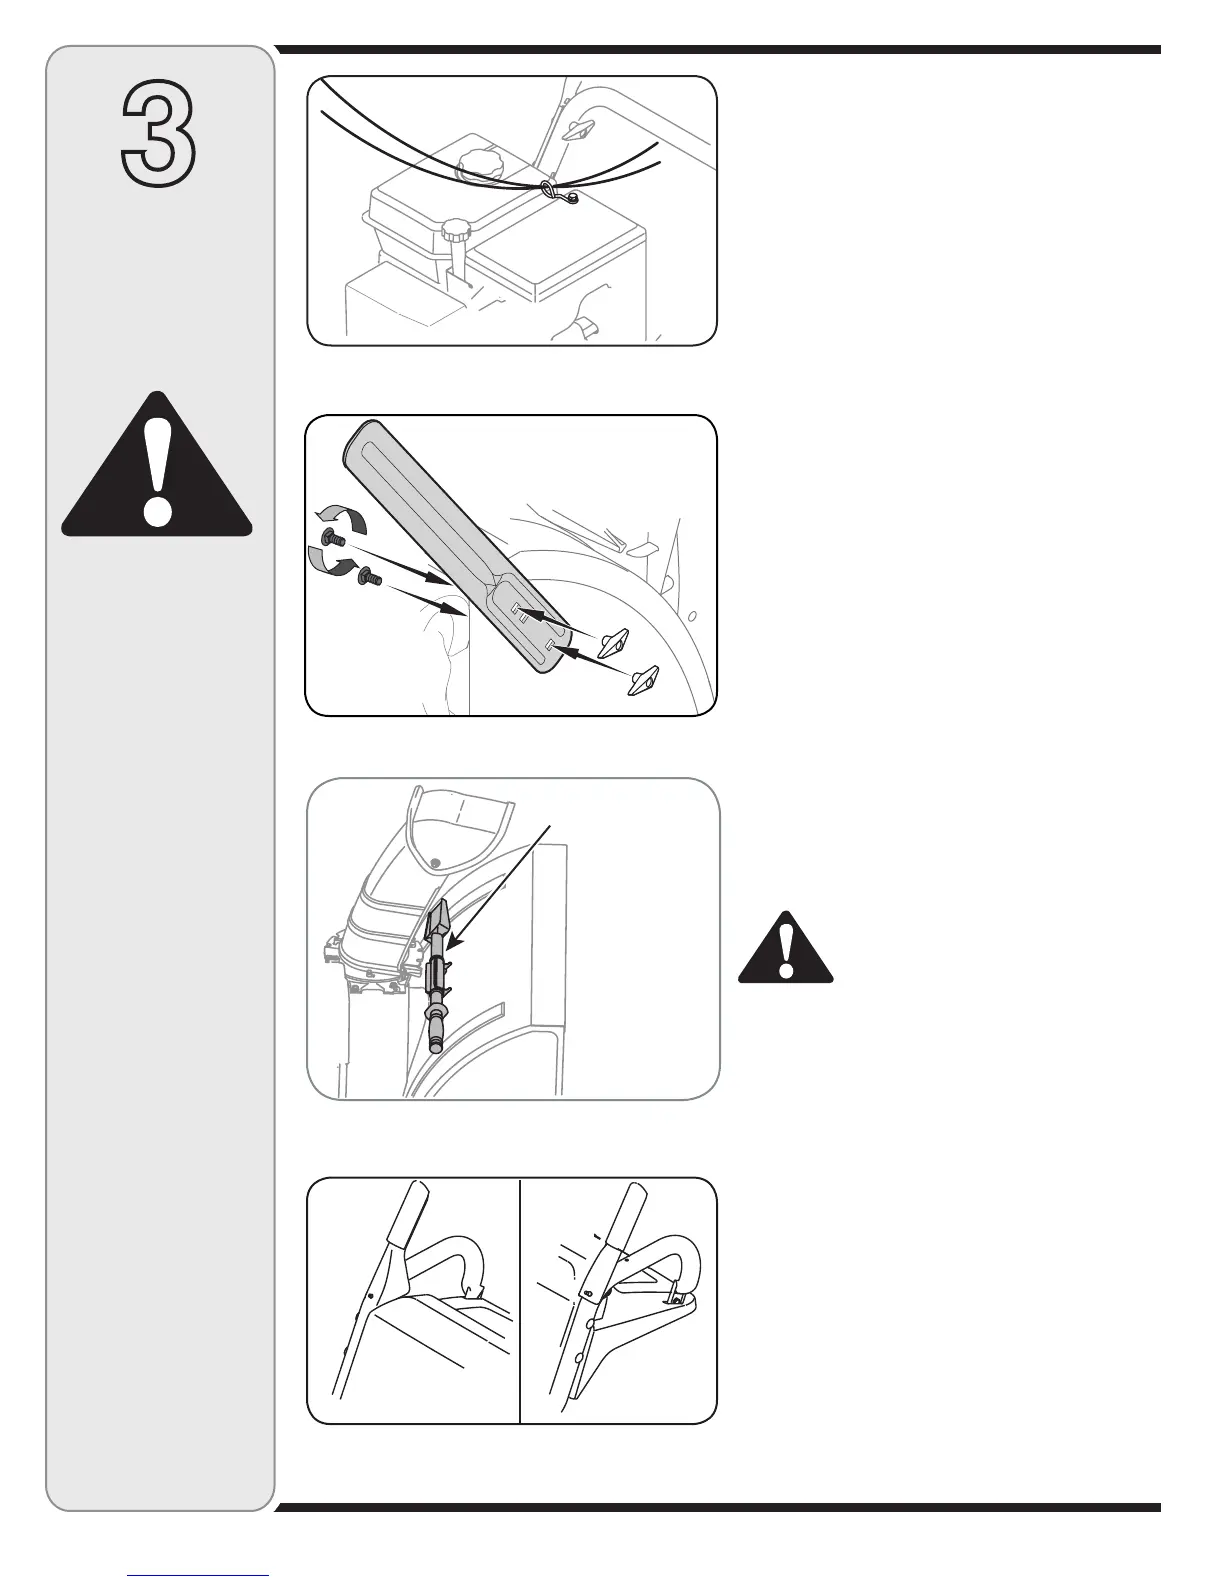
• Normally the cable ties holding the steering cables
against the handle are loosely installed on each side
of the lower handle at the factory. Pull the cable ties
tight to secure. Cut the excess from the ends of cable
ties.
• Ifnotalreadyattached,slipthecablesthatrunfrom
the handle panel to the discharge chute into the cable
guide. See Figure 3-8.
Drift Cutters (If Equipped)
Drift cutters should be used when operating the snow
thrower in heavy drift conditions.
• Onmodelssoequipped,driftcuttersandhardware
are assembled to the auger housing inverted.
• Removethecarriageboltsandwingnutssecuringthe
drift cutters to the housing.
• Repositiondriftcutterssotheyfaceforwardas
shown in Figure 3-9. Secure with hardware previously
removed, wingnuts should be fastened on the outside
of the housing as shown.
If your unit is not equipped with drift cutters, you may
contact Customer Support as instructed on page 2 for
information regarding price and availability.
Clean-Out Tool
The clean-out tool is mounted to the rear of the auger
housing and is designed to clear a clogged chute. See
Figure 3-10. Refer to the Operation section for more
detailed information regarding the chute clean-out tool.
NOTE: This item is fastened with a cable tie to the rear of
the auger housing at the factory. Cut the cable tie before
operating the snow thrower.
WARNING: Never use your hands to
clean snow and ice from the chute
assembly or auger housing.
Final Adjustments
Make these final adjustments before operating your snow
thrower for the first time. Failure to follow these instruc-
tions may cause damage to the snow thrower.
Wheel Drive Control & Shift Lever
Perform the following test to determine need for adjust-
ment:
• Movetheshiftleverintosixth(6)position.SeeFigure
4-1.
• Withthedrivecontrolreleased(seeFigure3-11A),
push the snow thrower forward, then pull it back. The
machine should move freely.
• Engagethedrivecontrolandattempttomovethe
machine both forward and back, resistance should be
felt.
WARNING
Never use your hands
to clean snow and
ice from the chute
assembly or auger
housing.
Figure 3-10
Clean-Out
Tool
Figure 3-9
Figure 3-8
Figure 3-11
Drive
Auger